www.dadehpardazan.ir 88594014-15
7 Utility Functions (Fn)
7-32
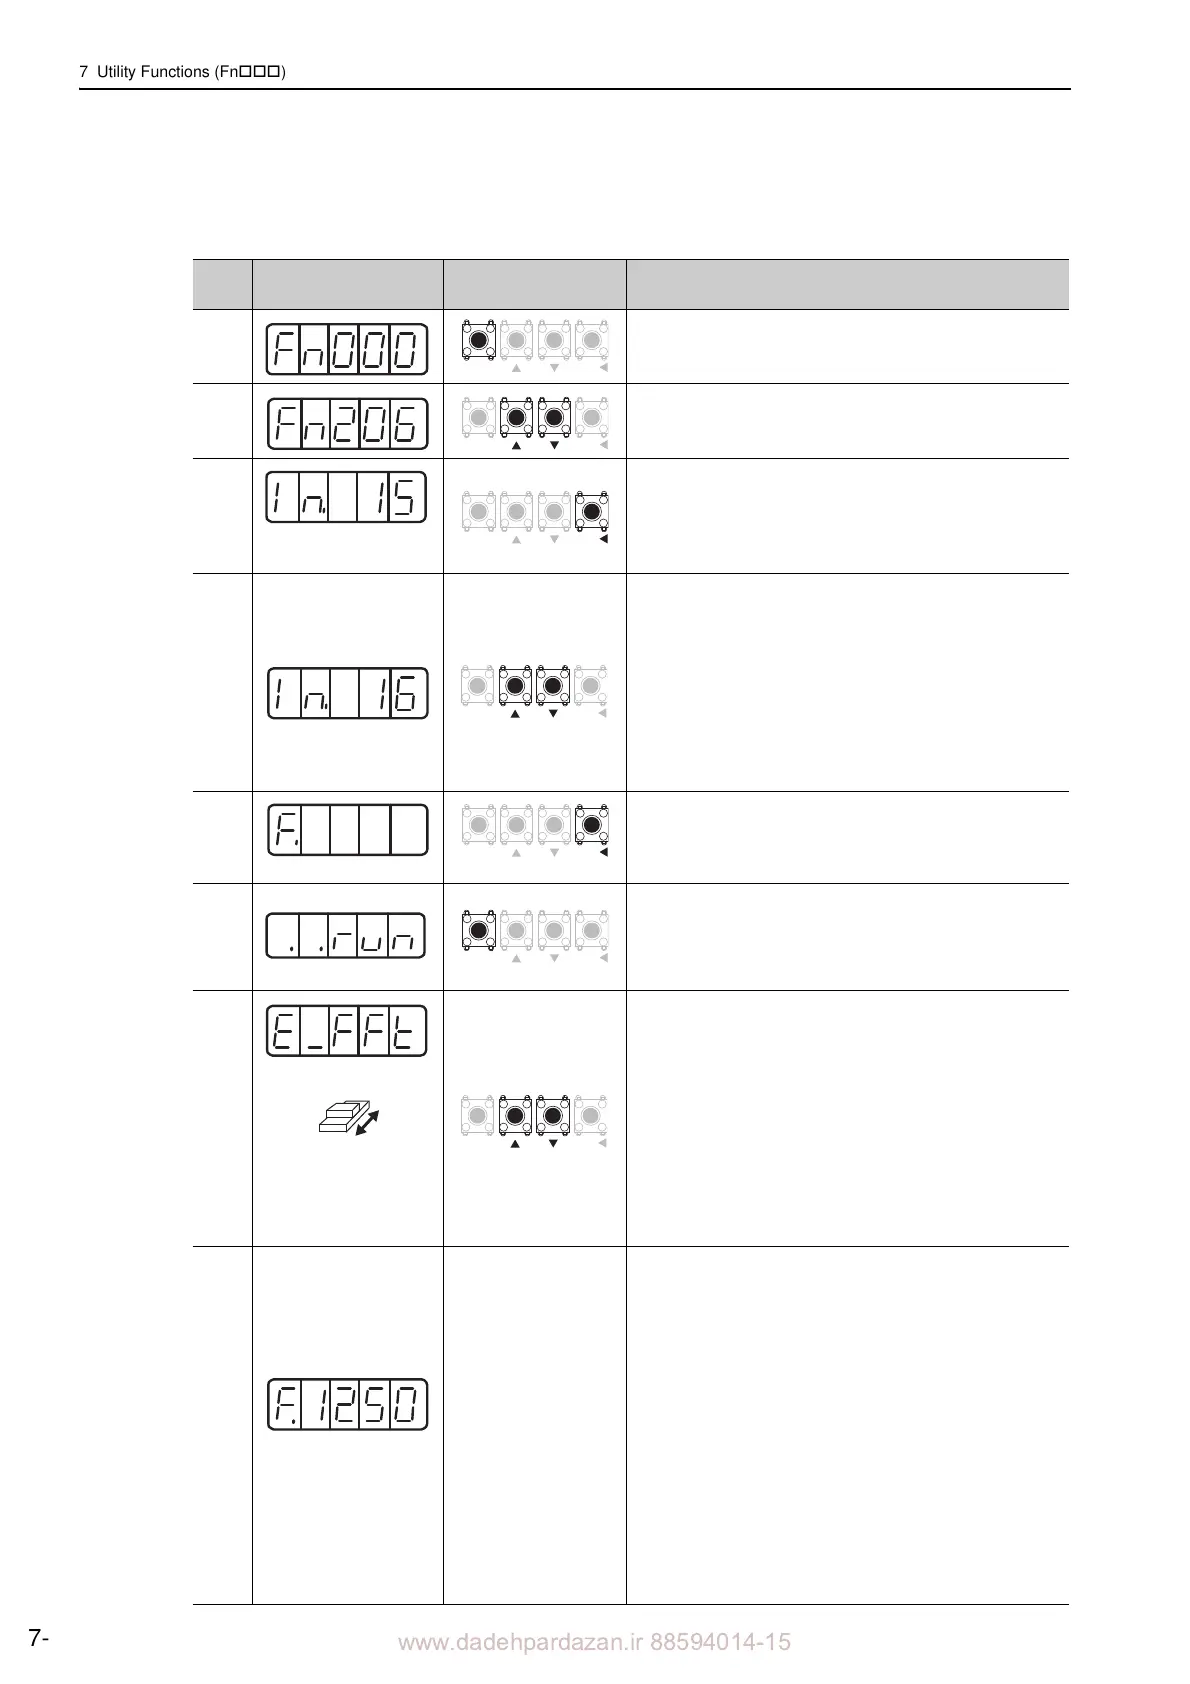
(2) Operating Procedure
Use the following procedure.
Step
Display after Opera-
tion
Keys Operation
1 Press the MODE/SET Key to select the utility function.
2 Press the UP or DOWN Key to select
Fn206.
3
Setting reference
amplitude
Press the DATA/SHIFT Key for approximately on
e second.
The display shown on the left appears. The panel operator is
in the reference amplitude setting mode.
4
Press the UP or DOWN Key to set a
reference amplitude.
Reference amplitude setting range: 1 to 800
Notes:
• At the initial execution of Fn2
06, do not change the refer-
ence amplitude setting, but start from
the initial value 15.
Though increasing reference amplitude increases the
detection accuracy, the vibration and noise occurring on
the machine will increase momentarily. Increase the
amplitude value little by little, observing the result.
• The set value of reference amplitude is stored in Pn456.
5
Run ready status
Press the DATA/SHIFT Key for
approximately one second
to enter the run ready status.
6
Press the MODE/SET Key to enter
Servo ON status (the
servomotor power ON).
Note: Press the MODE/SET Key again to turn the servo-
mo
tor power OFF. "F" is displayed to indicate the
run ready status (step 5).
7
Display flashes.
Servomotor
sligh
t movement
In the Servo ON status (the servomotor power ON), press
the UP Key (forward) or the DOWN Key (reverse). The ser-
vomotor oscillates (within
10 mm) in automatic operation.
The servomotor performs such movements for approxi-
mately 2 seconds. During this operation,
the display shown
on the left flashes.
Notes:
• Press the MODE/SET Key to stop the servomotor. No
detection is executed. "F
." is displayed to indicate the run
ready status (step 5).
• Do not enter the machine’s working area, because the ser-
vomotor moves. Some n
oise may result.
8
Detection result
example
At normal completion of the detection, "
E_FFt" stops flash-
ing and the detected resonance frequency is disp
layed.
When failing to detect, "F----" is displayed.
To set the detection result, proceed to step 9. T
o monitor the
resonance frequency without setting the detection result,
press the DATA/SHIFT Key for approximately one second
to return to step 2.
<IMPORTANT>
If the operation ended normally b
ut it took two seconds or
more, the detection accuracy may not be good. Set the
reference amplitude little higher
than 15 in step 4 and re-
execute the operation. A higher detection accuracy may be
obtained.
Though increasing reference amplitude
increases the detec-
tion accuracy, the vibration and n
oise occurring on the
machine will increase momentarily. Increase the amplitude
value little by little, observing the result.
MODE
SET
DATA
MODE
SET
DATA
 Loading...