CONSOLE AI | Configuration - Offline (Huddle) | 65
3. Drag the channel icon to where you want it to appear within FlowView.
Add a Channel Route
4. To route audio from one channel to another, grab the output connector from one channel and drag it to
the input connector of another channel. The mouse pointer changes to a target to show that you are
making a connection.
If you have successfully made the route connection, a solid line appears between the two channel
icons.
The color of the line depends on the crosspoint type. See Change Crosspoint Properties below for more
details.
5. To route audio from multiple channels to another channel, select more than one channel (hold down the
CTRL key and select multiple channel icons OR drag around several channel icons to select more than
one) and then drag the entire group onto the connector of another channel. The mouse pointer charges
to a target to show that you are making a connection.
Channel routes are created for each selected channel.
6. To route audio from a channel group to a channel, or from a channel group to another channel group,
grab the channel group (you must select it anywhere except by the image at the left of the icon) and
drag it on top of another channel group icon or onto a channel icon. The mouse pointer changes to a
target to show that you are making a connection.
Channel routes are created for each member of the group or groups.
7. Add, remove, or modify crosspoints.
Note:
For more information about using a matrix view to make crosspoint connections between assets,
see Connecting Channels Using MatrixView (Huddle).
Change Crosspoint Properties
8. To change the properties of a route (also referred to as a crosspoint), double-click the route line to show
the crosspoint properties:
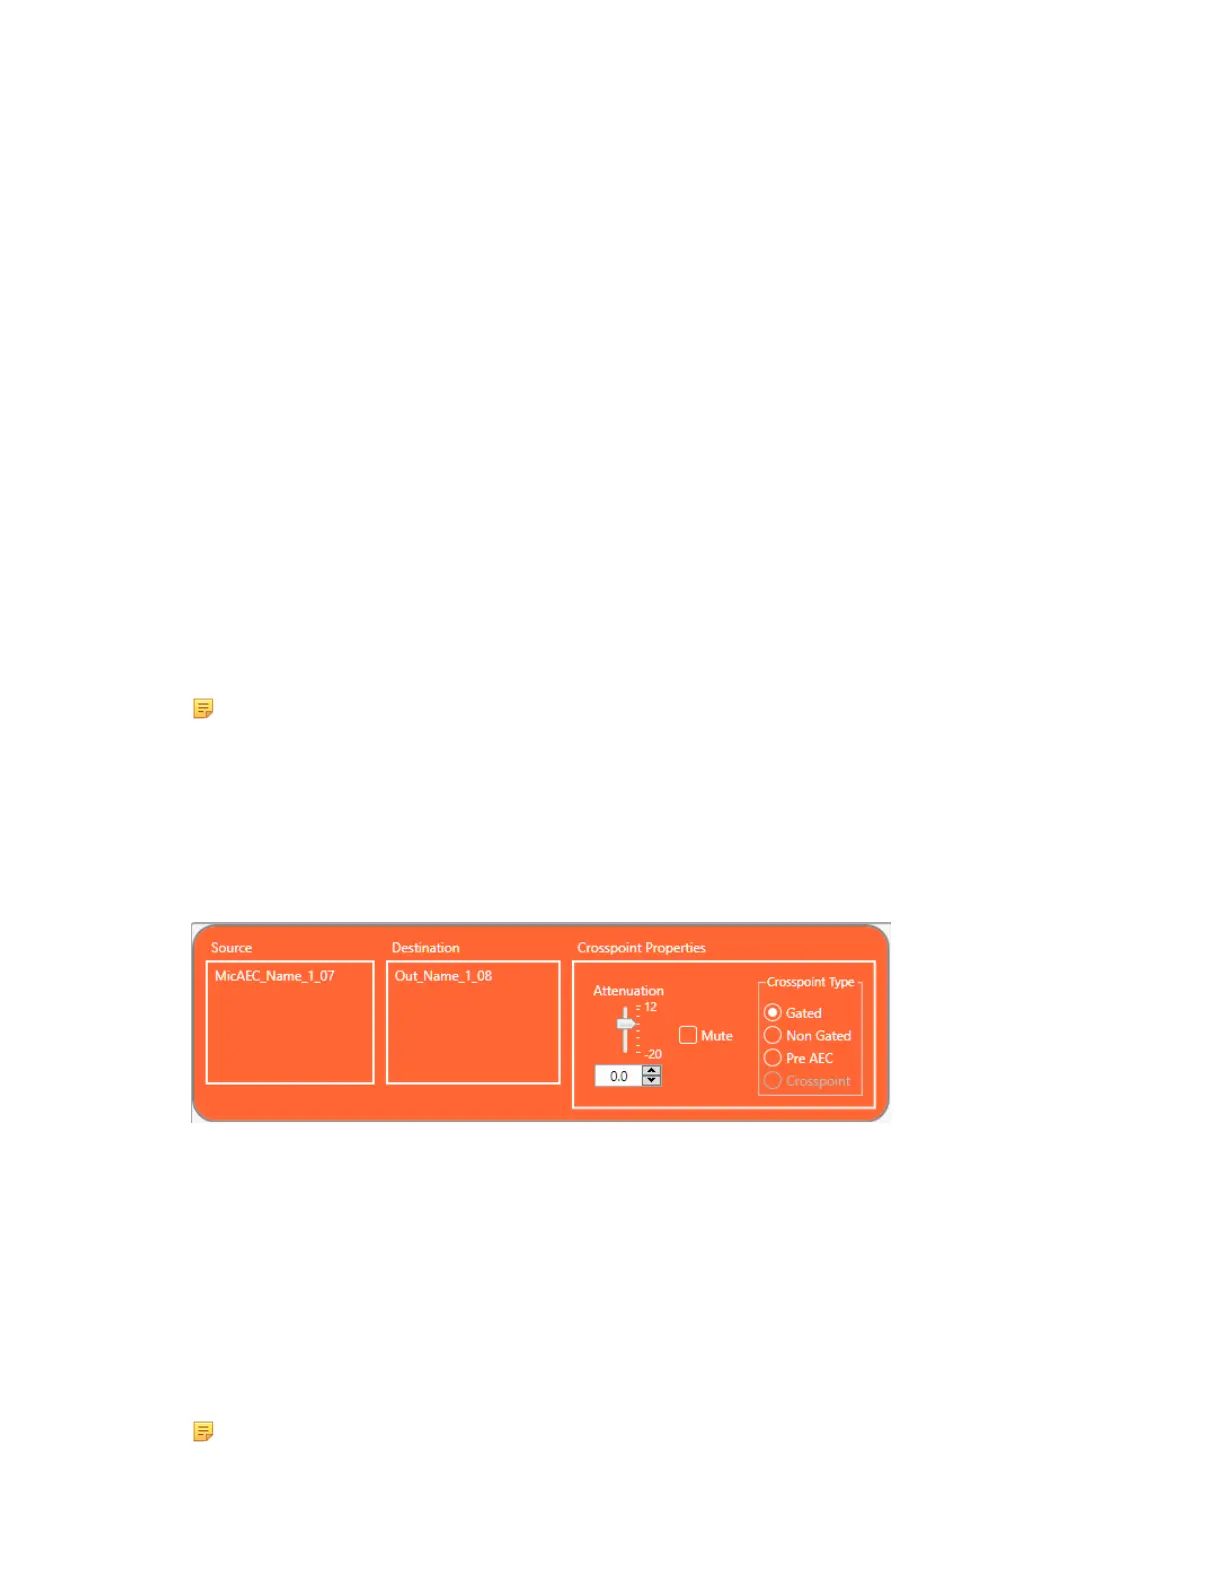
The Crosspoint Properties appear at the bottom of the FlowView screen:
The Source and Destination of the route appear on the left side of the Crosspoint Properties settings.
9. You can change the Attenuation in any of the following ways:
• Drag the slider
• Type a value in the text box
• Click the incrementer and decrementer arrows beside the text box to set the value
10.To mute this crosspoint, click the Mute check box.
The crosspoint will appear with a red 0 inside, to show that it is muted.
11.You can choose a Crosspoint Type from the Crosspoint Type group. The types are described in the
table below.
Note: Which types are available depends on the source and destination channels.
CONSOLE AI User Manual