Measuring
Adapting to the transducer
156 A0534-30.0 HBM: public MGCplus
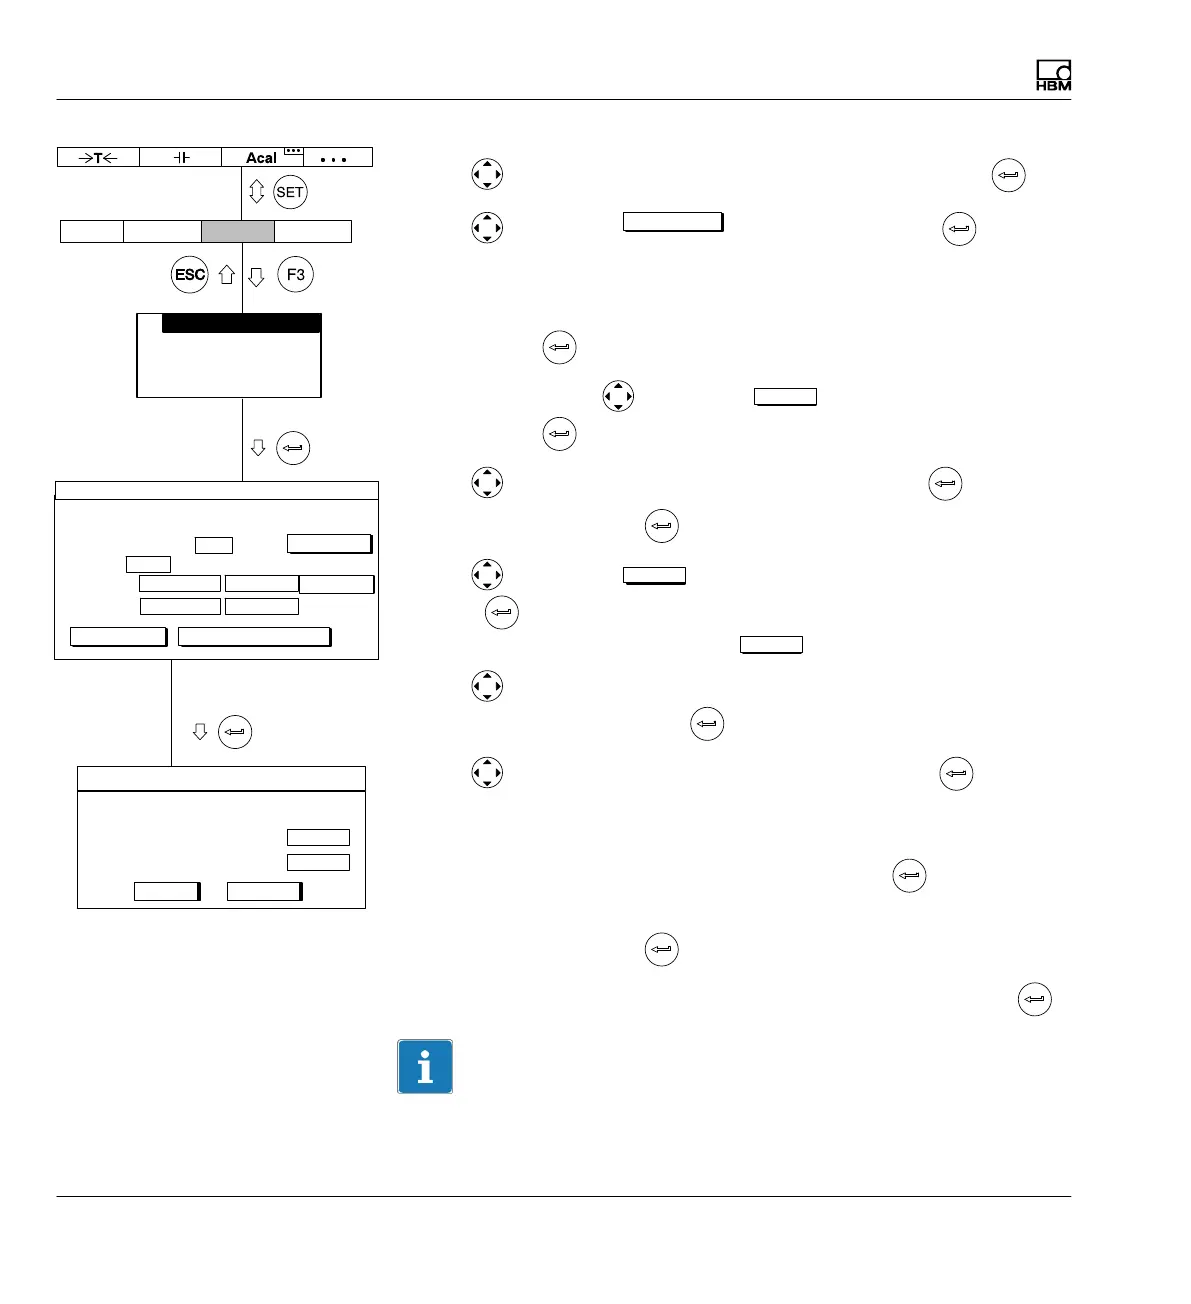
9. Use to select the Adjust amplifier button and confirm with .
10. Use
to select the
calibrate...
button and confirm with .
11. Unload the transducer.
12. In the left edit field for characteristic curve point 1 enter the value 0 and
confirm with
.
13. Use the cursor key
to select the
measure
button in line "Point 1" and
confirm with
.
14. Use
to switch to the Shunt off selection field, press and select
Shunt on. Confirm with
.
15. Use
to select the
measure
button symbol in line Point 2. Now if you
press
a measurement starts and the current measured value ap
pears in kHz on the left next to the
measure
button symbol.
16. Use
to select the left edit field in line Point 2. Enter the calibration
value 24.22 and confirm with
17. Use to select the OK button symbol and confirm with (the am
plifier converts the nominal (rated) value to 50 Nm. The calibration data
for 25 Nm remains intact).
18. In the pull-up menu select Display and confirm with
.
19. In the Decimal places edit field enter the desired number of decimal
places and confirm with
.
20. In the Step selection field select the desired step and confirm with
.
Information
The step refers to the last decimal place of the display value.
Type Freq.0..20kHz
Level:
Unit: kHz
Zero pt.:
Nom. val.:
Ext.fct...
AmplifierSystem Display Options
Transducer
Signal conditioning
Display
Analog outputs
Switch
Nm
0.0000Point 1:
kHz
0.0000
Shunt on
CancelOK
measure
24.220Point 2 2.4210
measure
Characteristic curve points
5.0000 ...
TRANSDUCER CHANNEL1
Nm
0.0000 ... 10.0000 ...
50.0000 ...
calibrate... Adjust amplifier
5V
measure
Unit:
Ext.fct...