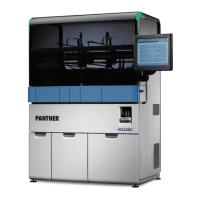
Panther System
®
Operator’s Manual
AW-17791-001 Rev. 002 (EN)
96
System Operation
Note—If the system is using pipette tips from the selected drawer, the
system will not unlock the Tips Drawer until the current process is complete.
3. Open the desired Tip Drawer(s).
The onscreen representation of the opened drawer will shift forward. All empty (red)
tray graphics will change to full (green) in expectation of the replacement of all empty
tip trays.
Note—In the Setup or Ready state, multiple drawers can be opened at the
same time.
4. Replace the empty tip trays in the open drawer according to the desired replacement
option detailed in the table below. Always load new tip trays carefully, making sure to
avoid contact with tip surfaces.
Replacement Option Operator Instruction
Reload All
Empty Trays
(Default)
1. Remove empty tip trays.
2. Load new tip trays.
3. Close the Tip Drawer.
Reload All Partial
and Empty Trays
1. Remove empty and partial tip trays.
2. Load new tip trays.
3. Click the tray icon of the replaced partial tray in the Tip
Loading Management window until the border turns to
green.
4. Close the Tip Drawer.
Reload Only
Selected Trays
1. Remove the selected tip tray(s).
2. Load new tip trays.
3. Click the tray icon of the replaced tray(s) in the Tip
Loading Management window until the border turns to the
appropriate final status color.
4. Close the Tip Drawer.
Table 53. Tip Replacement Options
5. The drawer(s) lock and the system updates the tip count. Ensure that all tip rack icons
on the screen have the appropriate colored borders, indicating successful
replacement, before proceeding.
6. Select Accept.
The window closes.