Panther System
®
Operator’s Manual
AW-17791-001 Rev. 002 (EN)
164
System Operation
2. Make any needed changes to the printer setup.
3. Select the appropriate button in the printer window to start printing.
The system sends the report to the printer.
Exporting Reports
Export reports to a desired drive location. The selected reports can be exported
directly from the Report Menu screen or from the Report Navigation Bar.
To export reports:
1. From the Report Menu screen or the Report Navigation Bar, select Export.
The Report Export window opens with the Output Directory field listing one of
the following locations:
l The network destination selected in the Report Management menu of the
System Configuration screen (see Report Export Directory on page 229)
l The USB drive location (E:\) if a USB disk is installed
2.
Select the field directory button , change the export location, and select OK,
if necessary.
A directory opens to allow for changes to the desired file destination.
3. Select OK.
The system exports the report file to the chosen export file location.
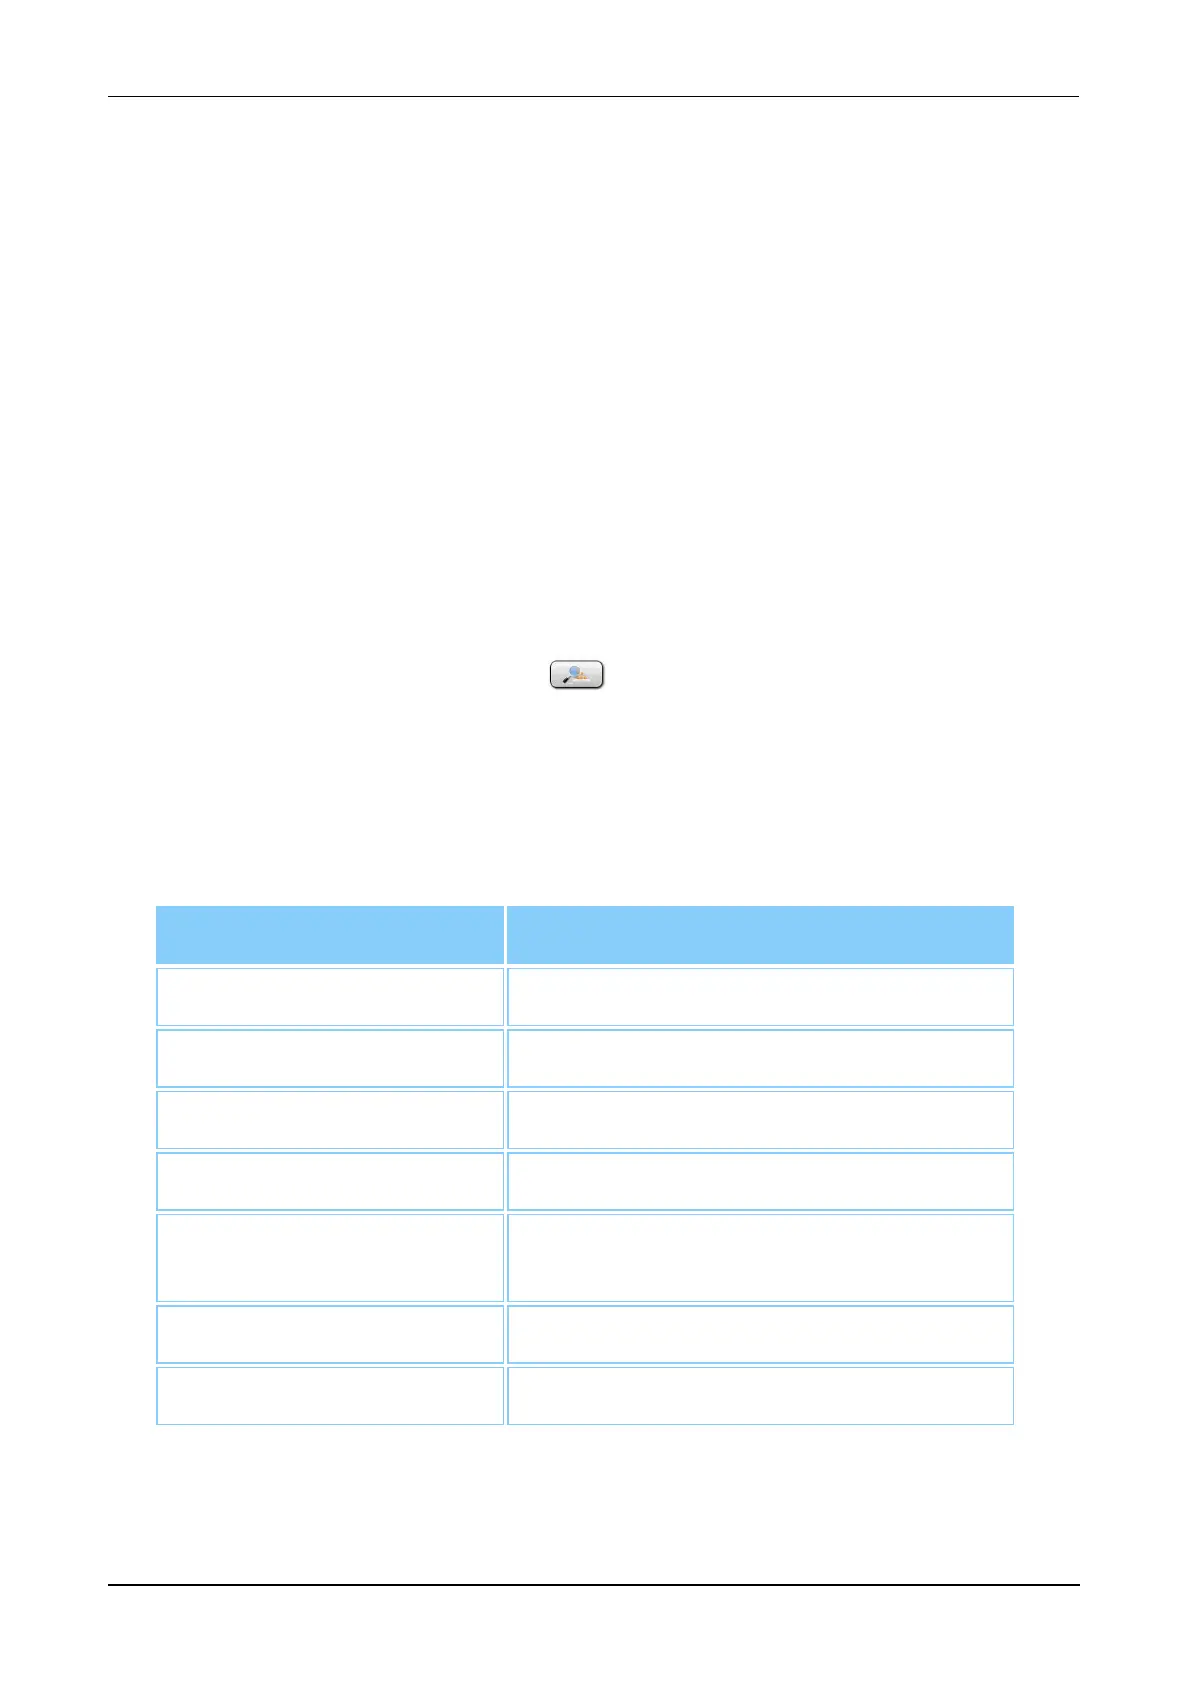
The default names of the .pdf data file for each of the report types are as follows:
Report Type File Name
Activity Log Report ActivityYYYYMMDD-HHMMSS*.pdf
Assay Reagent Report AssayReagentYYYYMMDD-HHMMSS*.pdf
Configuration Report ConfigurationYYYYMMDD-HHMMSS*.pdf
Diagnostics Log Report DiagnosticsYYYYMMDD-HHMMSS*.pdf
Exceptions by Worklist
Report
ExceptionsWorklistYYYYMMDD-
HHMMSS**.pdf
Exceptions Report ExceptionsYYYYMMDD-HHMMSS*.pdf
Levey-Jennings Report LeveyJenningsYYYYMMDD-HHMMSS*.pdf