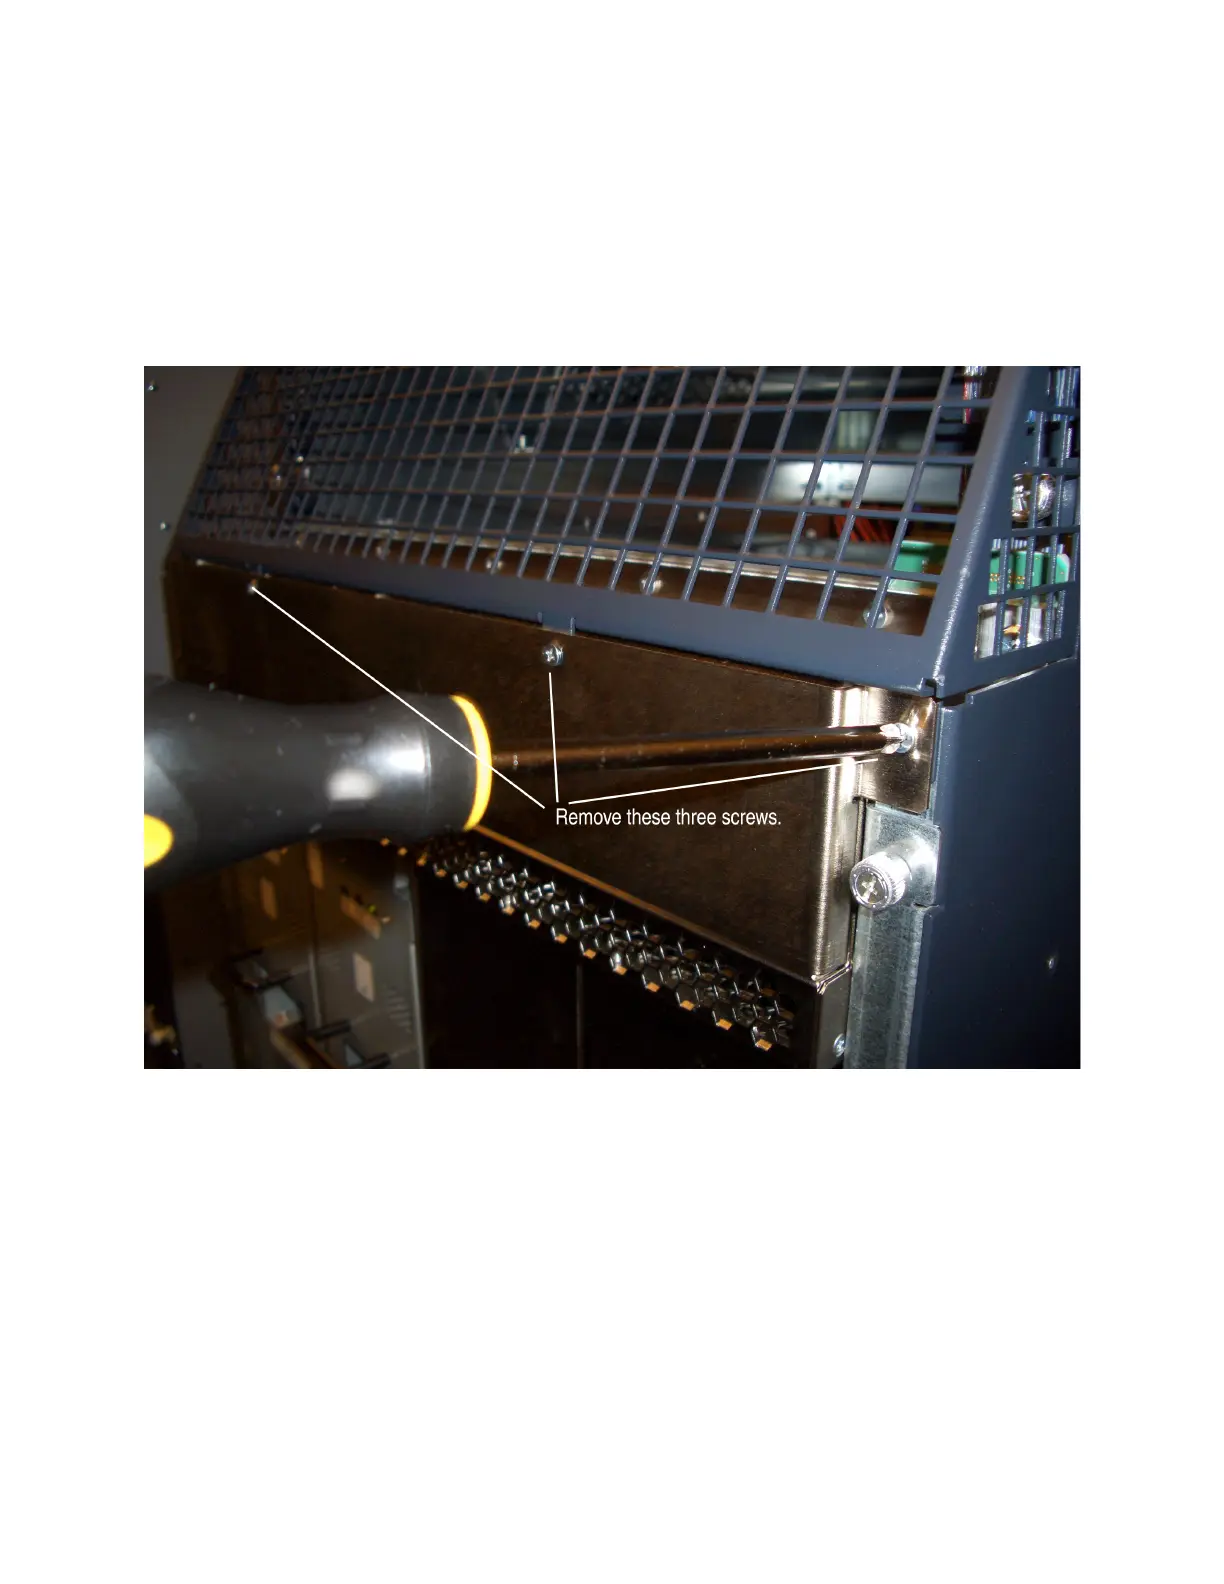
2. With a Phillips screwdriver, loosen the three screws that secure the cover to the back of the chassis
(see Figure 77 on page 289). Take care to prevent the cover from falling off the chassis after you remove
the last screw.
Save the three screws, which will be needed later to secure the cover to the chassis.
Figure 77: Removing the AC Power Inlet Cover
3. Remove the cover and temporarily place it aside for later reinstallation.
Removing the Rear Air Exhaust Grate
To remove the rear air exhaust grate, follow this procedure:
1. Attach an electrostatic discharge (ESD) grounding strap to your bare wrist, and connect the strap to
one of the ESD points on the chassis.
2. With a flatblade or Phillips screwdriver, loosen the two captive screws that secure the grate to the
back of the chassis (see Figure 78 on page 290 and Figure 79 on page 291).
289