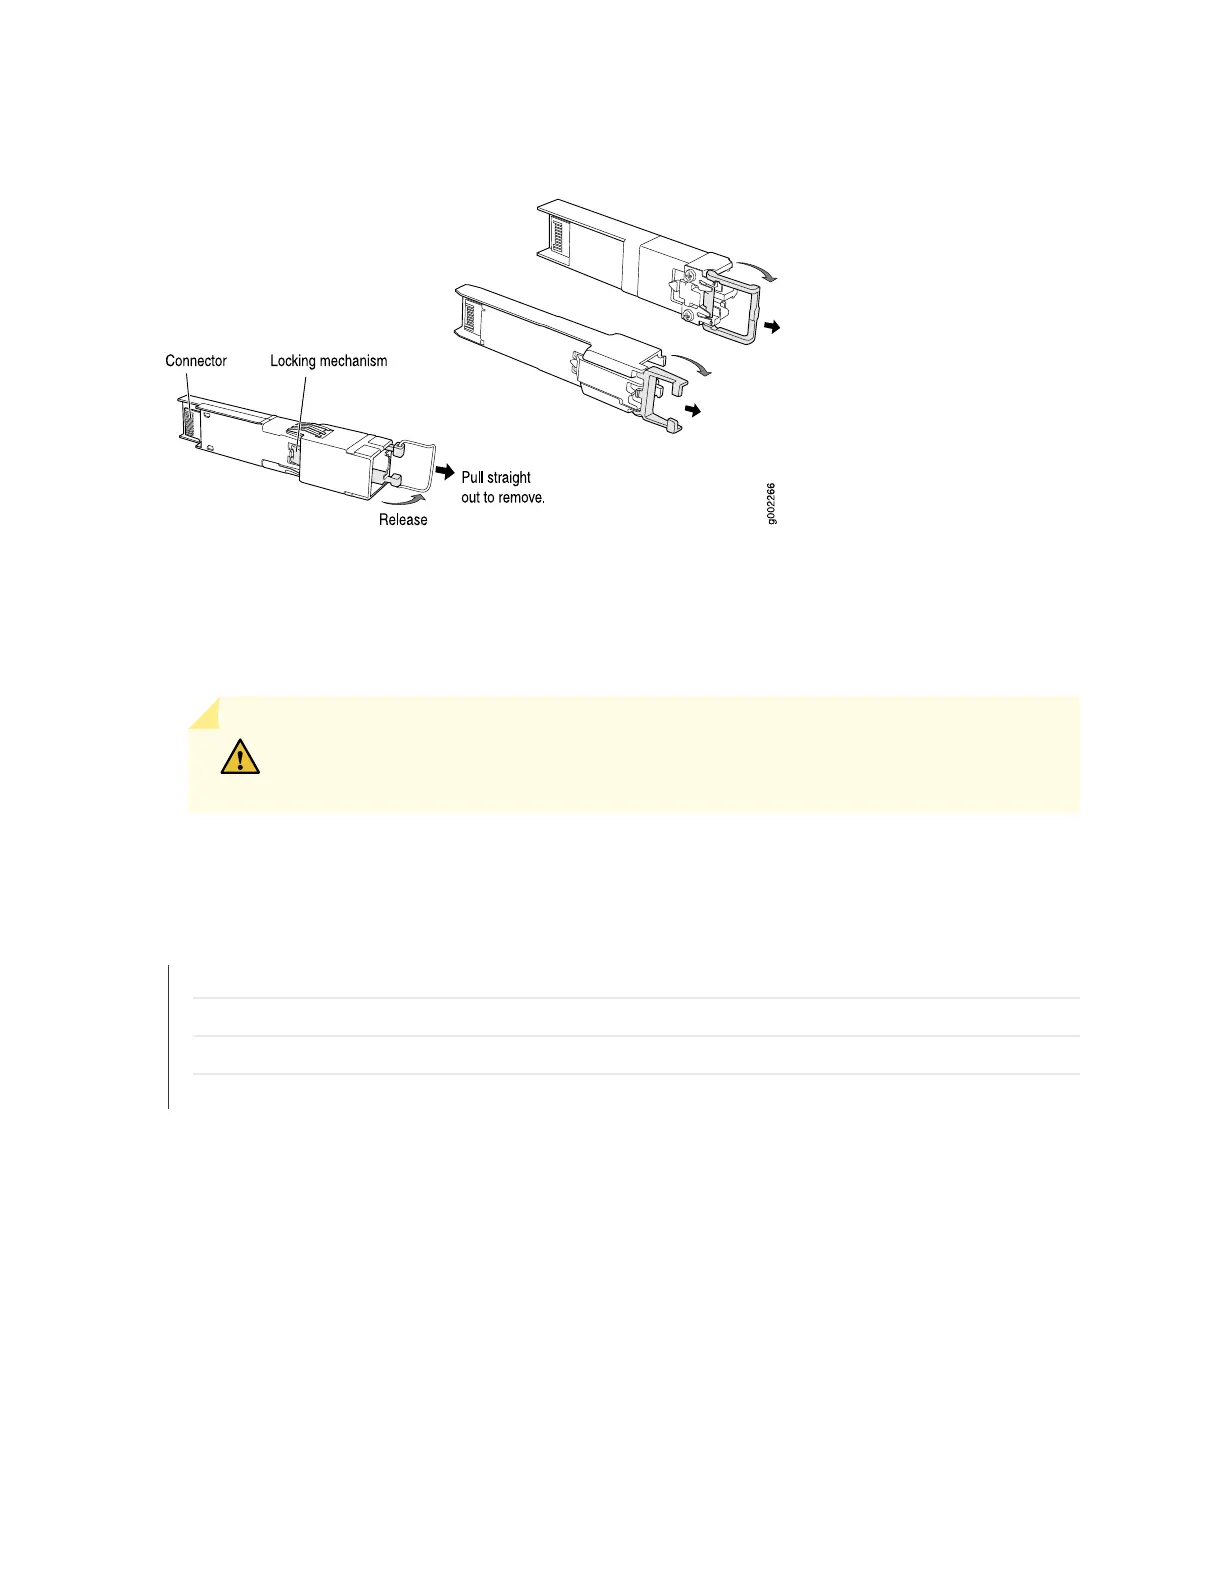
Figure 207: Removing SFPs or XFPs
8. Place a rubber safety cap over the transceiver.
9. Place the removed transceiver on an antistatic mat or in an electrostatic bag.
CAUTION: After removing a transceiver from the chassis, wait at least 30 seconds
before reinserting it or inserting a transceiver into a different slot.
SEE ALSO
Preventing Electrostatic Discharge Damage to an MX960 Router
Installing an SFP or XFP Transceiver into an MX960 DPC, MPC, MIC, or PIC | 425
Replacing an MX960 PIC | 517
Replacing an MX960 DPC | 485
Installing an SFP or XFP Transceiver into an MX960 DPC, MPC, MIC, or PIC
To install an SFP or XFP:
1. Wrap and fasten one end of the ESD grounding strap around your bare wrist, and connect the other
end of the strap to the ESD point on the chassis.
2. Take each transceiver to be installed out of its electrostatic bag, and identify the slot on the component
where it will be installed.
528