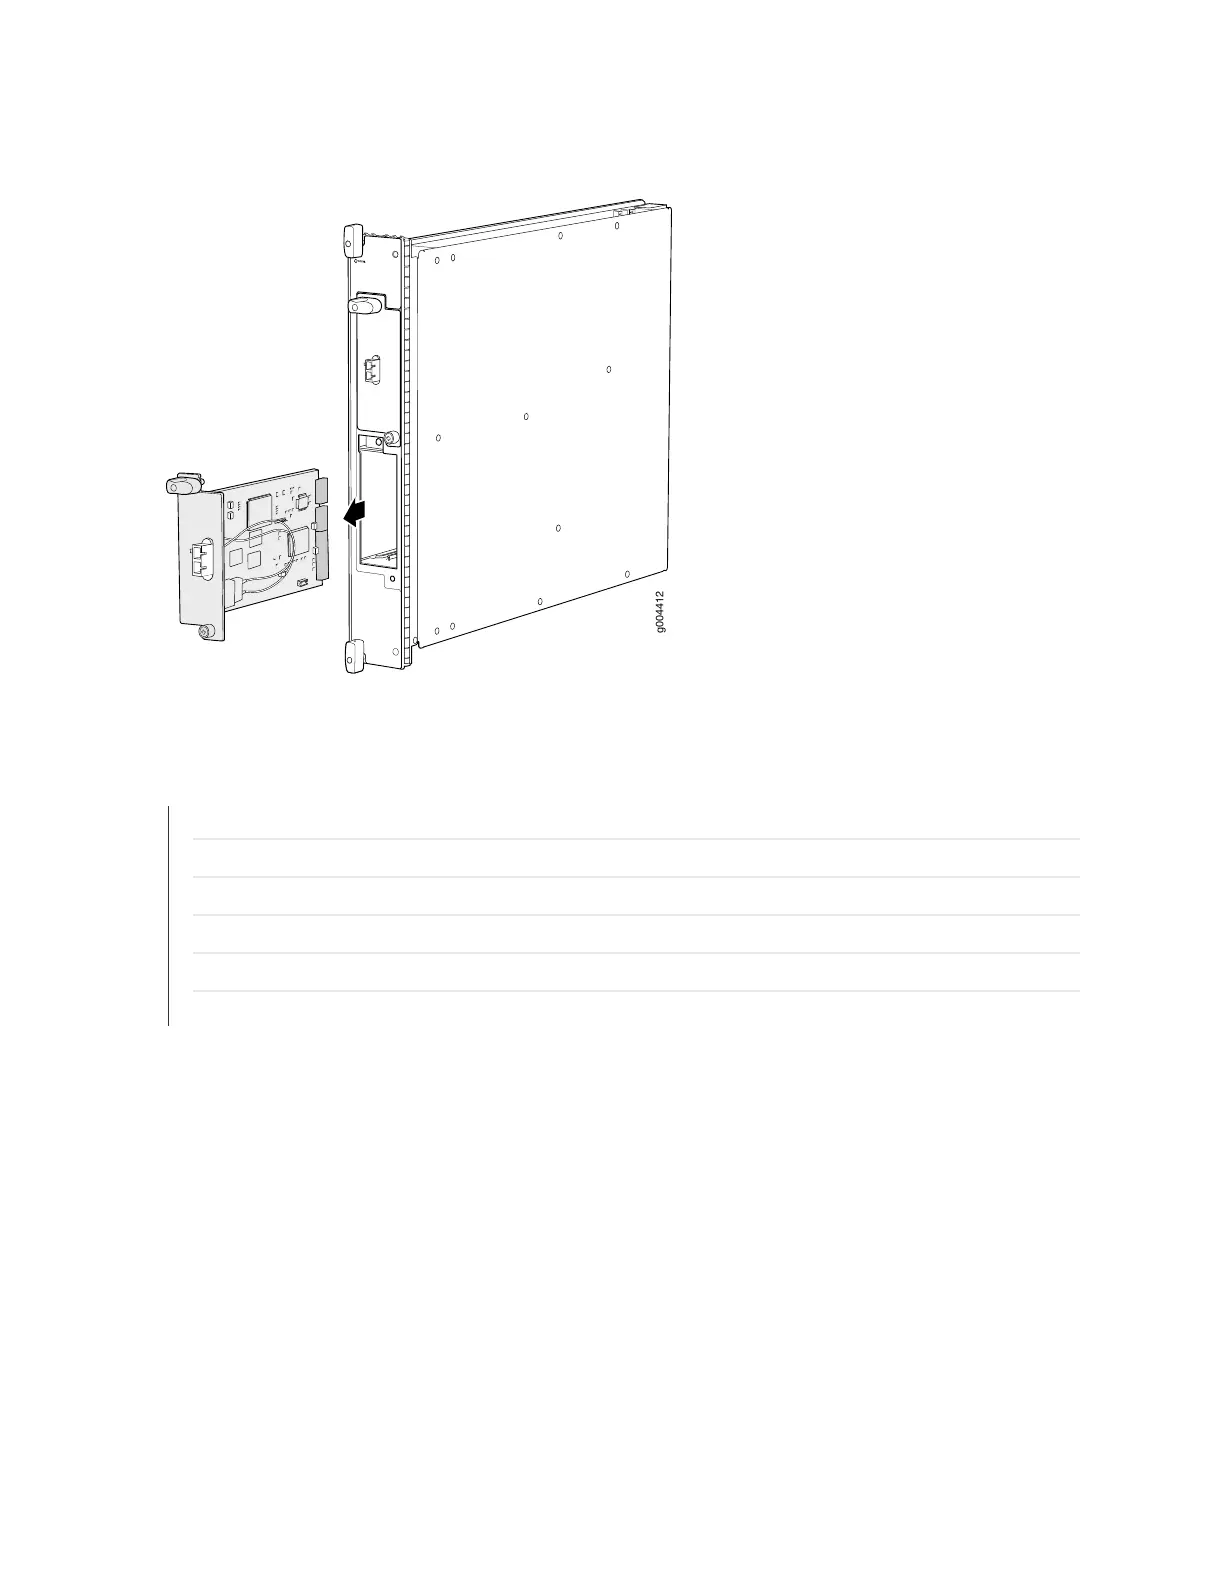
Figure 205: Removing a PIC
SEE ALSO
MX960 PIC Description | 78
Preventing Electrostatic Discharge Damage to an MX960 Router
Installing an MX960 PIC | 406
Troubleshooting the MX960 PICs | 662
Maintaining MX960 PICs | 616
MX960 PIC Serial Number Label | 690
Installing an MX960 PIC
To install a PIC (see Figure 147 on page 408):
1. Wrap and fasten one end of the ESD grounding strap around your bare wrist, and connect the other
end of the strap to the ESD point on the chassis.
2. If the PIC uses fiber-optic cable, verify that a rubber safety cap is over each transceiver on the faceplate.
Install a cap if necessary.
3. Align the notches in the connector at the rear of the PIC with the notches in the PIC slot in the FPC
and then slide the PIC in until it lodges firmly in the FPC.
519