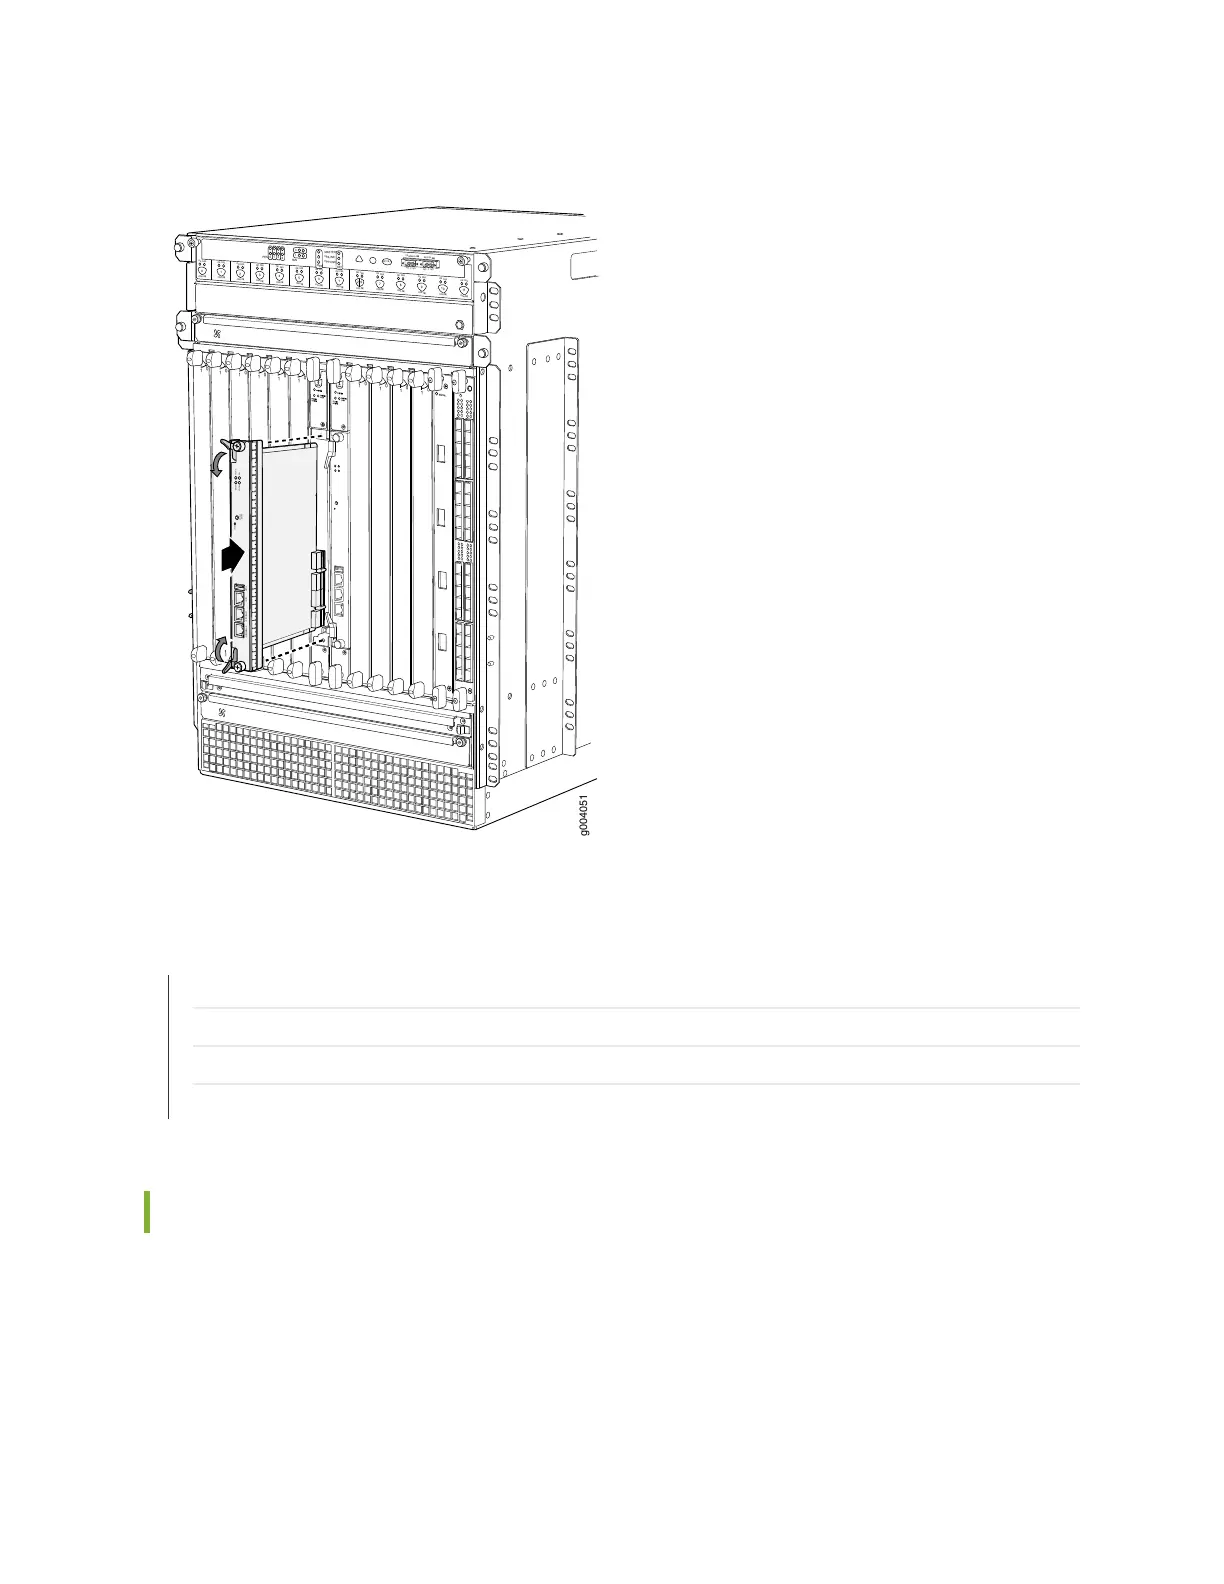
Figure 137: Installing a MX960 Routing Engine
OK
0
F
AIL
ONLINE
OK
1
F
AIL
ONLINE
OK
2
F
AIL
ONLINE
OK
3
F
AIL
ONLINE
OK
4
F
AIL
ONLINE
OK
5
F
AIL
ONLINE
OK
0
F
AIL
ONLINE
MASTER
ONLINE
OFFLINE
RE0
F
AN
PEM
1
0
0
1
2
3
RE1
OK
1
F
AIL
ONLINE
OK
7
F
AIL
ONLINE
OK
8
F
AIL
ONLINE
OK
9
F
AIL
ONLINE
OK
10
F
AIL
ONLINE
OK
1
1
F
AIL
ONLINE
OK
2
6
F
AIL
ONLINE
ACO/L
T
YELLO
W ALARM
RED ALARM
NC
NO
C
NC
NO
C
1
0
1
0
1
0
1
0
1
0
1
1
0
0
1
0
1
0
1
0
g004051
CONSOLE
AUXUSB
RESET
ONLINE/
OFFLINE
HDD
OK/FAIL ONLIN E
MASTER
ETHERNET
RELATED DOCUMENTATION
Preventing Electrostatic Discharge Damage to an MX960 Router
Replacing Connections to MX960 Routing Engine Interface Ports | 473
Removing an MX960 Routing Engine | 461
MX960 Routing Engine Description | 30
Installing an MX960 Switch Control Board
1. Wrap and fasten one end of the ESD grounding strap around your bare wrist, and connect the other
end of the strap to the ESD point on the chassis.
2. Carefully align the sides of the Switch Control Board with the guides inside the chassis.
387