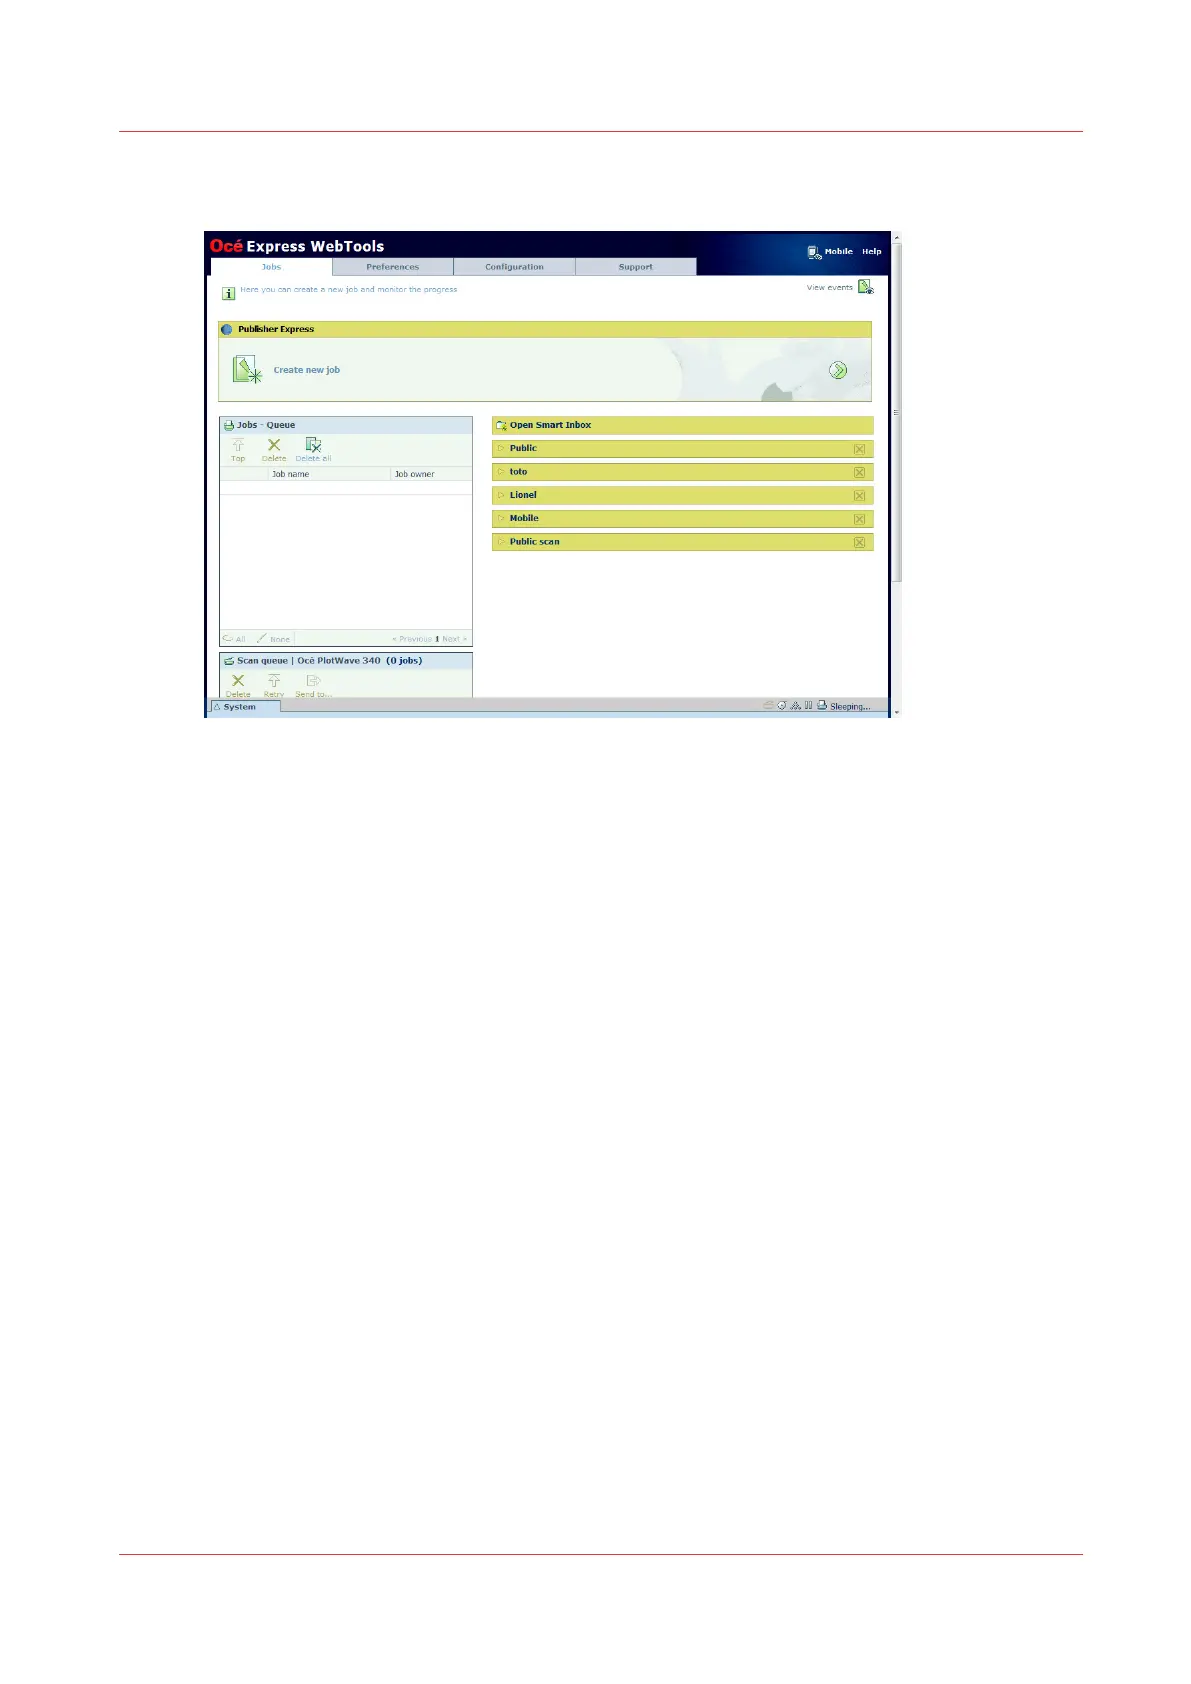
The Jobs tab
The Jobs tab
Create a new job in the Océ Publisher Express section.
• When you want to submit a new job, click [Create new job]. A new window opens, here you
can define some basic job settings and browse the file you want to print. For more information,
see
Use Océ Publisher Express to send a print job
on page 172.
Monitor jobs in the Queue section.
• In the job queue and scan queue you get an overview of the jobs waiting to be printed, or
scans waiting to be sent. The options listed above the Queue section allow you to move a
selected job to the top of the queue or to delete the job. When you click [Delete all] all jobs are
deleted from the queue. For more information, see
The Smart Inbox and the queue concept
on
page 93.
Control your jobs in the Smart Inbox section.
• When you click [Open Smart Inbox] and enter a name, the new Smart Inbox immediately
appears in the Smart Inbox overview. This Smart Inbox is used for print jobs, and is only
visible on your local browser. When you send a print job via the Smart Inbox, the Smart Inbox
is also shown on the user panel. For more information, see
Create and open a Smart Inbox for
print jobs (Smart Inbox section)
on page 100.
You can also create a Smart Inbox for scan jobs under the [Preferences] tab. For more
information, see
Create and open a Smart Inbox for scan jobs
on page 102.
• You can get an overview of all the Smart Inboxes on your system. When you select a print job
in the Smart Inbox you can use the options listed above the Smart Inbox section to print, edit,
or delete the jobs.
• You can get an overview of all scan jobs. All scan jobs are placed in the Scans Smart Inbox.
When you select a scan job you can use the options listed above the Scans Smart Inbox
section to print, save, or delete the scan job.
• Get an overview of all jobs on the system. When you enable the [Preferences] - [System
defaults] - [Job management] - [Display a view on all Smart Inbox jobs] setting, all jobs are
displayed.
The Jobs tab
Chapter 3 - Define your Workflow with Océ Express WebTools
67