Routine Maintenance and Repair 8-5
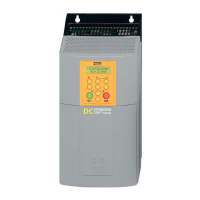
DC590+ Series DC Digital Drive
Repairs for Frames 4 & 5
Replacing the Fan (Frames 4 & 5)
WARNING!
Ensure that all wiring is
electrically isolated and cannot be
made “live” unintentionally by other
personnel.
Remove the terminal cover. Unscrew the three
screws securing the baffle and remove. Disconnect
the fan supply cable. Remove the two M8
earth/ground screws on the back of the drive
(Frame 5). Remove the fan cover. Remove the fan
assembly and screws as detailed above.
Reverse the procedure for refitting the fan
assembly – refer to the refitting note in the diagram
above. The replacement fan assembly includes the
fan, cover and capacitor, requiring just a simple
connection of the supply cable.
Heatsink Cooling Fan
Connections
These fans are connected on the power board to the
cooling fan supplies, CONN 2 or 3 as described
below:
• 380, 500, 725, 830A models have a single fan
matched to the auxiliary supply and connected
to CONN 2.
1580A models have two fans matched to the
auxiliary supply connected to CONN 2 & 3.
 Loading...
