Workshop
Manual
Rolls Royce Silrer Shadow
8
Bentley
T
Ser~es
Chapter
J
9.
Thoroughly clean the half-shaft and visually
inspect the shaft bearing bores and trunnion pin for
signs of damage, cracks or surface flaws.
10.
Inspect the ball and trunnion joint seal for
serviceability;
if
necessary it should be renewed.
Ball and trunnion joint seal-To renew
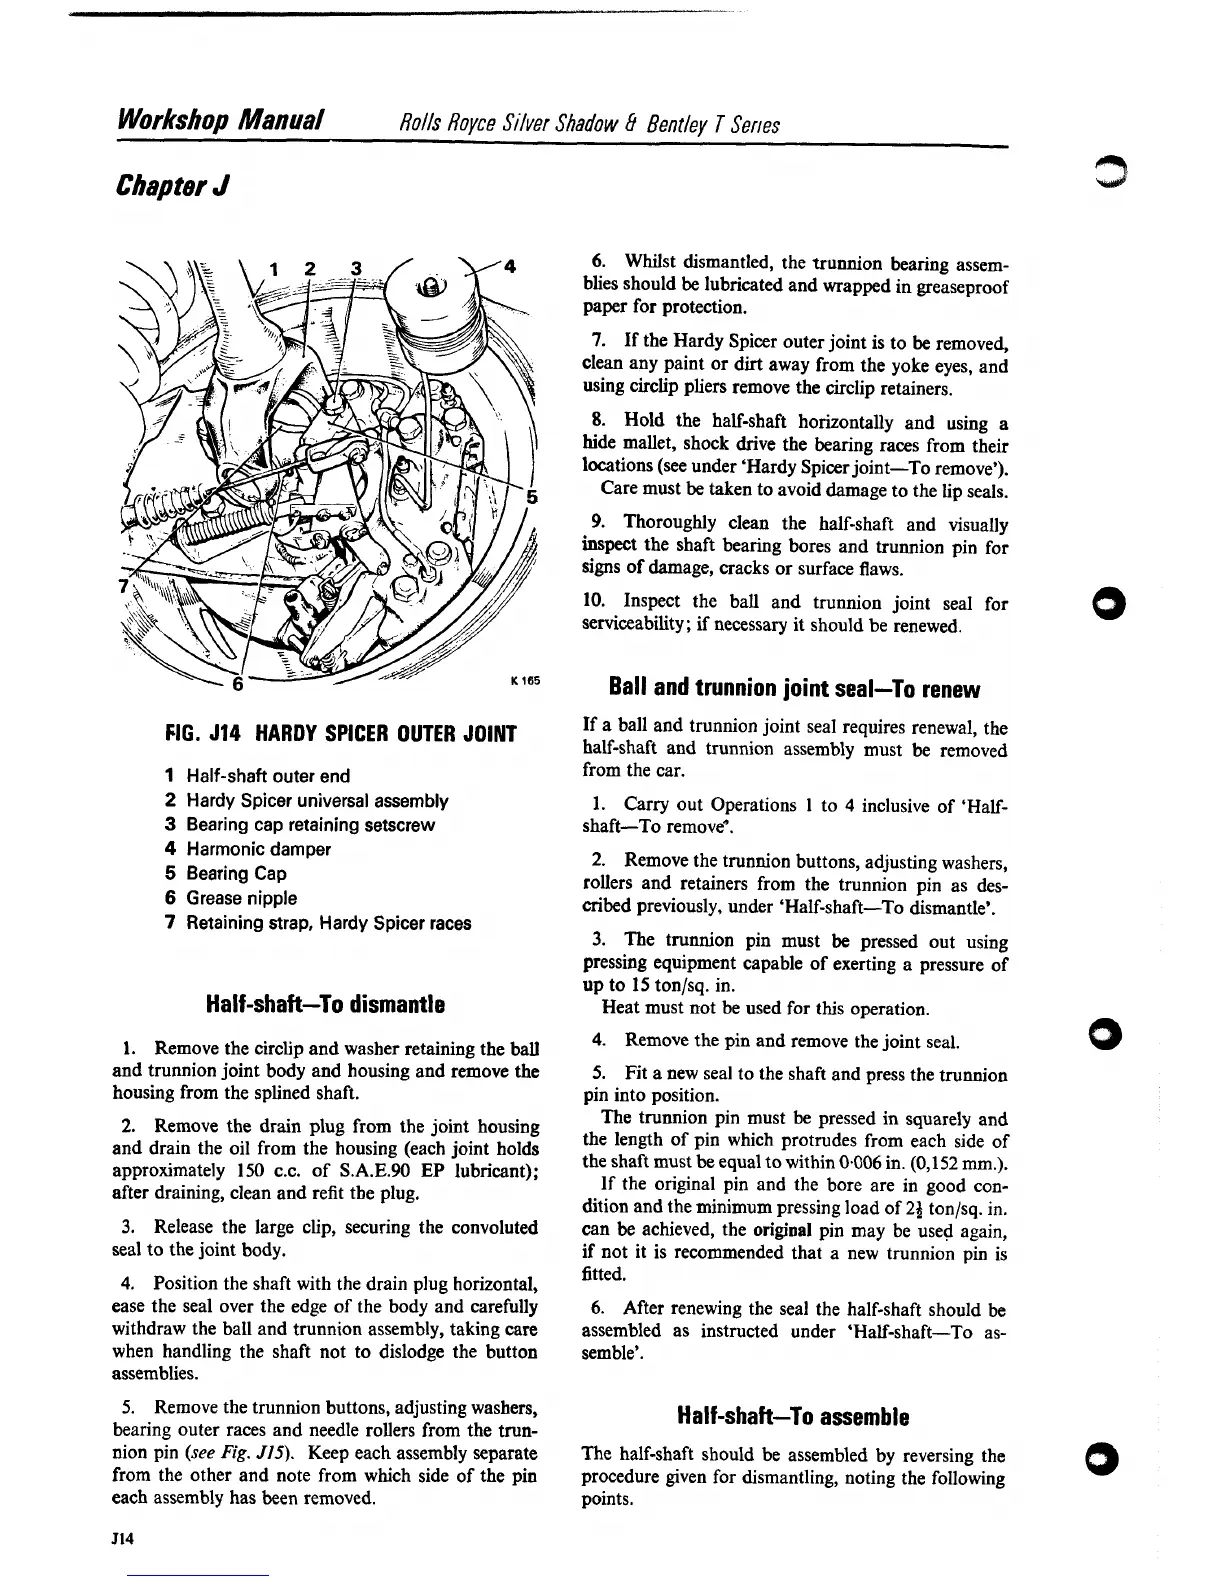
FIG. 514 HARDY SPICER OUTER JOINT
1
Half-shaft outer end
2
Hardy Spicer universal assembly
3
Bearing cap retaining setscrew
4
Harmonic damper
5
Bearing Cap
6
Grease nipple
7
Retaining strap, Hardy Spicer races
Half-shaft-To dismantle
1.
Remove the circlip and washer retaining the ball
and trunnion joint body and housing and remove the
housing from the splined shaft.
2.
Remove the drain plug from the joint housing
and drain the oil from the housing (each joint holds
approximately 150
C.C.
of S.A.E.90 EP lubricant);
after draining, clean and refit tbe plug.
3.
Release the large clip, securing the convoluted
seal to the joint body.
4.
Position the shaft with the drain plug horizontal,
ease the seal over the edge of the body and carefully
withdraw the ball and trunnion assembly, taking care
when handling the shaft not to dislodge the button
assemblies.
5.
Remove the trunnion buttons, adjusting washers,
bearing outer races and needle rollers from the trun-
nion pin
(see
Fig.
J15).
Keep each assembly separate
from the other and note from which side of the pin
each
assembly has been removed.
6.
Whilst dismantled, the trunnion bearing assem-
blies should
be
lubricated and wrapped in greaseproof
paper for protection.
7.
If the Hardy Spicer outer joint is to
be
removed,
clean any paint or dirt away from the yoke eyes, and
using circlip pliers remove the circlip retainers.
8.
Hold the half-shaft horizontally and using
a
hide mallet, shock drive the bearing races from their
locations (see under 'Hardy Spicer joint-To remove').
Care must be taken to avoid damage to the lip seals.
If a ball and trunnion joint seal requires renewal, the
half-shaft and trunnion assembly must be removed
from the car.
1. Carry out Operations
1
to
4
inclusive of 'Half-
shaft-To remove*.
2.
Remove the trunnion buttons, adjusting washers,
rollers and retainers from the trunnion pin as des-
cribed previously, under 'Half-shaft-To dismantle'.
3.
The trunnion pin must
be
pressed out using
pressing equipment capable of exerting a pressure of
up to 15
tonlsq. in.
Heat must not be used for this operation.
4.
Remove the pin and remove the joint seal.
5.
Fit
a
new seal to the shaft and press the trunnion
pin into position.
The trunnion pin must be pressed in squarely and
the length of pin which protrudes from each side of
the shaft must
be
equal to within 0.006 in. (0,152 mm.).
If the original pin and the bore are in good con-
dition and the minimum pressing load of
2a tonlsq. in.
can be achieved, the
original
pin may be used again,
if
not it is recommended that a new trunnion pin is
fitted.
6.
After renewing the seal the half-shaft should be
assembled as instructed under 'Half-shaft-To as-
semble'.
Half-shaft-To assemble
The half-shaft should be assembled by reversing the
procedure given for dismantling, noting the following
points.