Rolls-Royze Silver Shadow
B
Bentlev
T
Series
Workshop
Manual
throttle sealing glands should not be removed as
servicing is not required.
Cars
from
Car
Serial Number
SRH
8742 and
on-
wards. Remove the two rubber seals from the throttle
spindle bore.
19. Unscrew and remove the slow-running valve
complete with spring, seal and brass washer.
20.
Remove the two screws and shakeproof washers
retaining the vacuum take-off plate and union. Lift off
the plate and gasket.
21. Remove the piston lifting pin by extracting the
circlip from its groove with the pin pressed upwards.
22.
Withdraw the pin downwards.
Carburetters-To assemble
Chapter
K
(1 1,11 mm.) diameter bar between the forked lever
and the lip of the float chamber lid. The prongs of
the lever should just rest on the bar
(see
Fig.
K14). If
they do not, carefully bend the lever at the start of
the pronged section until the correct setting is obtained.
13. Examine the piston rod and the outside surface
of the piston for damage.
14.
The piston assembly must be scrupulously clean.
Use paraffin or methylated spirits as a cleaning agent;
do not use abrasive. Clean inside the suction chamber
and piston rod guide using paraffin or methylated
spirits.
15. Fit the damper assembly and washer. Seal the
transfer holes in the piston assembly with rubber plugs
and fit the assembly to the suction chamber.
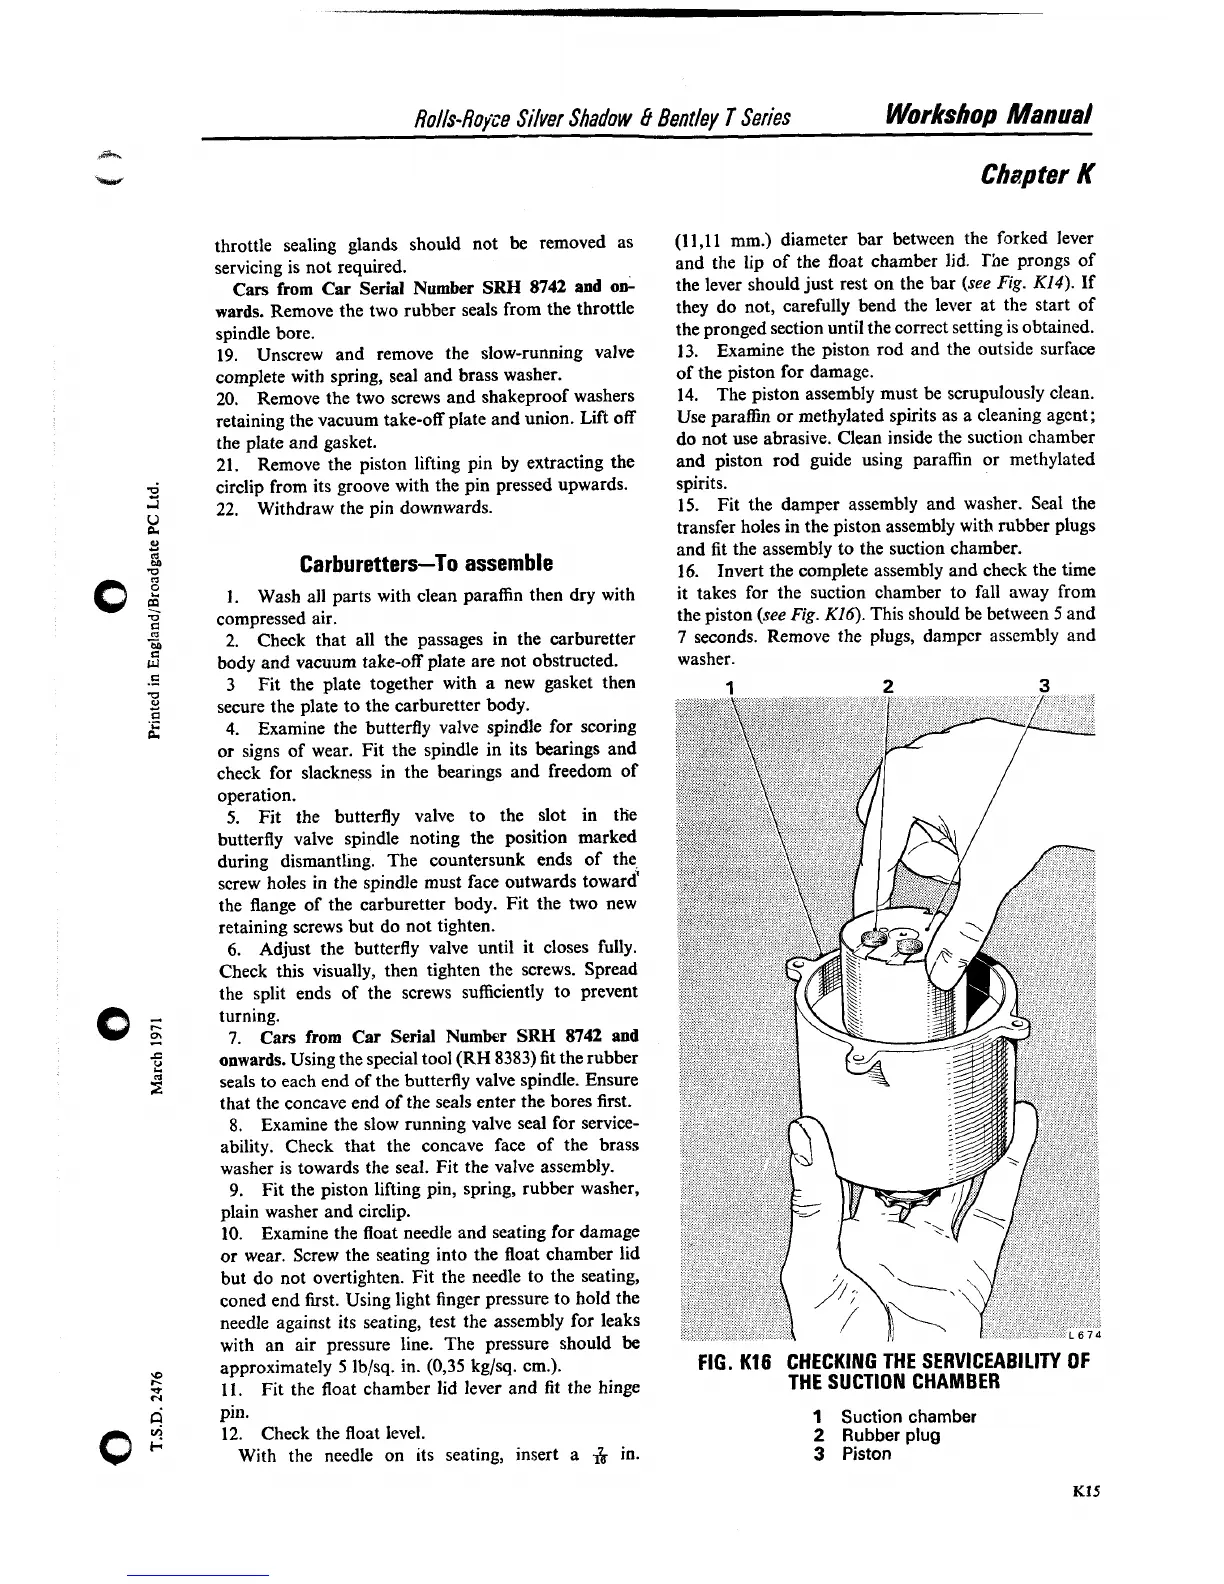
16.
Invert the complete assembly and check the time
I.
Wash all parts with clean paraffin then dry with
it takes for the suction chamber to fall away from
compressed air.
the piston
(see
Fig.
K16). This should be between
5
and
2.
Check that all the passages in the
carburetter
7
seconds. Remove the plugs, dampcr assembly and
body and vacuum take-off plate are not obstructed.
washer.
3 Fit the plate together with
a
new gasket then
1
2
3
secure the plate to the carburetter body.
4.
Examine the butterfly valve spindle for scoring
or signs of wear. Fit the spindle in its bearings and
check for slackness in the
bearlngs and freedom of
operation.
5. Fit the butterfly valve to the slot in the
butterfly valve spindle noting the position marked
during dismantling. The countersunk ends of the,
screw holes in the spindle must face outwards
toward
the flange of the carburetter body. Fit the two new
retaining screws but do not tighten.
6.
Adjust the butterfly valve until it closes fully.
Check this visually, then tighten the screws. Spread
the split ends of the screws sufficiently to prevent
turning.
7.
Cars from Car Serial Number
SRH
8742
and
onwards. Using the special tool
(RH
8383) fit the rubber
seals
to
each end of the butterfly valve spindle. Ensure
that the concave end of the seals enter the bores first.
8. Examine the slow running valve seal for service-
ability. Check that the concave face of the brass
washer is towards the seal. Fit the valve assembly.
9.
Fit the piston lifting pin, spring, rubber washer,
plain washer and circlip.
10.
Examine the float needle and seating for damage
or wear. Screw the seating into the float chamber lid
but do not overtighten. Fit the needle to the seating,
coned end first. Using light finger pressure to hold the
needle against
its
seating, test the assembly for leaks
with an air pressure line. The pressure should be
approximately
5
Ib/sq. in. (0,35 kg/sq. cm.).
FIG.
K16
CHECKING THE SERVICEABILITY
OF
11.
Fit the float chamber lid lever and fit the hinge
THE SUCTION CHAMBER
pin.
12. Check the float level.
With the needle on its seating, insert a
&
in.
1
Suction chamber
2
Rubber plug
3
Piston