---
Rolls-Royce
Silver
Shadow
B
Bentley
T
Series
Workshop
Manual
0
Chapter
K
is located in the housing groove.
30.
Before tightening the faur screws securing the
float chamber, ensure that the chamber is pushed
towards the inlet flange of the carburetter. This is very
important to prevent a possible foul with the throttle
controls
(see Fig.
K21
diagram
2);
tighten the screws.
31. Check that the jet is not sticking in its guide. This
can be carried out by moving the jet lever up and
down.
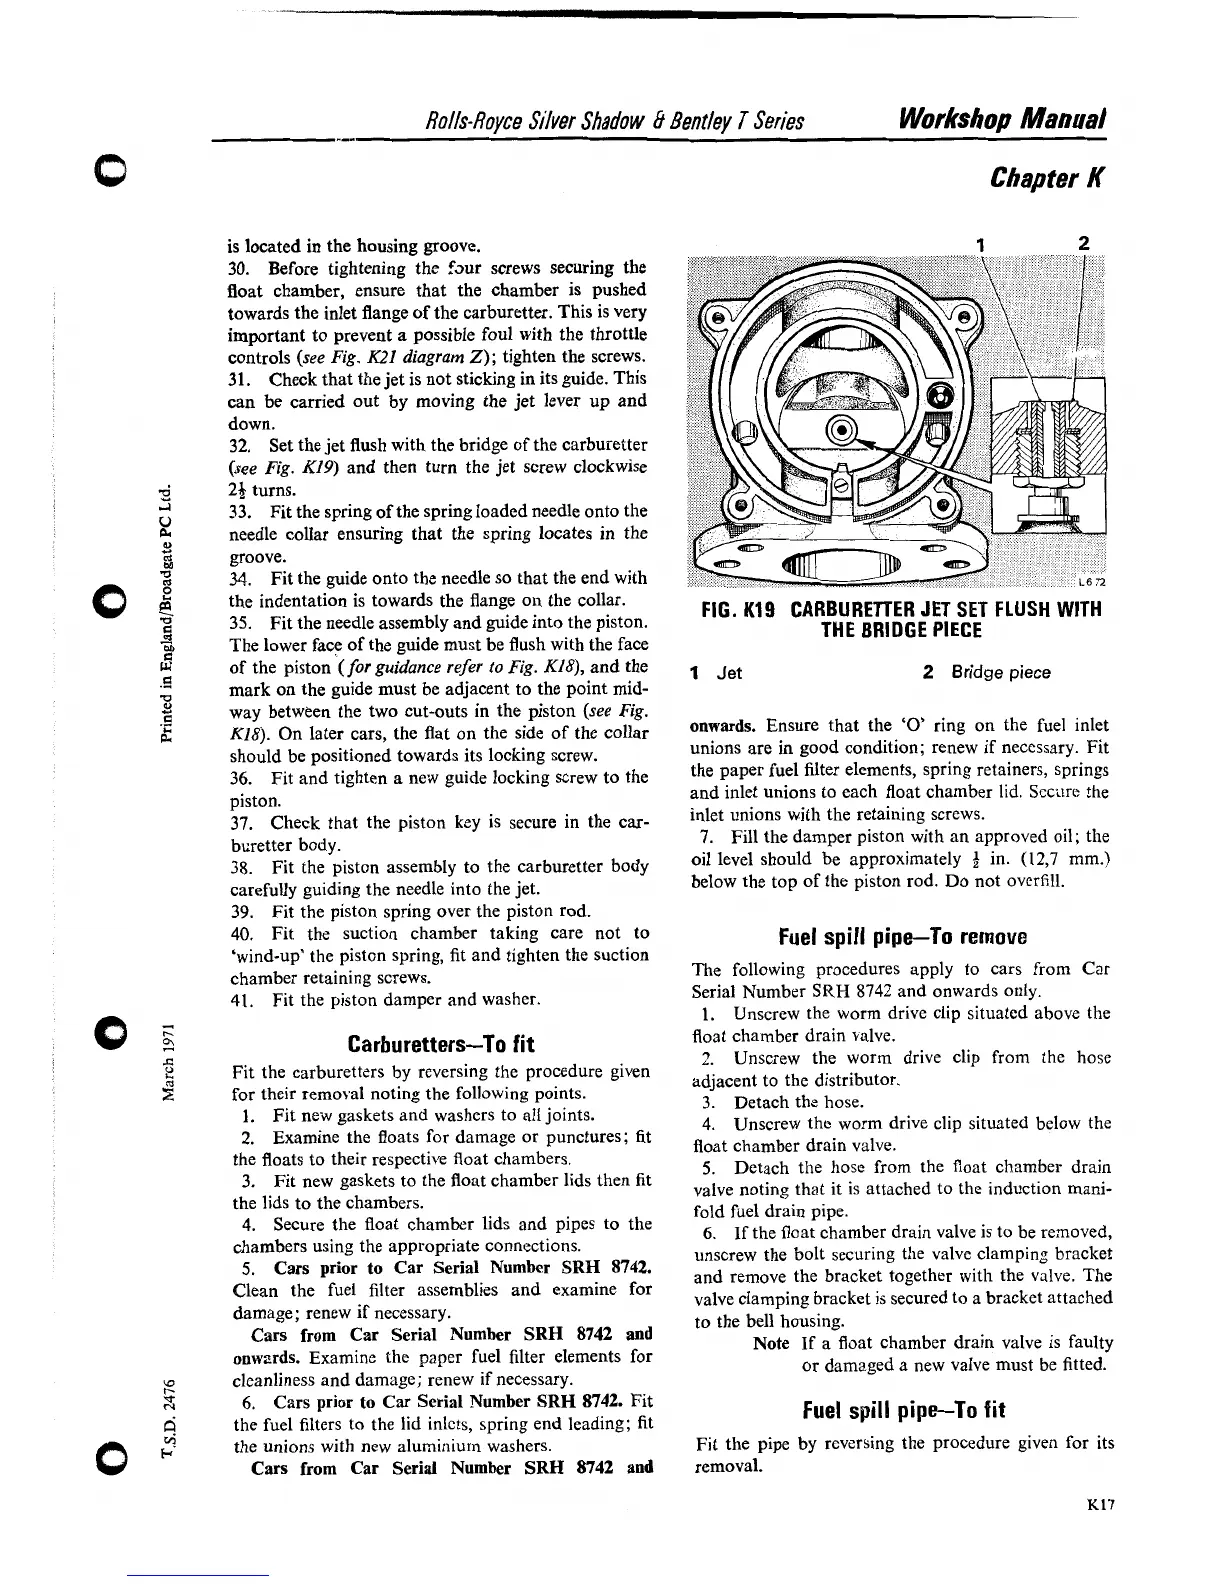
32. Set the jet flush with the bridge of the
carburetter
(see Fig.
K19) and then turn the jet screw clockwise
24 turns.
33. Fit the spring of the spring loaded needle onto the
needle collar ensuring that the spring locates in the
groove.
34.
Fit the guide onto the needle so that the end with
the indentation is towards the flange on the collar.
35. Fit the needle assembly and guide into the piston.
The lower face of the guide must be flush with the face
of the piston
(for
guidance refer
to
Fig.
K18), and the
mark on the guide must be adjacent to the point mid-
way between the two cut-outs in the piston
(see Fig.
K18).
On later cars, the flat on the side of the collar
should be positioned towards its locking screw.
36. Fit and tighten a new guide locking screw to the
piston.
37.
Check that the piston key is secure in the car-
buretter body.
38.
Fit the piston assembly to the carburetter body
carefully guiding the needle into the jet.
39.
Fit the piston spring over the piston rod.
40.
Fit the suction chamber taking care not to
'wind-up' the piston spring, fit and tighten the suction
chamber retaining screws.
41.
Fit the piston damper and washer.
Carburetters-To fit
Fit the carburetters by reversing the procedure given
for their removal noting the following points.
1.
Fit new gaskets and washers to all joints.
2.
Examine the floats for damage or punctures; fit
the floats to their respective float chambers.
3.
Fit new gaskets to the float chamber lids then fit
the lids to the chambers.
4.
Secure the float chamber lids and pipes to the
chambers using the appropriate connections.
5.
Cars prior to Car Serial Number SRH 8742.
Clean the fuel filter assemblies and examine for
damage; renew if necessary.
Cars
from Car Serial Number SRH 8742 and
onwrrds.
Examine the paper fuel filter elements for
cleanliness and damage; renew if necessary.
6.
Cars prior to Car Serial Number SRH 8742. Fit
the fuel filters to the lid
inlets, spring end leading;
fit
the unions with new aluminium washers.
Cars from Car Serial Number SRH 8742 and
FIG.
K19
CARBURETTER JET SET FLUSH WITH
THE BRIDGE PIECE
1
Jet
2
Bridge
piece
onwards. Ensure that the
'0'
ring on the fuel inlet
unions are in good condition; renew if
necessary. Fit
the paper fuel filter elements, spring retainers, springs
and inlet unions to each float chamber lid.
Secure the
inlet unions with the retaining screws.
7.
Fill the damper piston with an approved oil; the
oil level should be approximately
4
in. (12,7 mm.)
below the top of the piston rod. Do not overfill.
Fuel spill pipe-To remove
The following procedures apply to cars from Car
Serial Number SRH 8742 and onwards only.
1.
Unscrew the worm drive clip situated above the
float chamber drain valve.
2.
Unscrew the worm drive clip from the hose
adjacent to the distributor.
3. Detach the hose.
4.
Unscrew the worm drive clip situated below the
float chamber drain valve.
5.
Detach the hose from the float chamber drain
valve noting that it is attached to the induction mani-
fold fuel drain pipe.
6.
If the float chamber drain valve is to be removed,
unscrew the bolt securing the valve clamping bracket
and remove the bracket together with the valve. The
valve clamping bracket is secured to a bracket attached
to the bell housing.
Note If a float chamber drain valve is faulty
or damaged a new valve must be fitted.
Fuel
spill
pipe-To fit
Fit the pipe by reversing the procedure given for its
removal.