Rolls-Royce Silver Shadow
B
Bentley
T
Series
Workshop
Manual
C
Cir~pter
R
Kantenspur snow chains-TO remove
3.
Position the chain adjacent to the rear wheel
1.
Unhook the fastener, unthread it and allow it
to hang at the bottom of the wheel
(see Fig.
R14
inset
H).
2.
Move the chain towards the inner side of the
wheel until part of the tread is visible
(see
Fig.
R14
inset
H).
3.
Attach the rubber tensioner vertically over
the wheel centre
(see Fig.
R14
inset
I).
4.
Repeat Operations
1,
2
and
3
on the other
wheel.
5.
Move the wheels one quarter of a revolution
until the free part of the tread is on the ground
(see
Fig.
R14
inset
J)
then remove the tensioners.
6.
Hold the chain on the upper part of the wheel,
then pull it outwards and downwards until the chain
is situated around the base of the wheel
(see Fig.
R14
insets
K
and
L).
Repeat this operation on the
other front wheel.
7.
Drive the car out of the chains.
ensuring that the tension chain and tensioning key
are positioned away from the car
(see Fig.
R16
inset
A).
4.
Hook the end or hook links onto the fitting
clip and fasten the clip to the tyre
(see Fig.
R16
inset
B).
5.
Move the car forward one revolution of the
wheels so that the clip can be removed.
6.
Remove the clip and evenly distribute the free
anti-skid sections around the tyre.
7.
Check that the hooks and links are not twisted.
8.
Connect the inner and outer chains by means
of the hook link and the end or extension links. The
inside chain should be connected first.
9.
Tighten the tension chain and lock the
tensioning key.
10.
Check to ensure that the tensioning key is
correctly tightened; snow chains must not be fitted
too tightly to the tyres. When correctly fitted it
should be possible to slide a hand between the
chain and tyre
(see Fig.
R16
inset
C).
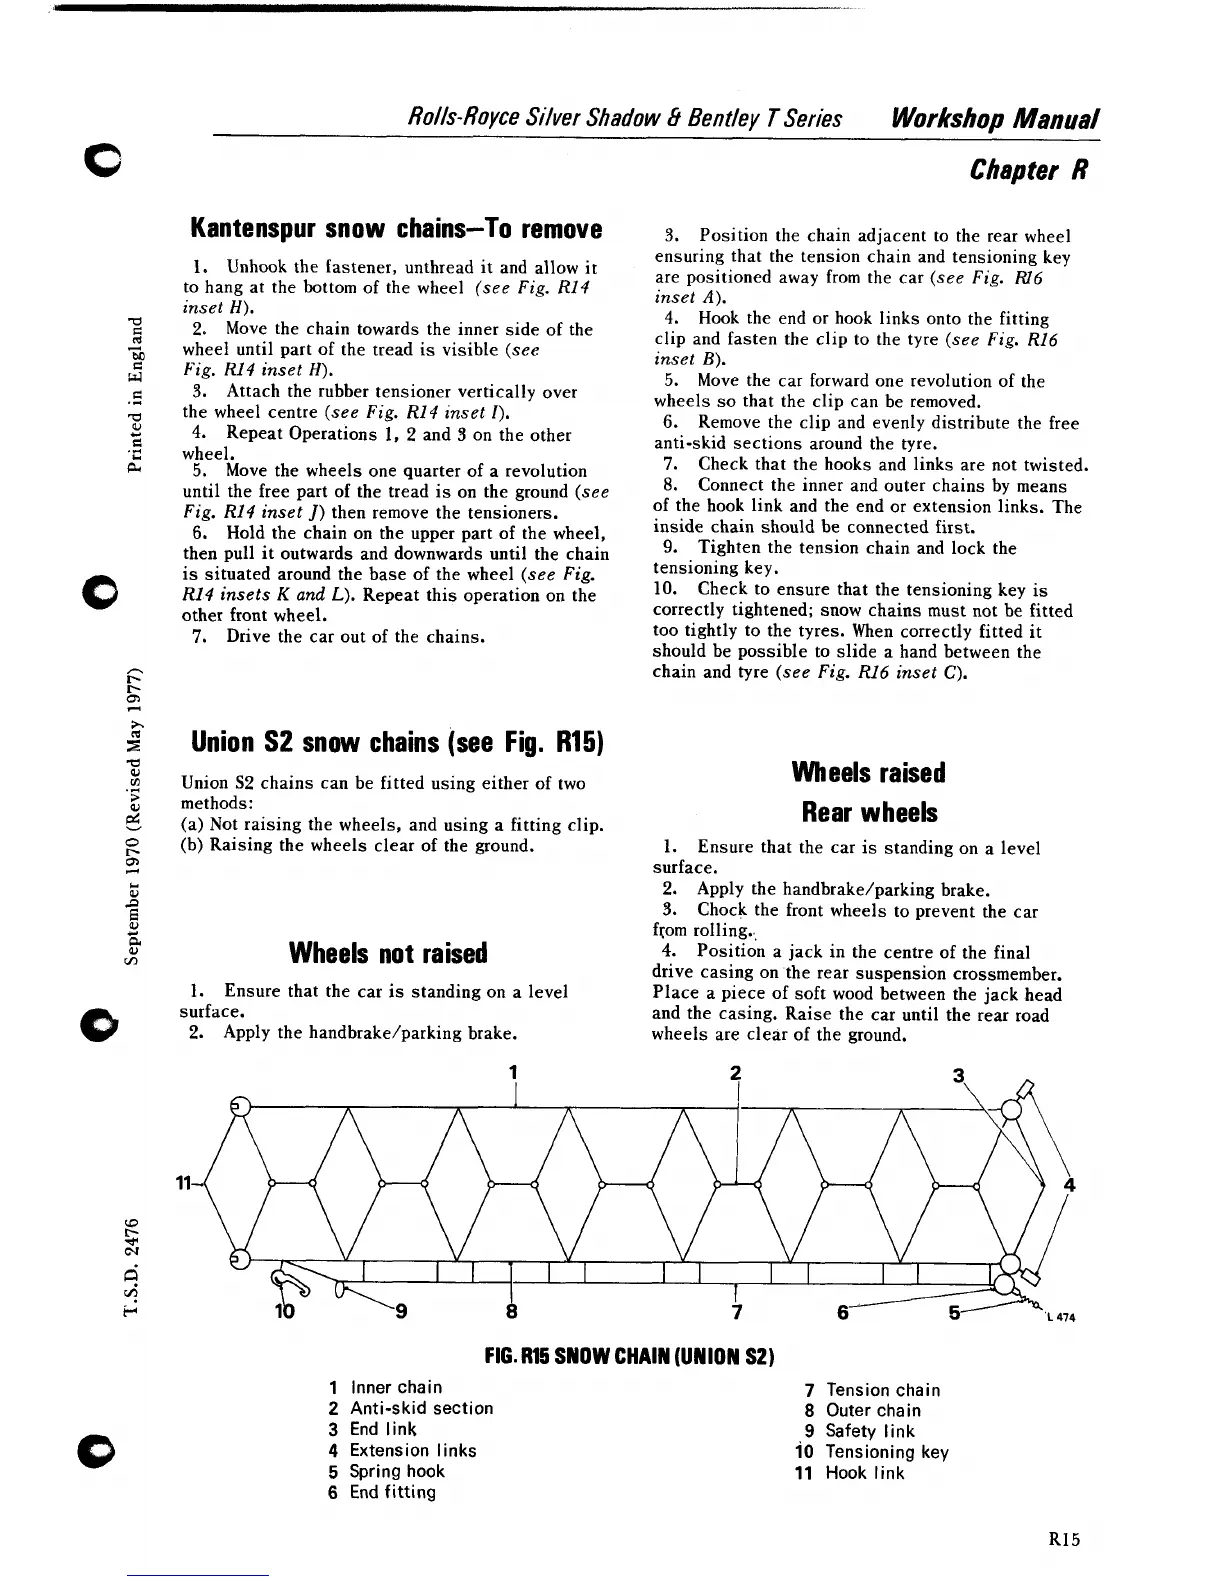
Union
S2
snow chains (see Fig.
R15)
-
Union
S2
chains can be fitted using either of two
Wheels raised
methods:
(a) Not raising the wheels, and using a fitting clip.
Rear wheels
(b) Raising the wheels clear of the ground.
1.
Ensure that the car is standing on a level
surface.
2.
Apply the handbrake/parking brake.
3.
Chock the front wheels to prevent the car
from rolling.,,
Wheels not raised
4.
Position a jack in the centre of the final
drive casing on the rear suspension crossmember.
1.
Ensure that the car is standing on a level
Place a piece of soft wood between the jack head
surface.
and the casing. Raise the car until the rear road
2.
Apply the handbrake/parking brake. wheels are clear of the ground.
FIG.
R15
SNOW CHAIN (UNION S2)
1
Inner chain
2
Anti-skid section
3
End link
4
Extension links
5
Spring hook
6
End
fitting
7
Tension chain
8
Outer chain
9
Safety link
10
Tensioning key
11
Hook link