Rolls- Royce Silver Shadow
B
Bentley
T
Series
Workshop
Manual
Chaptsr
M
2.
Operate the washer motor for a few seconds to
clean away any sediment present.
3.
If a poor jet of fluid prevails, check the
'
Telkathene' washer which may be mis-shapen;
renew if necessary.
Washer unit-To maintain
1.
This unit requires no maintenance other than to
ensure that the electrical connections are clean and
correctly tightened. Ensure that the container is
kept clean.
2.
If the motor unit fails it should be replaced by
a new unit.
16
W
wiper motor--
Parking switch adjustment
The parking switch of this motor is provided with
an adjustment to allow for different angles of park.
When replacing a drive gear assembly it may be
necessary to re-adjust the parking switch to suit
the new assembly. Failure to do this may result in
one of the following faults:
1.
With the wiper switch in the intermittent
position and the blades parked on the screen, moving
the switch to the off position does not cause the
blades to move to the off screen position.
2.
When moving the wiper switch from off to
intermittent, there is an
8
to 10 second delay before
the wiper motor operates.
If
a new gear assembly has been fitted and the
wiper motor exhibits one of the above faults the
relevant following procedure should be adopted.
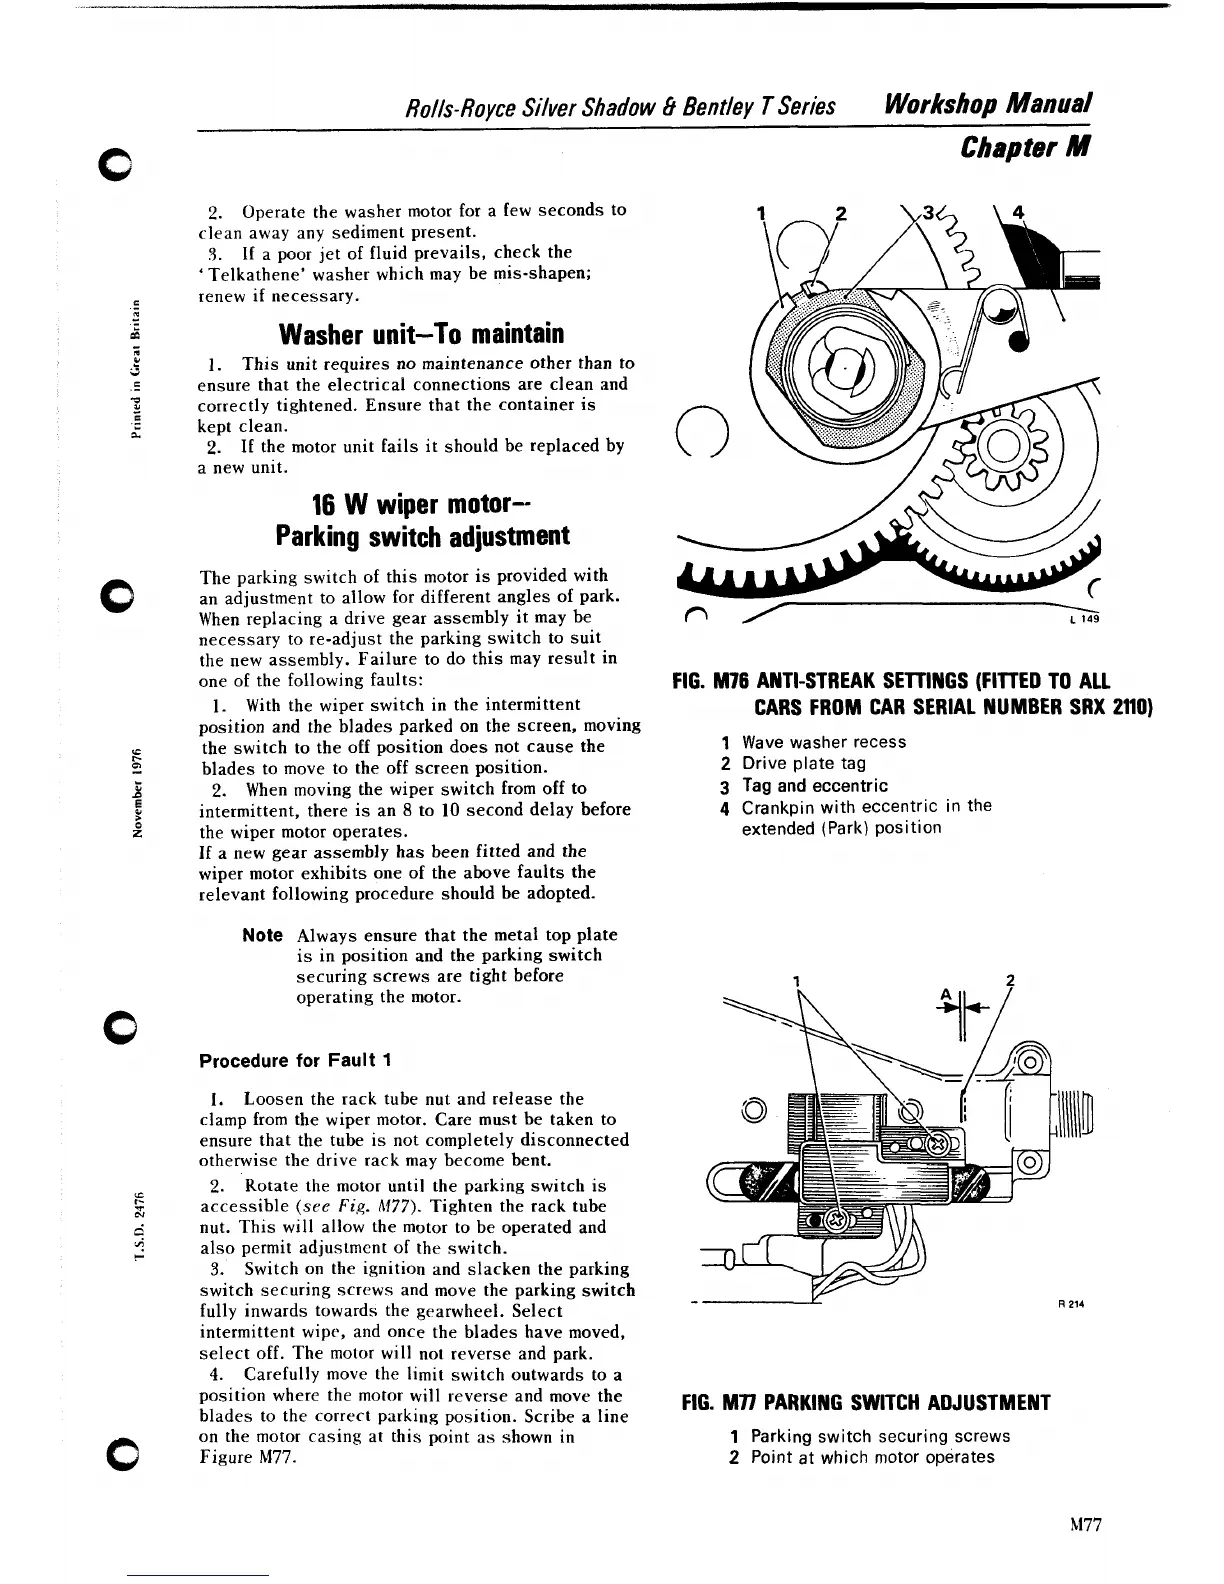
FIG. M76 ANTI-STREAK SETTINGS (FITTED TO ALL
CARS FROM CAR SERIAL NUMBER SRX
2110)
1
Wave washer recess
2
Drive plate tag
3
Tag
and
eccentric
4
Crankpin with eccentric in the
extended (Park) position
Note
Always ensure that the metal top plate
is in position and the parking switch
securing screws are tight before
1
2
operating the motor.
Procedure for Fault
1
1.
Loosen the rack tube nut and release the
clamp from the wiper motor. Care must be taken to
ensure that the tube is not completely disconnected
otherwise the drive rack may become bent.
2.
Rotate the motor until the parking switch is
accessible
(see
Fig.
12177).
Tighten the rack tube
nut. This will allow the motor to be operated and
also permit
adjustrncnt of the switch.
3.
Switch on the ignition and slacken the parking
switch securing screws and move the parking switch
fully inwards towards the gearwheel. Select
intermittent wipe, and once the blades have moved,
select off. The motor will not reverse and park.
4.
Carefully move the limit switch outwards to a
position where the motor will reverse and move the
blades to the correct parking position. Scribe a line
FIG.
Mn
PARKING SWITCH ADJUSTMENT
on the motor rasing at this point as shown in
1
Parking switch securing screws
Figure
M77.
2
Point at which motor operates