STONEX R2
measurement point.
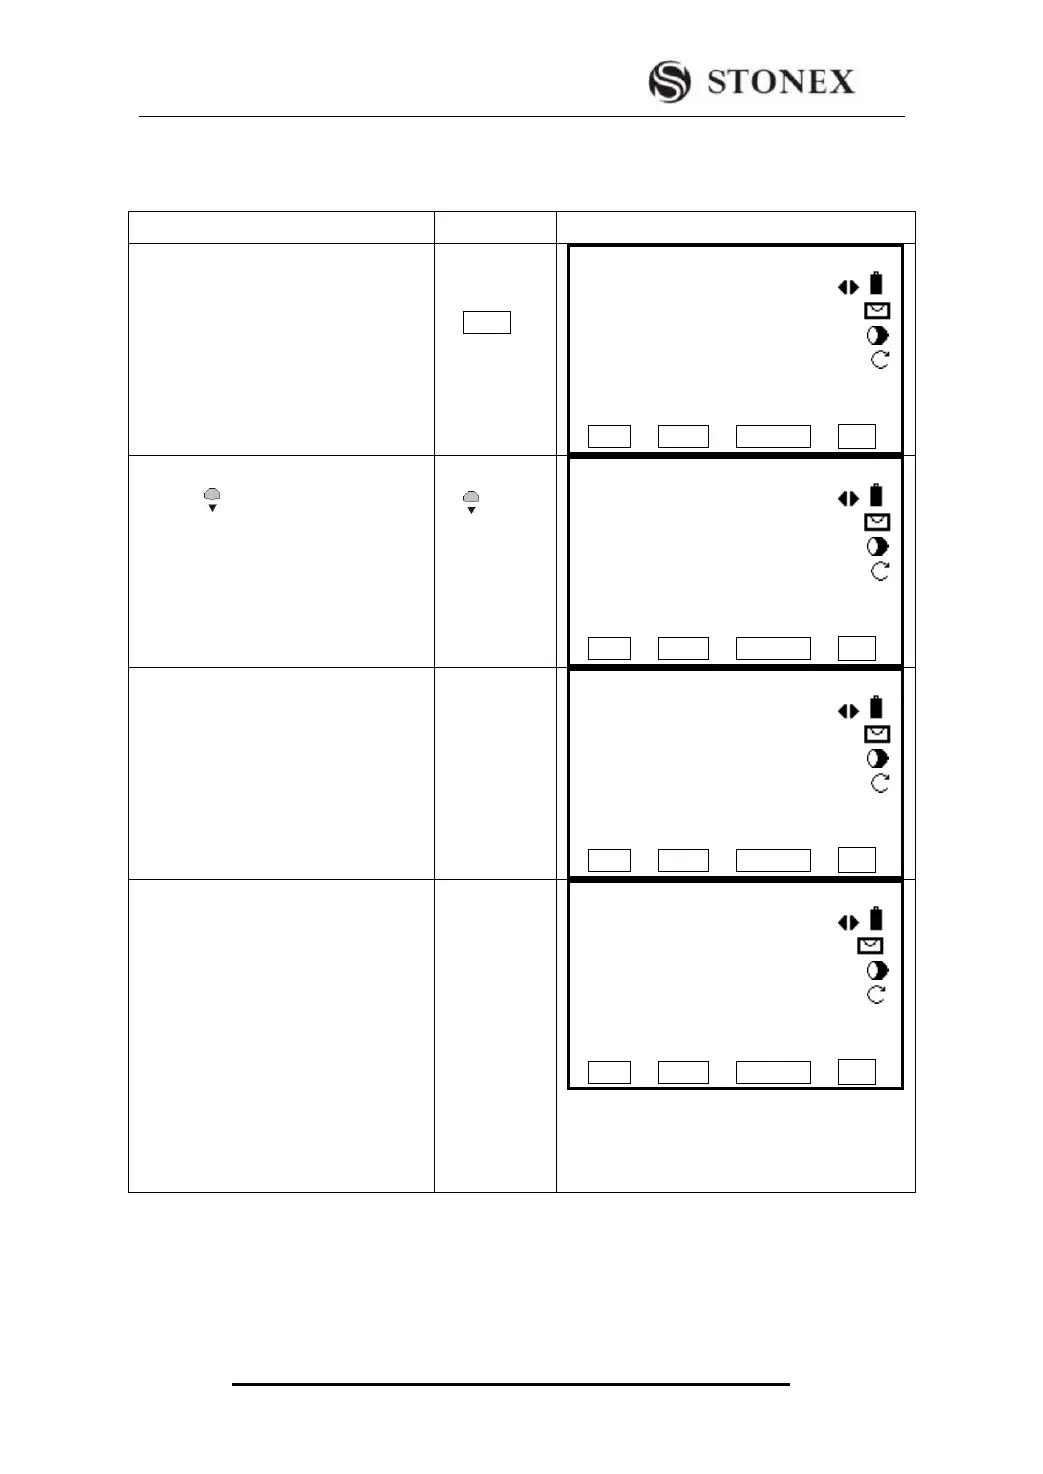
① Press [PAGE] to turn to Page 3,
and select the point to be staked out.
You can also call up the point to be
staked out by inputting the PtID in Pt
Search function in Page 1.
【Stake Out 】 3/3 ▼
PtID : 6
Type: Meas.
R.HT : 2.000 m
△X/N: ---.--- m
△Y/E: ---.--- m Ⅰ
△H : ---.--- m
All DIST RECORD ↓
②Press to move to R.HT item and
input the prism height.
【Stake Out 】 3/3 ▼
PtID : 6
Type: Meas.
R.HT : 2.000 m
△X/N: ---.--- m
△Y/E: ---.--- m Ⅰ
△H : ---.--- m
All DIST RECORD ↓
③Collimate the prism, press [F2]
(DIST) to start measurement and
calculate the stake-out factor offset
between the station point and stake-out
point.
【Stake Out 】 3/3 ▼
PtID : 6
Type: Meas.
R.HT : 2.000 m
△X/N: 2.785 m
△Y/E: 2.698 m Ⅰ
△H : 0.396 m
All DIST RECORD ↓
④ Northing the prism in E direction
until △Y/E displays 0 m.
When △Y/E is positive, it means the
stake-out point is on the right of
measurement point. Move the prism
rightward.
When △X/N is negative, it means the
stake-out point is on the left of
measurement point. Move the prism
leftward.
【Stake Out 】 3/3 ▼
PtID : 6
Type: Meas.
R.HT : 2.000 m
△X/N: 0.000 m
△Y/E: 2.698 m Ⅰ
△H : 0.396 m
All DIST RECORD ↓