STONEX R2
② Press [F1] (B&D) to display as the
right dialog.
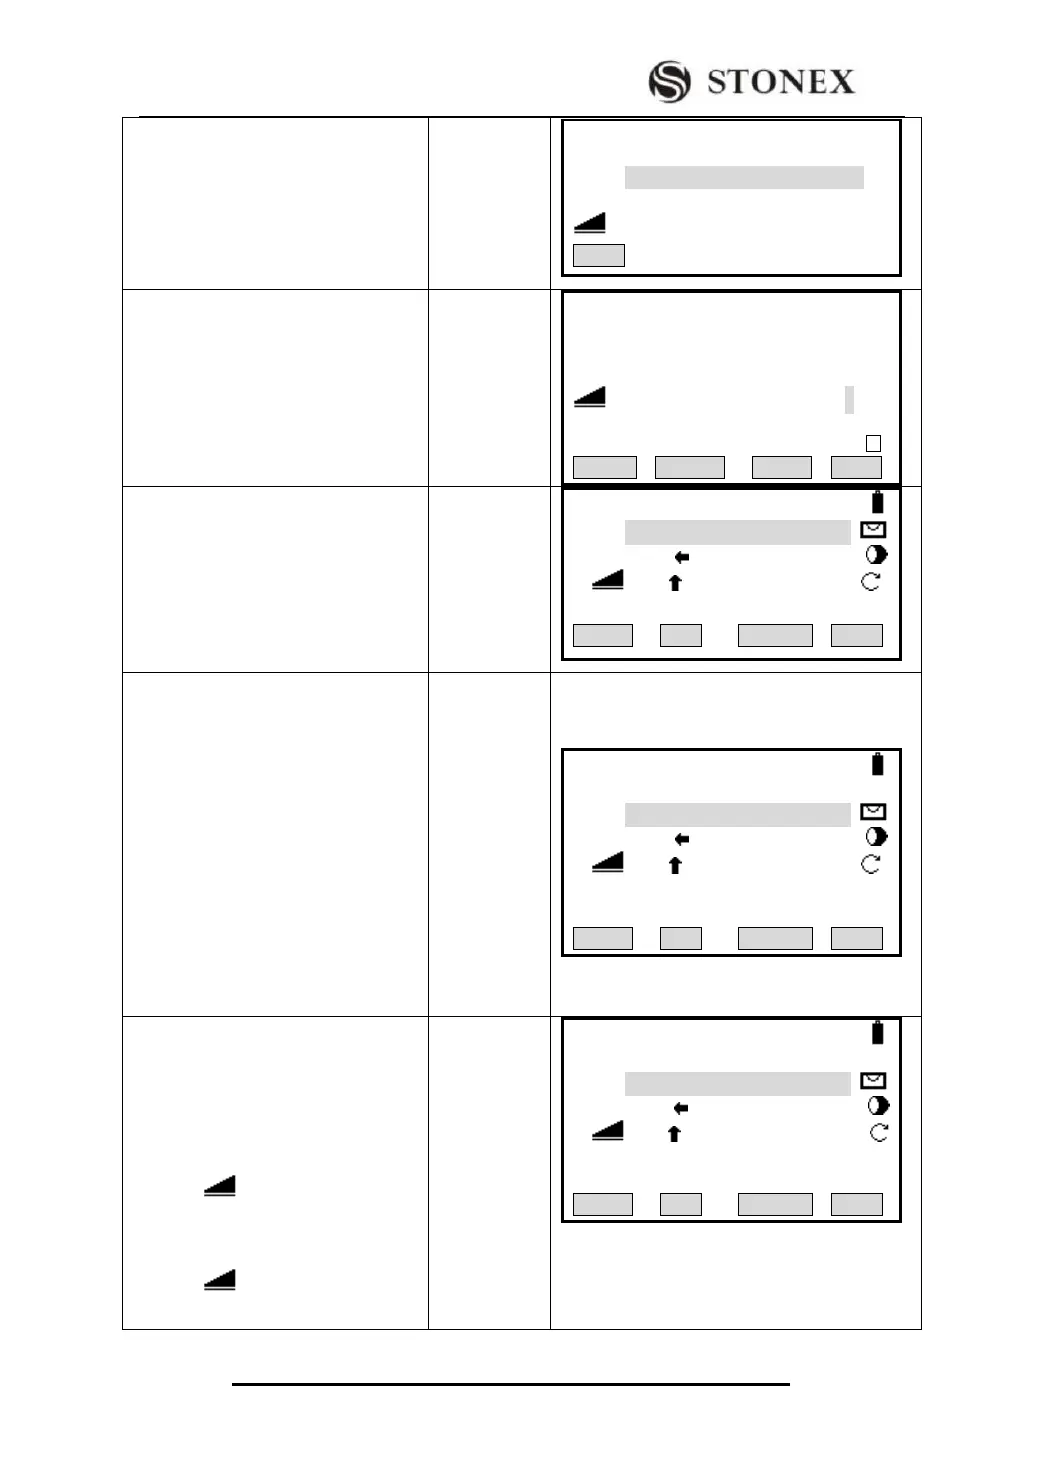
【New Point(SideShot)】
Input TGT Pt AZ & Dist.!
PtID: --- ---
AZ: ---°---′---″
: ---.--- m
BACK
③ Input the PtID, AZ and HD of the
point to be staked out. After inputting,
press [ENT] to move to next item.
‴1)
Input PtID,
AZ, HD
+
[ENT]
【New Point(SideShot)】
Input TGT Pt AZ & Dist!
PtID: 50
AZ: 26°00′00″
: 10.000 m
01
INSERT DELETE CLEAR .
④ Collimate the prism, press [F2]
(DIST) to start measurement and
calculate the stake-out factor offset
between the station point and stake-out
point.
【Side Shot Stake Out】
PtID: 50
△Hz : -85°51′31″
△ : 10.000 m
Ⅰ
NewPt2 DIST RECORD BACK
⑤Rotate the telescope until the △ HZ
displays 0°00′00″, and notify the
surveyor to move the prism.
When △Hz is positive, it means the
stake-out point is on the right of
measurement point. Move the prism
rightward.
When △Hz is negative, it means the
stake-out point is on the left of
measurement point. Move the prism
leftward.
【Side Shot Stake Out】
PtID: 50
△Hz : -85°51′31″
△ : 1.509 m
Ⅰ
NewPt2 DIST RECORD BACK
⑥ Set the prism on 0 direction of
telescope, press [F2] (DIST) to start
measurement and calculate the
stake-out factor offset between the
station point and stake-out point.
When △ is positive, it means the
stake-out point is further. Move the
prism further from the station.
When △ is negative, move prism
closer to station.
【Side Shot Stake Out】
PtID: 50
△Hz : 0°00′00″
△ : 1.509 m
I
NewPt2 DIST RECORD BACK