QUICKDESIGNER ASCII Flex Protocol •
••
• 269
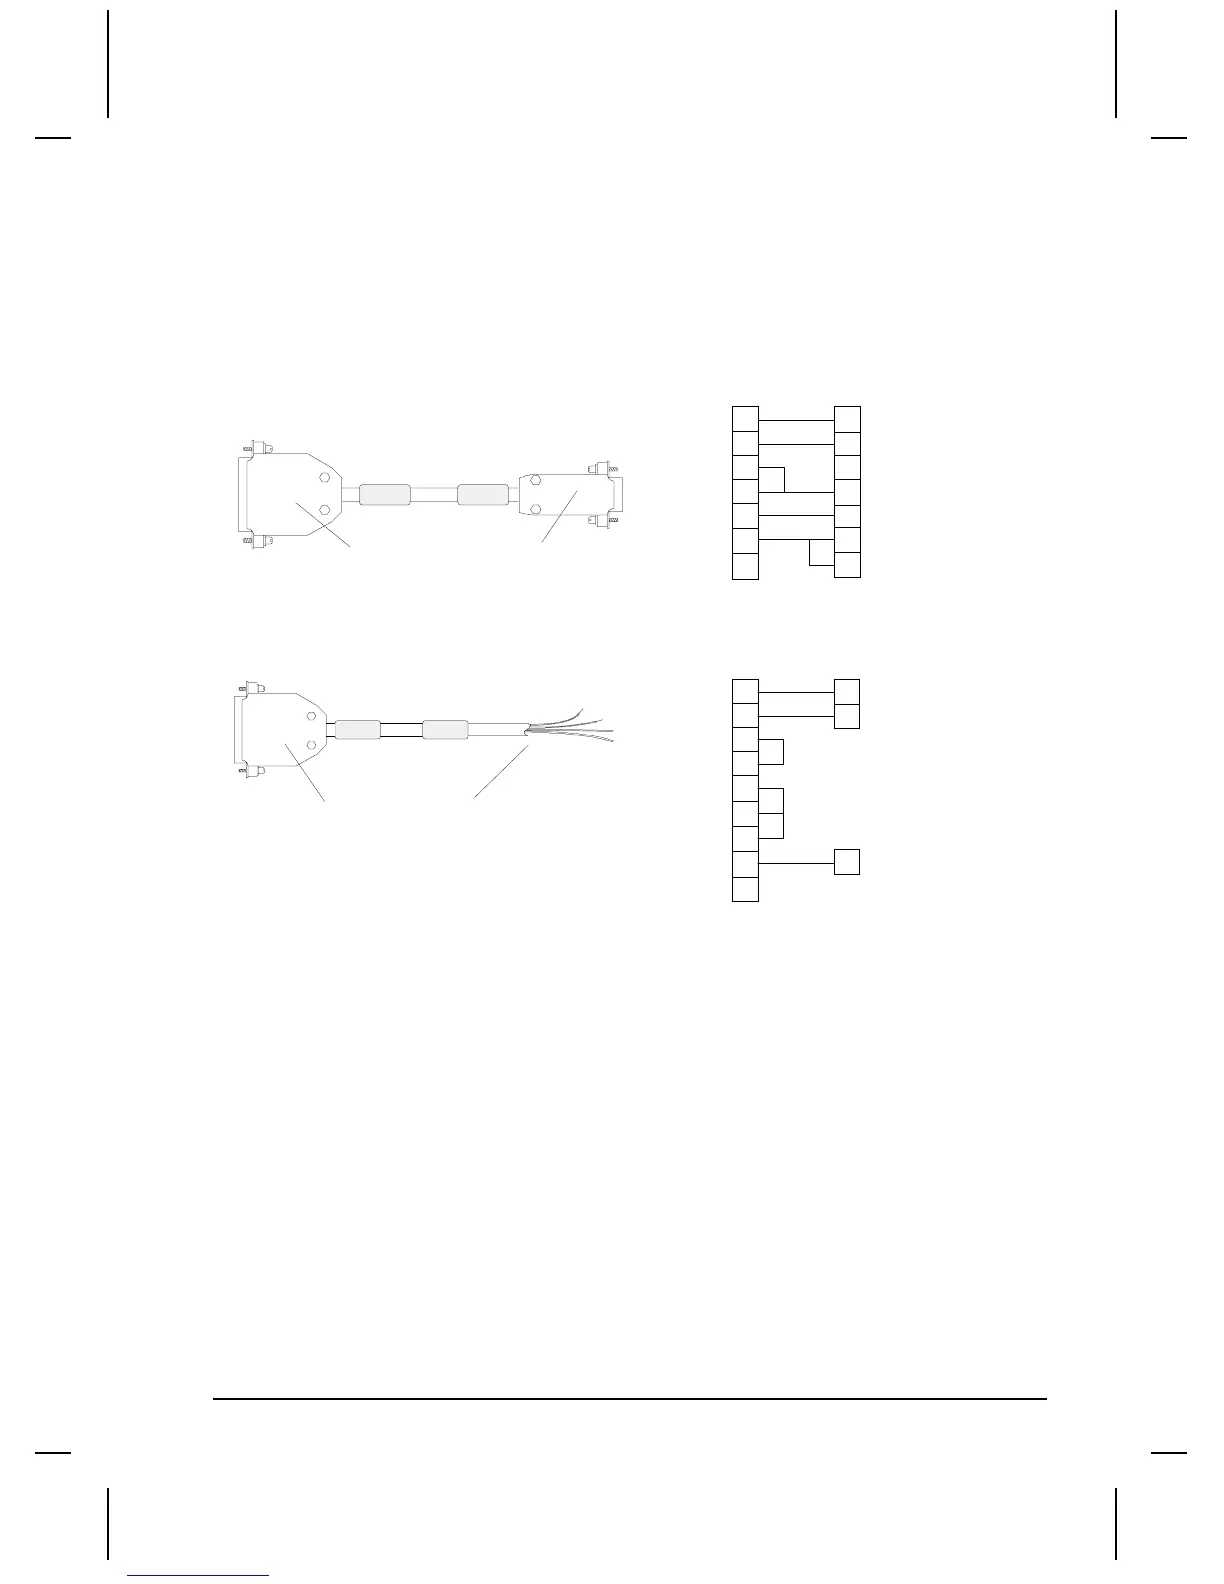
Hardware Connection
There are two methods used to connect a QuickPanel display to an intelligent controller or terminal.
Go to Project Setup and click the Port button. The choices for Handshake are None and Xon/off. Use
the Hardware Handshake cable with the None option when the Controller or PLC uses the hardware
handshaking lines to control the communications. Use the No Handshake cable with the None option
when the Controller or PLC does not do any hardware handshaking. Use the No Handshake cable if
your Controller or PLC uses software handshake. Both cables are shown below.
TO TCP DEVICE
TO PC PORT
SHIELD
2
3
8
5
7
2
3
5
4
8
6
25 PIN MALE
9 PIN FEMALE
HARDWARE HANDSHAKE
TO PLC PORT
TO TCP DEVICE
20
TX2
RX3
1
CD
CTS
GND
DTR
RX
TX
DTR
GND
DSR
CTS
TO CONTROLLER
TO TCP DEVICE
NO HANDSHAKING
25 PIN MALE
TO TCP DEVICE
TO CONTROLLER
SHIELD
2
3
4
5
6
20
TX2
RX3
1
RTS
CTS
DTR
RX
TX
GND
8
CD
7
GND
For this demo, the NO handshake cable was used to connect the display to a PC. A terminal emulation
program was used to display the command sequences received from the display. Function keys in the
terminal program were used to send sequences to the display. The communication setup for the
terminal program was setup to match the display settings. The terminal mode screen is shown below.
Note the Function keys are shown at the bottom of the screen.
Once the communication parameters are set correctly, the screen should show the command string
being sent by the display. This string is sent by the display because a Numeric Data Display is tied to
the variable RL2, which is assigned to a Poll. Each time RL2 appears in the Poll list, the sequence
associated with RL2 is executed. Remember that the sequence sends out a string and waits for a reply.
 Loading...