Chapter 2. Hardware Setup
143
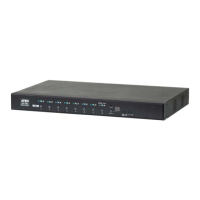
KE8950 / KE8952 LAN Installation
Setting up the units on a network allows point-to-point, point-to-multipoint,
and multipoint-to-multipoint computer to console operation by connecting
multiple KE8950 / KE8952 devices on the same TCP/IP LAN. Prior to the
setup, we recommend laying out the plans for your KE installation using our
performance guide (see Keys to Network Performance, page 433).
A few points to note during your setup:
The units are preconfigured with factory-default network settings. If you
install only one set of KE Series units, you do not need to change these
default network settings. See Default IP Addresses, page 154, for further
details.
In a network setup with multiple units, each Transmitter and Receiver
must be configured with a unique IP address. See Network Configuration,
page 153, for further details.
We recommend using 1000-Mbps Gigabit Ethernet switches (wire speeds,
non-blocking with 1 Gbps / 1.5 Mpps performance per port) between KE
Series devices installed on different LAN segments under a same office
network environment. 10/100 Mbps switches might cause poor
performance.
In multipoint configurations, the IGMP and flow control function of your
network switches/hubs must be enabled to avoid the deterioration of data
throughput. To ensure functionality use a layer 3 switch that supports
IGMP queries.
If your network uses cascaded switches, please check to ensure the data
throughput is sufficient.
To get the best performance, we suggest creating a private network for KE
devices, as they are bandwidth-intensive devices.
Make sure that all equipment is powered off.
Refer to the installation diagram on the following page, and do the following:
1. On the transmitter side, plug the mouse, keyboard, HDMI monitor,
microphone and speakers into the ports on the console section of the
KE8950T / KE8952T. Each port is marked with an appropriate icon to
indicate itself.
2. Connect the USB KVM cable provided to the KVM ports on the front of
the KE8950T / KE8952T.
 Loading...