1
On the Tab Selection screen of the Control Panel, press ◀ or ▶ to
select the Paper tab (
).
Note
• If the Tab Selection screen is not displayed, press the Menu button.
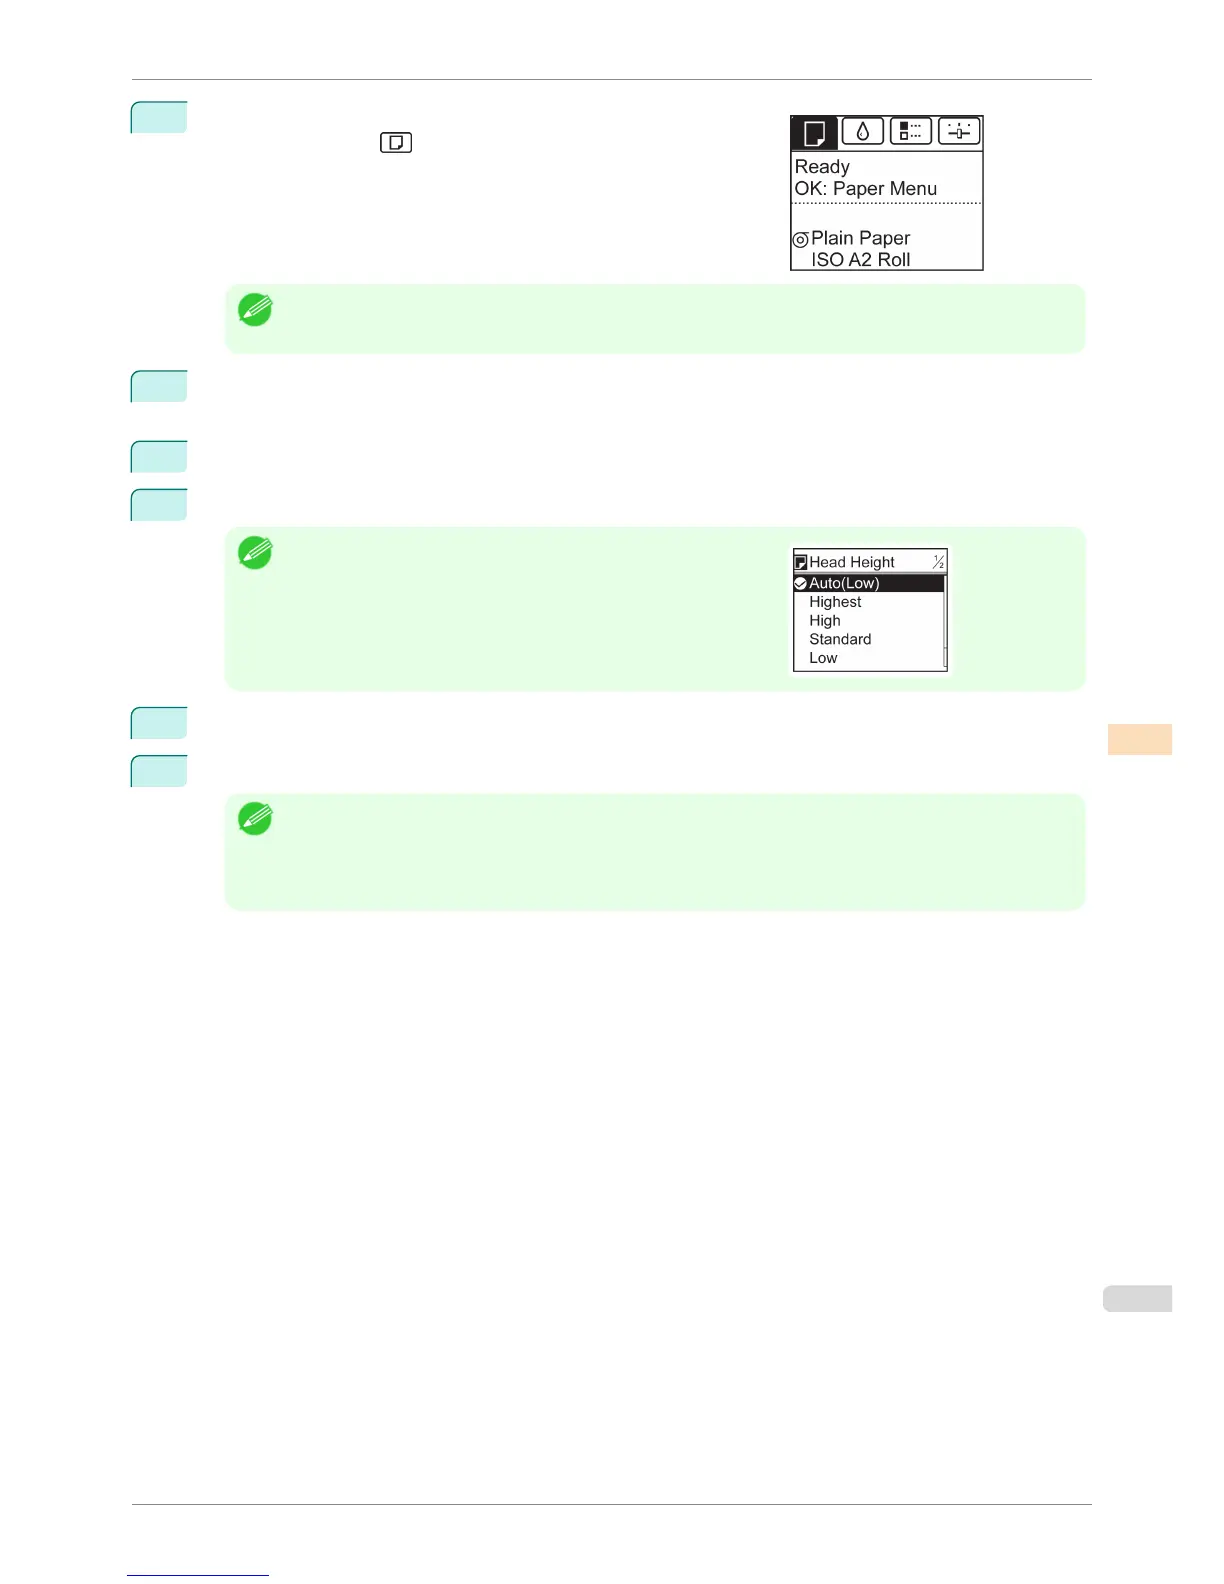
2
Press the OK button.
The Paper Menu is displayed.
3
Press ▲ or ▼ to select Paper Details, and then press the OK button.
4
Press ▲ or ▼ to select the type of paper, and then press the OK button.
Note
•
When Head Height is set to Automatic, the setting value selected
for the previous print job is displayed (to the right of Automatic )
once you select the type of paper currently supplied.
However, the value is cleared when the printer is turned off or the
paper is replaced.
5
Press ▲ or ▼ to select Head Height, and then press the OK button.
6
Press ▲ or ▼ to select the desired setting value, and then press the OK button.
Note
• Using Automatic will ensure that the printer adjusts the Printhead height to the optimal level before printing,
accounting for the ambient temperature and humidity. When a setting other than Automatic is used, that value
will always be applied.
• Depending on the type of paper, some setting values may not be available.
iPF8400S
Troubleshooting Paper Abrasion and Blurry Images
User's Guide
Adjustments for Better Print Quality Adjusting the Printhead
717