Step 2: TDR9000
™
Connections
1-6 72A-1898 Rev. A 11/01
Monday, November 26, 2001 1:09 pm
Step 2: TDR9000
™
Connections
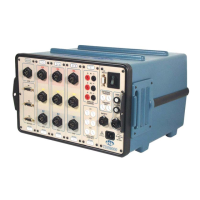
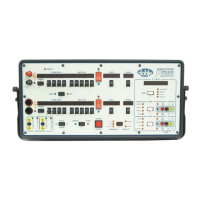
Figure 1.2, Figure 1.3 and Figure 1.4 on page 1-8 show the TDR9000
Physical Front Panel wirings for an EHV, OCB/Motion and Event Trigger
test, respectively.
N
OTE
For First Trip/Close tests complete steps 1 through 4 and then proceed
to ”First Trip/Close Tests” on page 4-1.
To connect the TDR9000:
1. Remove the front protective cover and store it in a safe place for
reuse.
If the printer option is available, locate the cover/printer assembly
near the laptop.
2. Plug the ground cable into the system ground receptacle and ground
the other end.
3. Plug the Safety Switch cable into the SAFETY receptacle of the System
module. The Safety Bypass flag is used for First Trip/Close tests.
4. Ensure that the line voltage is correct (100 - 240 VAC, 50 or
60 cycles).
5. Connect the female end of the Motion Transducer cable to one of the
MOTION connectors on the TDR9000 OCB/Motion module, if
present.
6. Connect the male end of the Motion Transducer cable to the
transducer.
7. Connect the Breaker Control cable to the TRIP/CLOSE connector on
the TDR9000 System module.
8. Connect either:
• An OCB Contact Monitor cable to the OCB connector on the
TDR9000 OCB/Motion module.
or
• The EHV Contact Monitor cables to the EHV connectors on the
TDR9000 EHV modules.
Refer to ”Connecting the TDR9000™ Physical Front Panel”
on page 4-30.