114
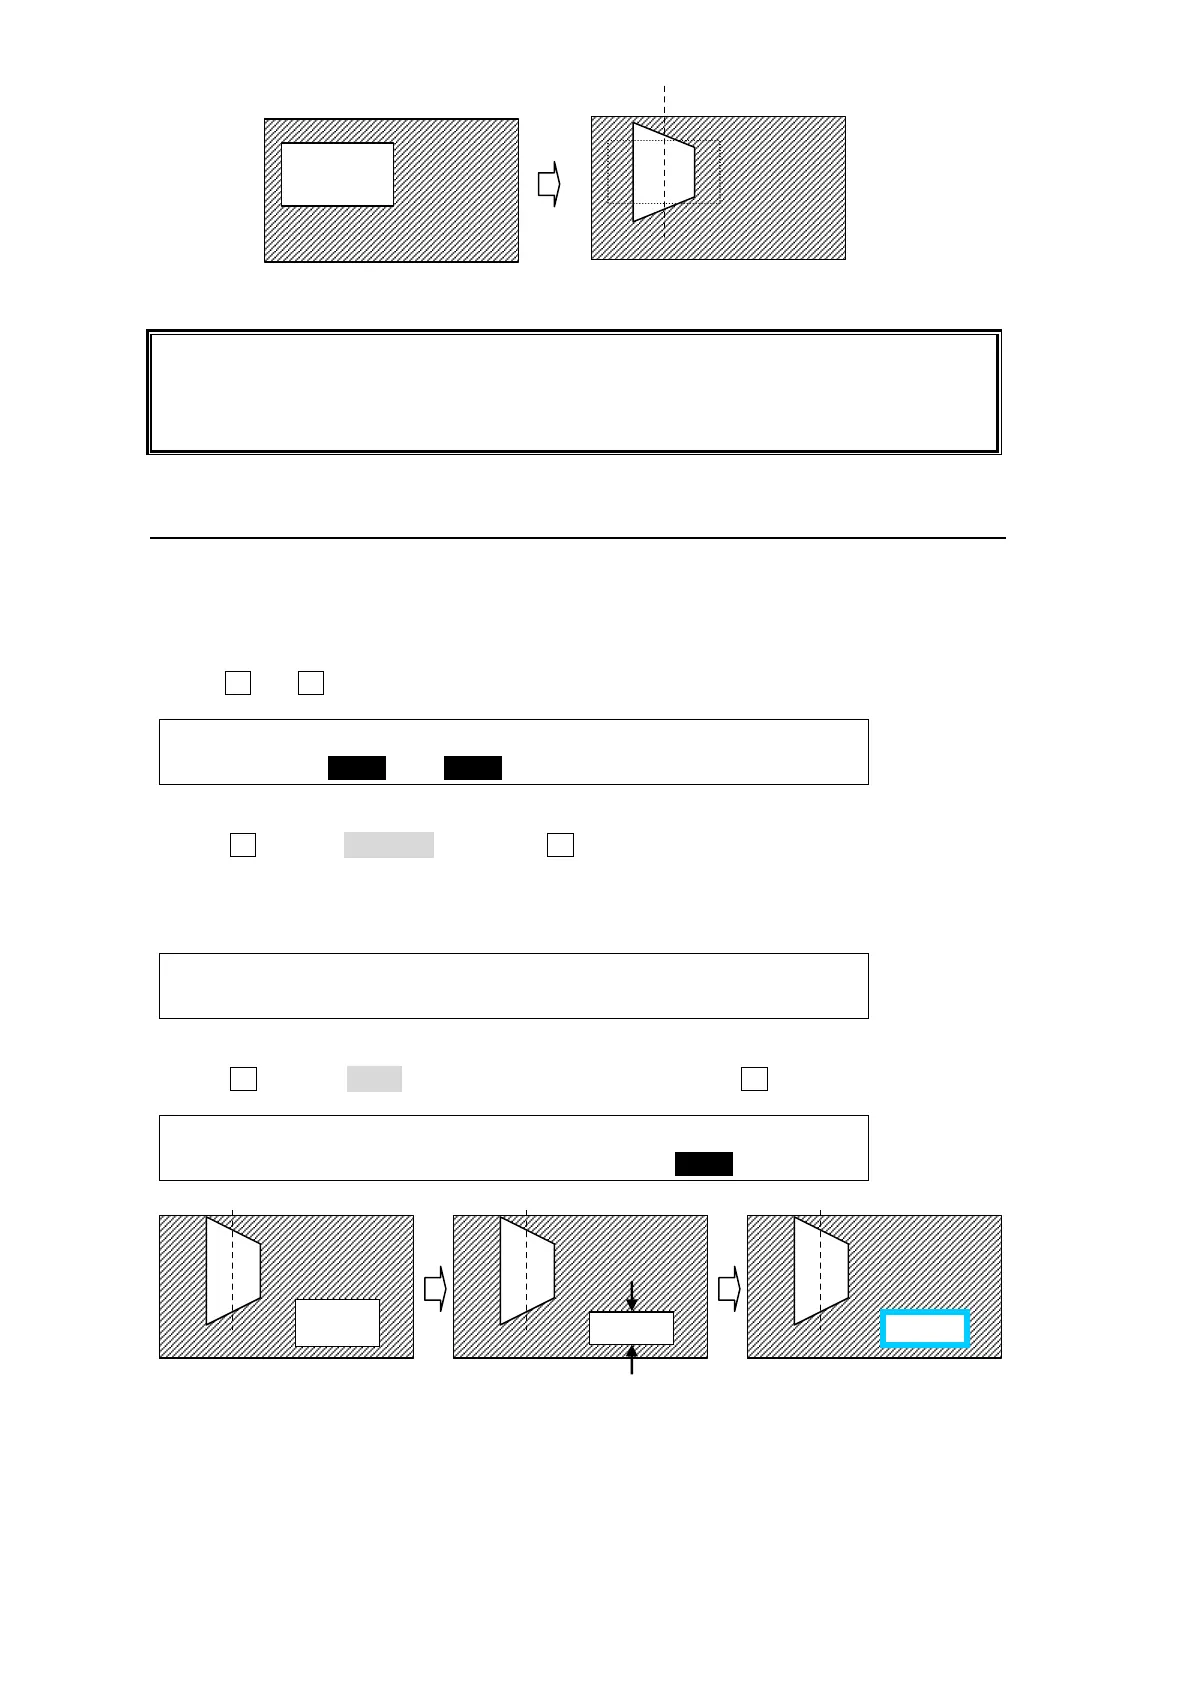
The center of rotation is placed on the center of the PinP image at the factory default
setting. (CENTER POSITION is set to (0, 0, 0))
The joystick is useful for rotation setting. See section 4-2-4. "Changing Settings or Values
Using the Joystick" for how to use the joystick.
15-2-5. Crop and Border
Using the procedure just used for PiP1, Insert PinP2 to the PGM image, move PinP2 to a
desired position and change PinP2 size. The example below shows how to crop PinP and
add a border.
(1) Open the [PinP2-POS/SIZE-CROP] (5/5) menu, referring to section 15-2-3.
(2) Use F1 and F2 to crop PinP2 on the top and bottom.
PinP2 : TOP :BOTTOM : LEFT : RIGHT : 5/5
CROP : =30.0 : =20.0 : =0.0 : =0.0 :
(3) Press the page down button to return to the [PinP2 - SETUP] menu.
(4) Turn F1 to select BORDER, then press F1 or the page down button to display the [PinP2-
BORDER] menu.
(5) To use an inside border, set INSIDE X and Y to specify the border width.
To use an outside border, set OUTSIDE X and Y to specify the border width.
PinP2 : INSIDE : OUTSIDE : 1/3
BORDER :X=0 Y=0 :X=0 Y=0 :
(6) Press the page down button to go to PAGE 3.
(7) Turn F4 to select BLUE for the border color, and then press F4 to confirm the setting.
PinP2 : BORDER COLOR :RECALL : 3/3
BDR COL :S=66.3 L=5.4 H=3.5 : >BLUE :
PinP1
Rotation Effect added
PinP1
PinP1 PinP1 PinP1
Border added
PinP2
Cropped on the top and bottom
PinP2PinP2
Rotation effect added


 To Next Page