GE HEALTHCARE
DIRECTION 5394141, REVISION 5 LOGIQ™ P5 SEVICE MANUAL
4-26 Section 4-5 - Peripheral Checks
Section 4-5
Peripheral Checks
Check that peripherals work as described below:
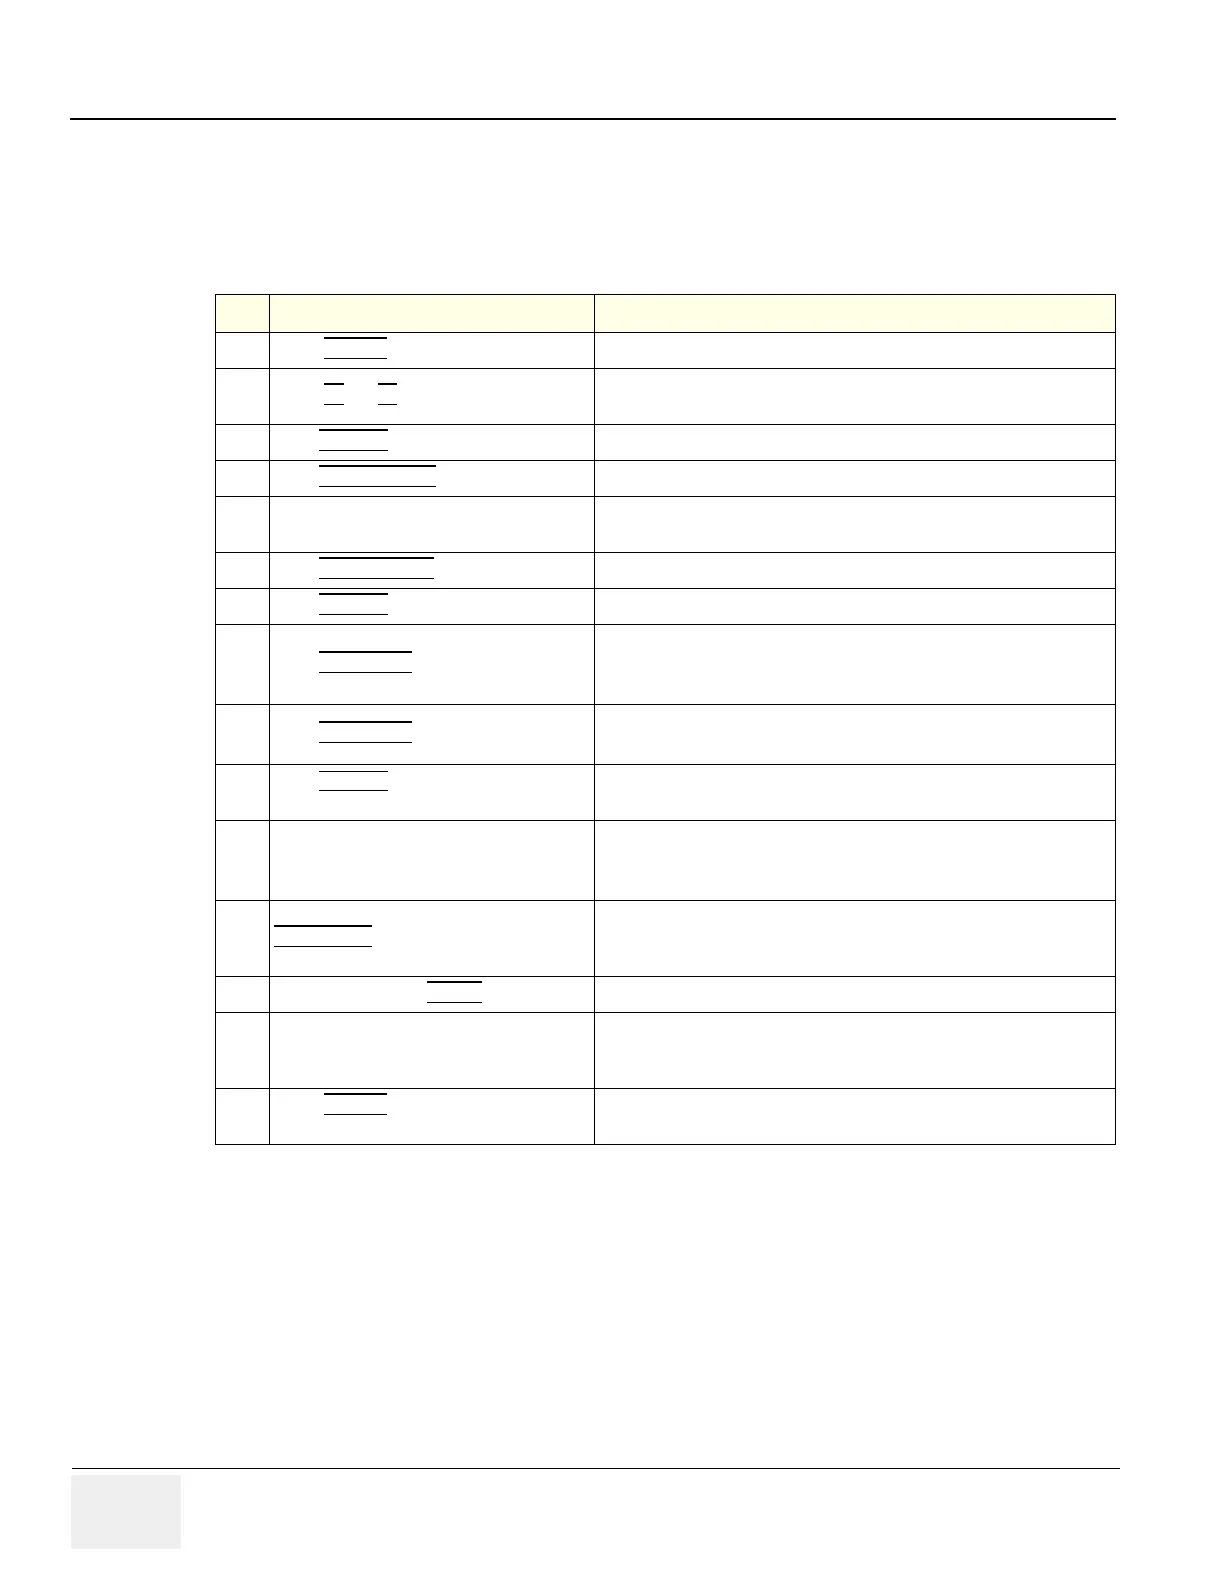
Table 4-7 Peripheral Checks
Step Task to do Expected Result(s)
1.
Press (FREEZE
) Stop image acquisition.
2.
Press (P1) or (P2) on the Keyboard
The image displayed on the screen is printed on B&W or Color printer,
depending on the key assignment configuration
3.
Press RECORD
on the Keyboard. To start the video counter at a different point:
4.
Press UPDATE MENU
in the Trackball area. The Video Set Counter / Search Dialog window is displayed
5.
Use the alphanumeric keyboard to enter
the counter number in the counter field.
Number appears
6.
Press SET COUNTER
to save the change. Number is saved
7.
Press RECORD
on the KEYBOARD to return to the scanning mode
8.
Press REC/PAUSE
icon on the screen
to Start Recording
A red dot is displayed in the VCR status area on the Title bar to indicate
that recording has begun
9.
Press REC/PAUSE
icon on the screen.
To Stop recording
The video status icon is changed to (Pause)
10.
Press RECORD
on the KEYBOARD and the
assignable play
To start, Play back an examination
11.
Use the Assignable keys on the Control
Panel
to perform actions on the recorded session, such as stop, pause, rewind
or fast forward.
The video status icon in updated accordingly.
12.
While in playback mode, use the
TRACKBALL
to adjust the video playback
speed and scroll through the record.
To search on the tape
13.
Press the assignable PAUSE
to stop the tape at the desired frame.
14.
When playing back an examination
part of it can be stored on the computer’s memory as a cineloop.The
cineloop enables the user to perform further operations on the stored
section (see for further information on cineloop operation).
15.
Press (FREEZE
) while playing back a
recorded session.
To store a recorded sequence as a cineloop. The last few seconds are
stored as a cineloop.

 Loading...


