EasyManuals Logo

GE LOGIQ P5 Service Manual

GE LOGIQ P5
532 pages
To Next Page IconTo Next Page
To Previous Page IconTo Previous Page
Page #193 background imageLoading...
Page #193 background image
GE HEALTHCARE
DIRECTION 5394141, REVISION 5 LOGIQ™ P5 SEVICE MANUAL
Section 5-11 - RFS (Service For Request) 5-53
5-11-2 System Checkout Procedure (cont’d)
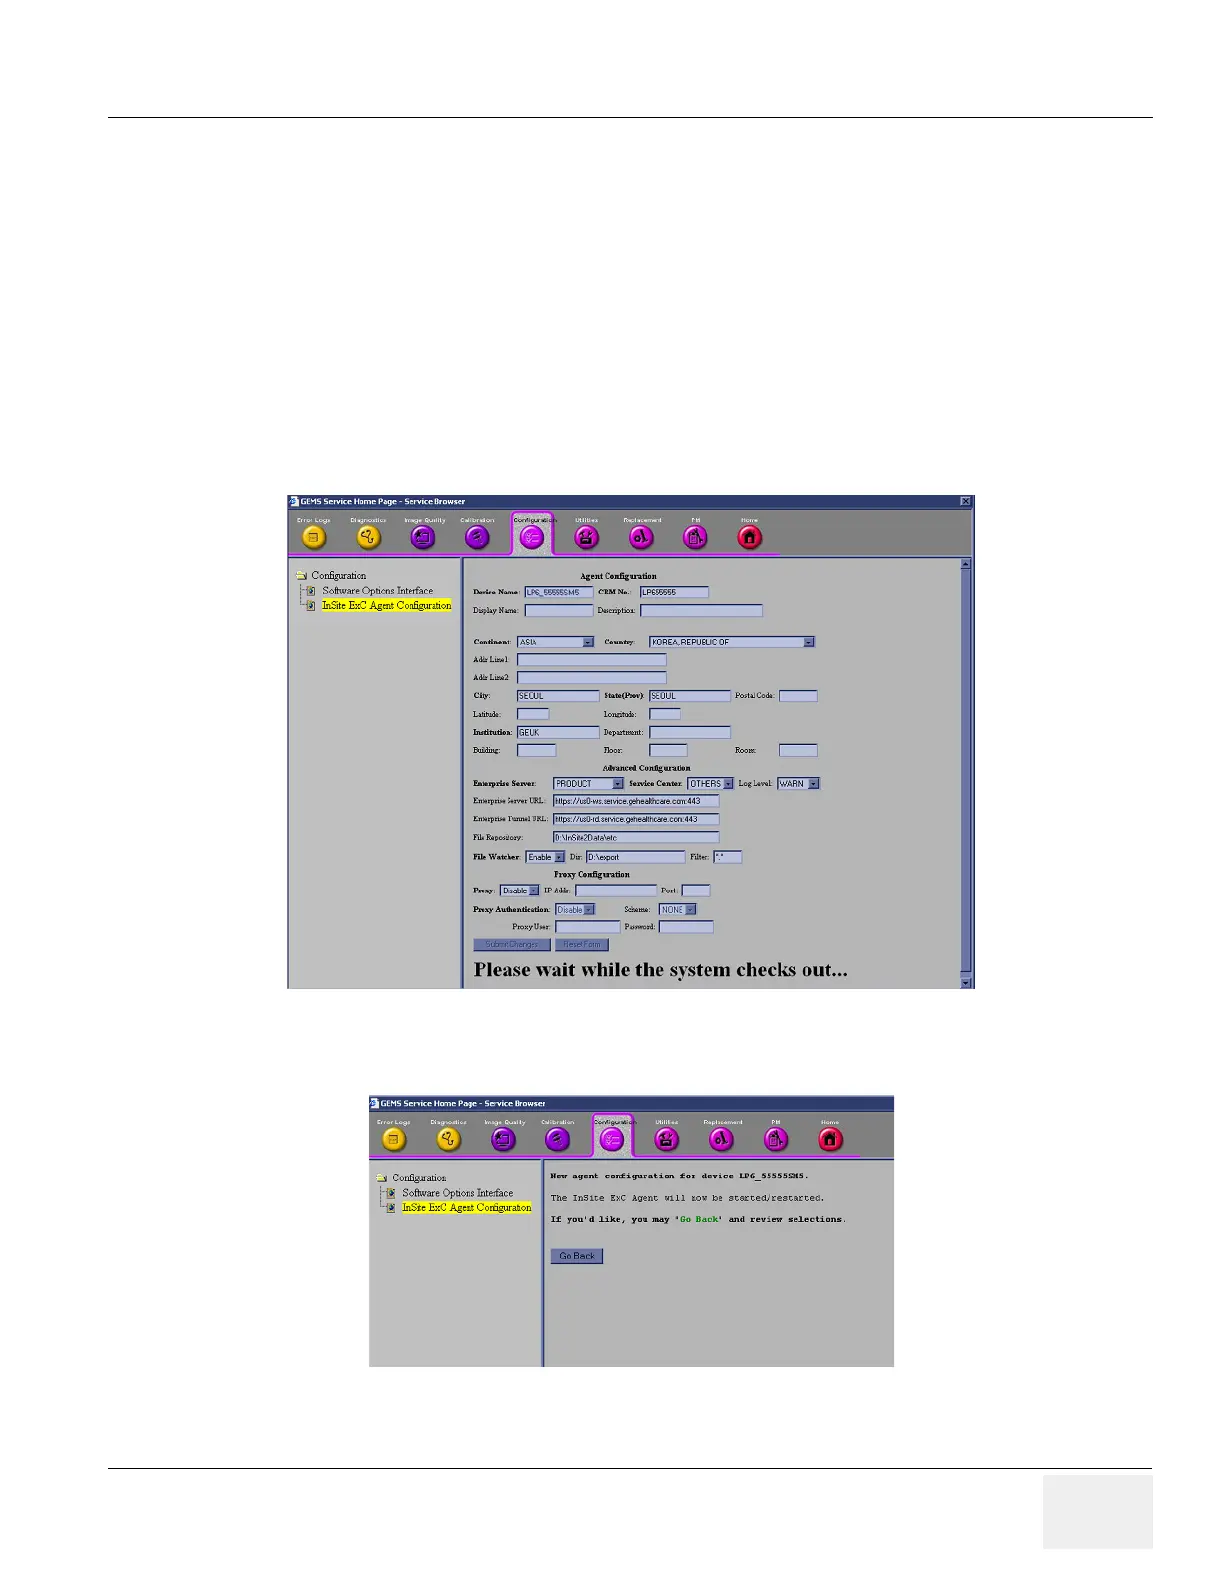
All bold fields should be filled
7.) Device Name and CRM No are pre-populated and can not be changed.
8.) Verify that “Send” button is enabled.
9.) Select Continent and Country
10.)Put City, State, and Institution
11.)Select “Product” for the Enterprise.
12.)If Proxy needs to be configured, select “Enable” for the Proxy filed and input IP address and Port
number.
13.)Press “Submit Changes”. “Please Wait” message is displayed while the system is checking out.
Figure 5-53
14.)Wait until following screen displays. (Figure 5-54)
15.)Configuration is complete.
16.)Close the Service Platform.
Figure 5-53 Please Wait
Figure 5-54 Configuration done

Table of Contents

Other manuals for GE LOGIQ P5

Questions and Answers:

Question and Answer IconNeed help?

Do you have a question about the GE LOGIQ P5 and is the answer not in the manual?

GE LOGIQ P5 Specifications

General IconGeneral
Power Supply100-240VAC, 50/60Hz
Display15" LCD
Doppler ModesColor Doppler, Power Doppler
Imaging ModesB-Mode, M-Mode
ProbesConvex, Linear, Phased Array
ApplicationsAbdominal, Vascular, Cardiac, OB/GYN, Small Parts, Musculoskeletal
ConnectivityDICOM, USB, Ethernet
Probe Connectors3
PortabilityMobile
Operating Temperature10°C to 40°C
Relative Humidity30%

Related product manuals