GE HEALTHCARE
DIRECTION 5394141, REVISION 5 LOGIQ™ P5 SEVICE MANUAL
8-148 Section 8-4 - Software Installation
8-4-4-2 Setting Computer Name
1.) Click on Utility, then select Connectivity.
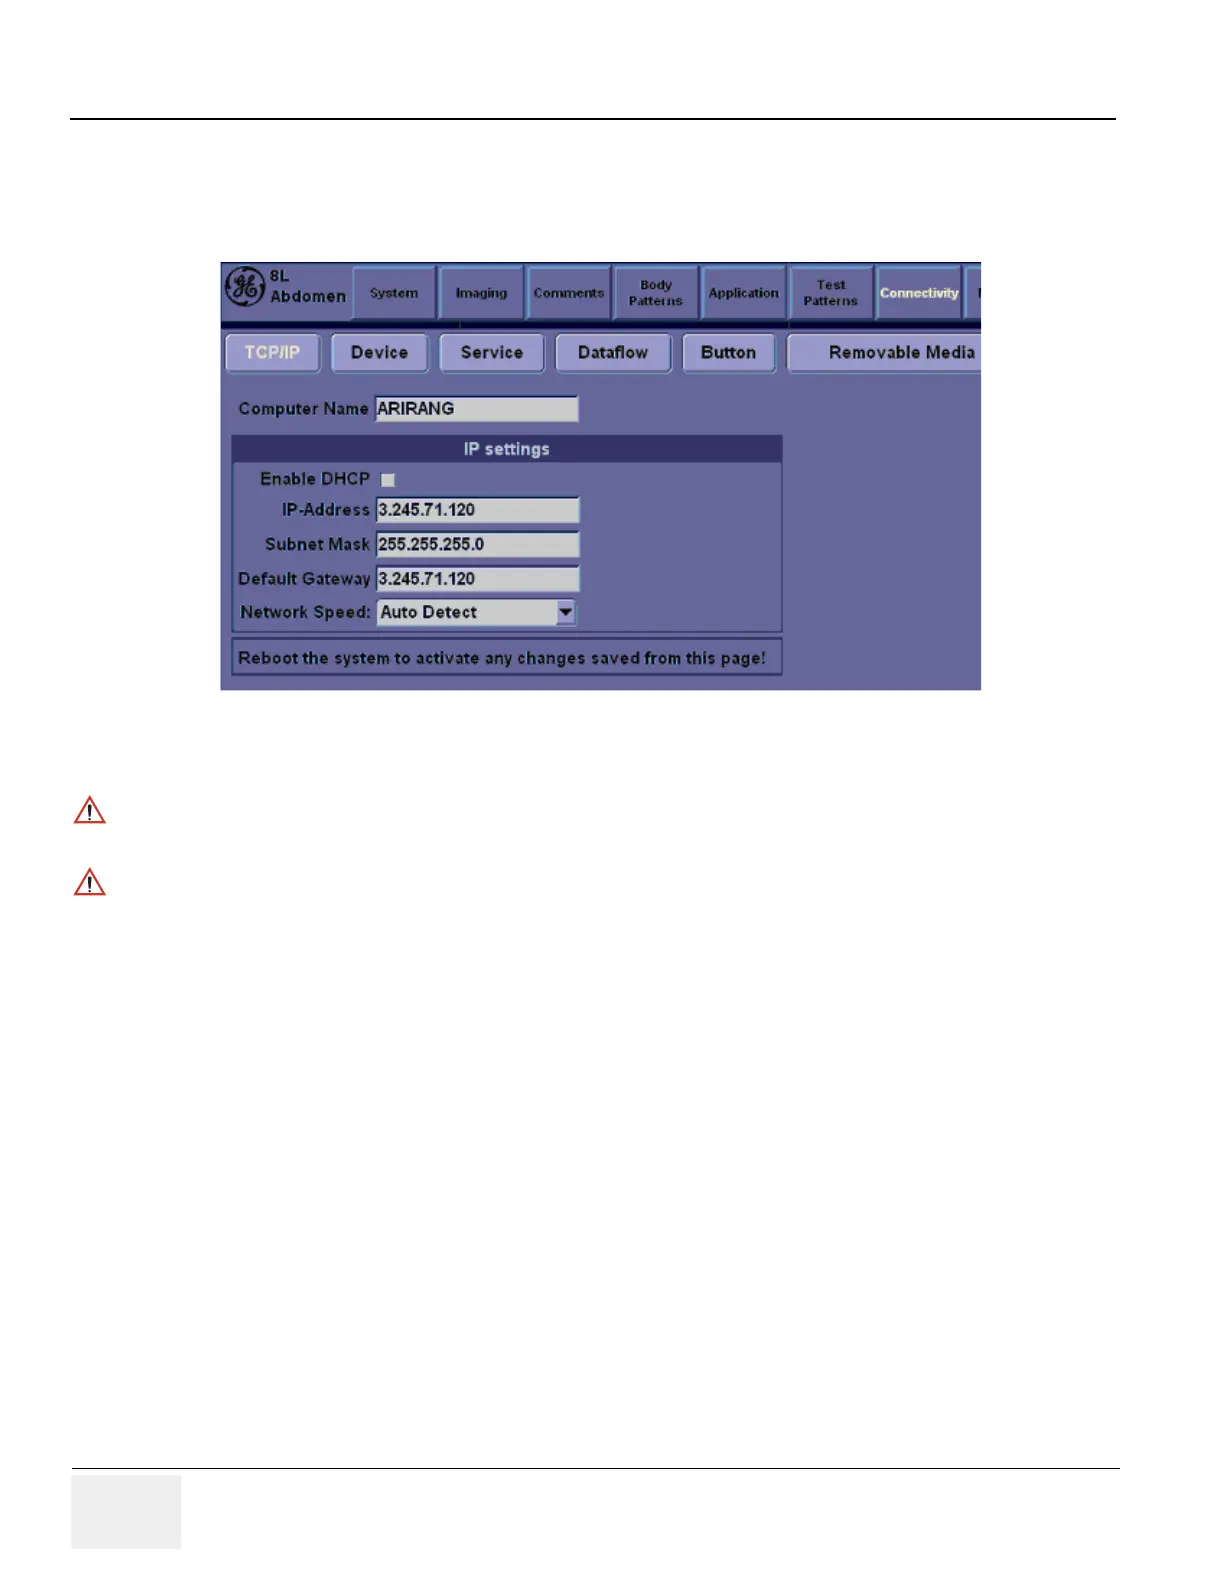
2.) Click on TCP/IP tab.
3.) Type
Computer Name
4.) Verify that Enable DHCP has no check mark. If checked, remove the mark.
NOTE: If Enable DHCP mark is checked, the system cannot checkout by VOLC.
5.) Check if Computer Name, IP Address, Subnet Mask, and Default Gateway are proper ones
which you wrote down in section 8-3-5-1Saving Connectivity.
NOTE: If the “Save” is NOT performed, you can NOT enter Patient screen and NOT perform
Export/Import
6.) Click on Save button
7.) Click OK for confirmation dialog box
8.) The system will power OFF automatically.
9.) Turn on the system for functional checks
Figure 8-203 TCPIP tab
The Computer name is unique. Check the scanner serial number printed on the label located at the
rear lower side of the scanner. For example, when 12345SU1 is printed, P5-12345SU1 must be
entered as a computer name.
If Enable DHCP checkbox is checked and LAN cable is disconnected from the system, the system
bootup time might slow down.

 Loading...


