98
Setting the Cable Length (Cable Length Correction)
5.1
Setting the Cable Length (Cable Length Correc-
tion)
With high frequency measurement, the inuence of the cable results in large measurement errors.
Setting the cable length enables you to reduce the measurement errors. Use a coaxial cable with
50
Ω
impedance.
Before performing correction, be sure to set the cable length.
Screen display method (For more information, see p. 27):
(Measurement screen) ADJ key>(ADJ screen) CABLE key
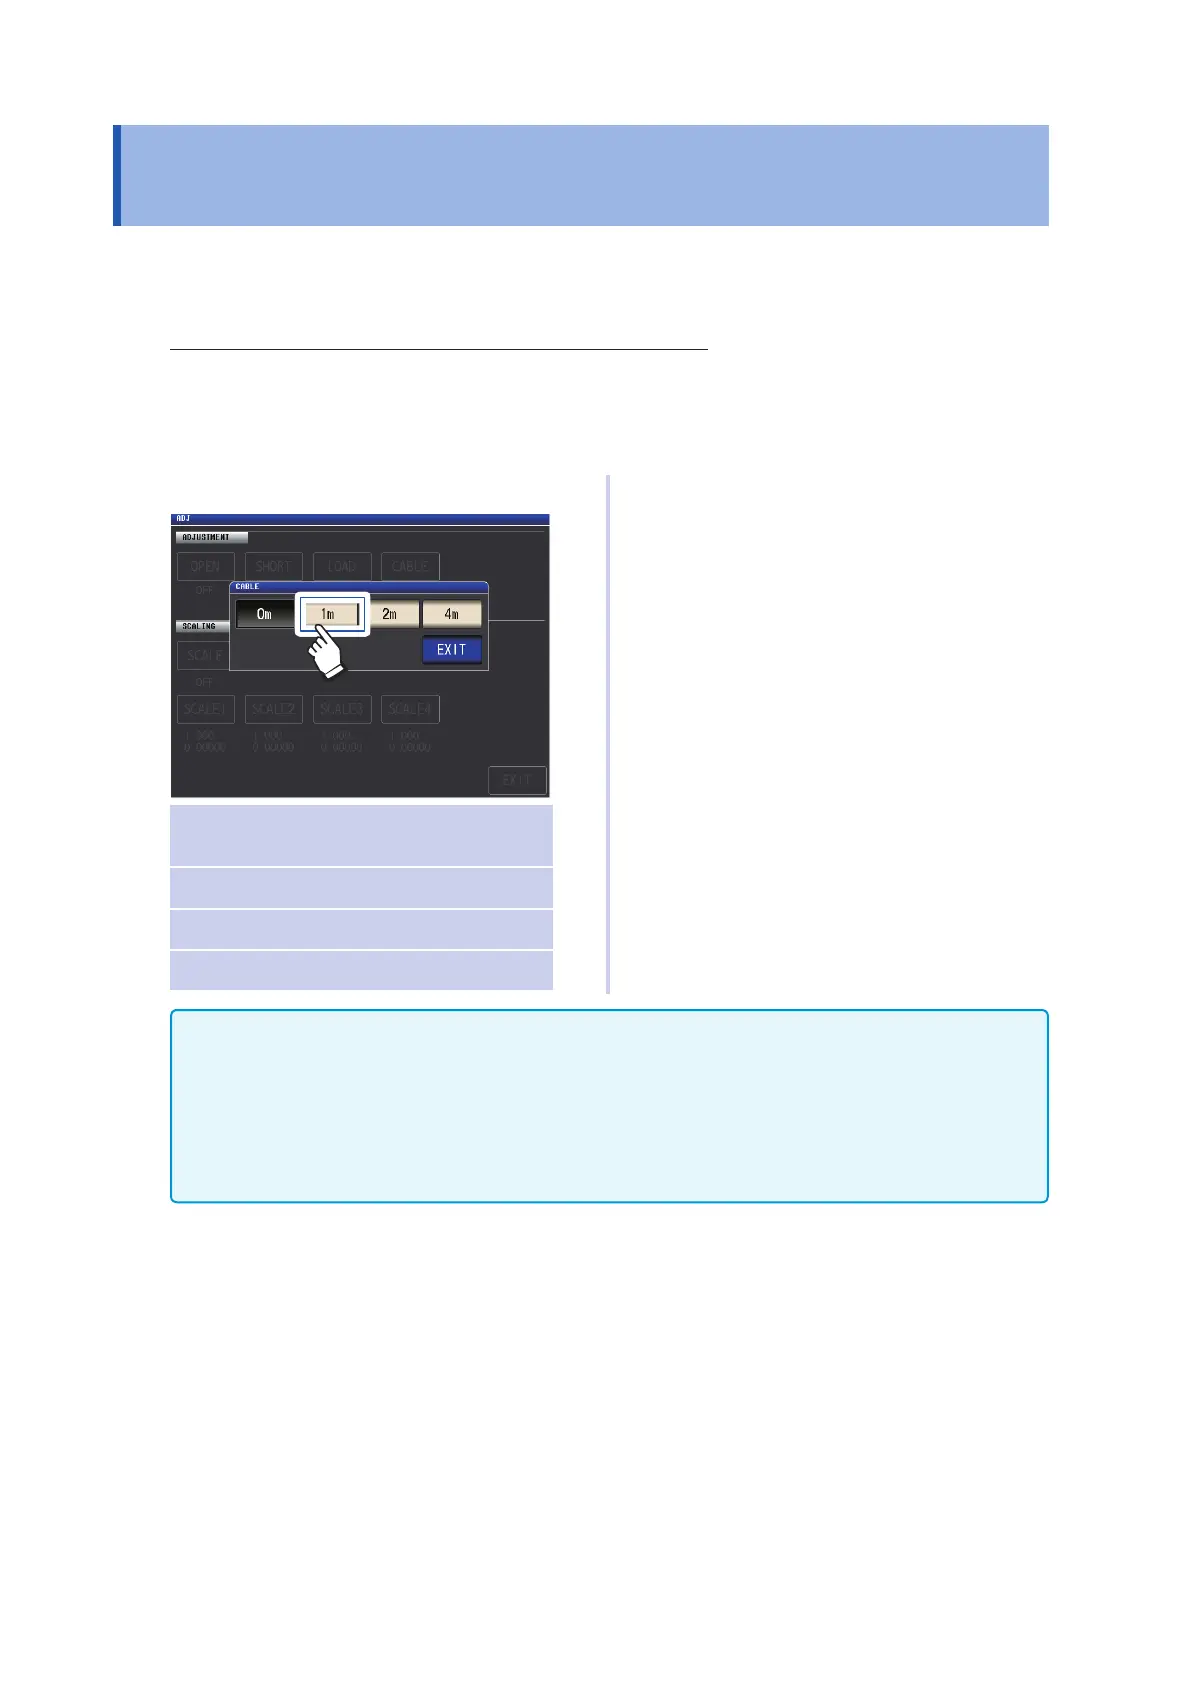
1
Select the cable length to be used.
0 m Select this when using a direct-coupled
xture or the like.
1 m
Select this when the cable length is 1 m
.
2 m Select this when the cable length is 2 m.
4 m Select this when the cable length is 4 m.
2
Touch the EXIT key twice.
Displays the measurement screen.
• If the cable length changes, repeat open, short, and load correction.
• The guaranteed accuracy range varies with the cable length. (See"E: Coefcient of the measurement
cable's length" (p. 215).)
• When manufacturing your own cables, make sure that the cable length matches the length set with the
instrument. (See "Points to pay attention to when making your own probe" (p. 35).)
• When using the L2000, 9140-10, 9500-10, L2001, and 9261-10, set cable length compensation to 1 m.
• Available range settings vary with the cable length setting. For more information, see p. 211 of "10.6
Measurement Range and Accuracy".