113
Load Correction (Correcting Values to Match Reference Values)
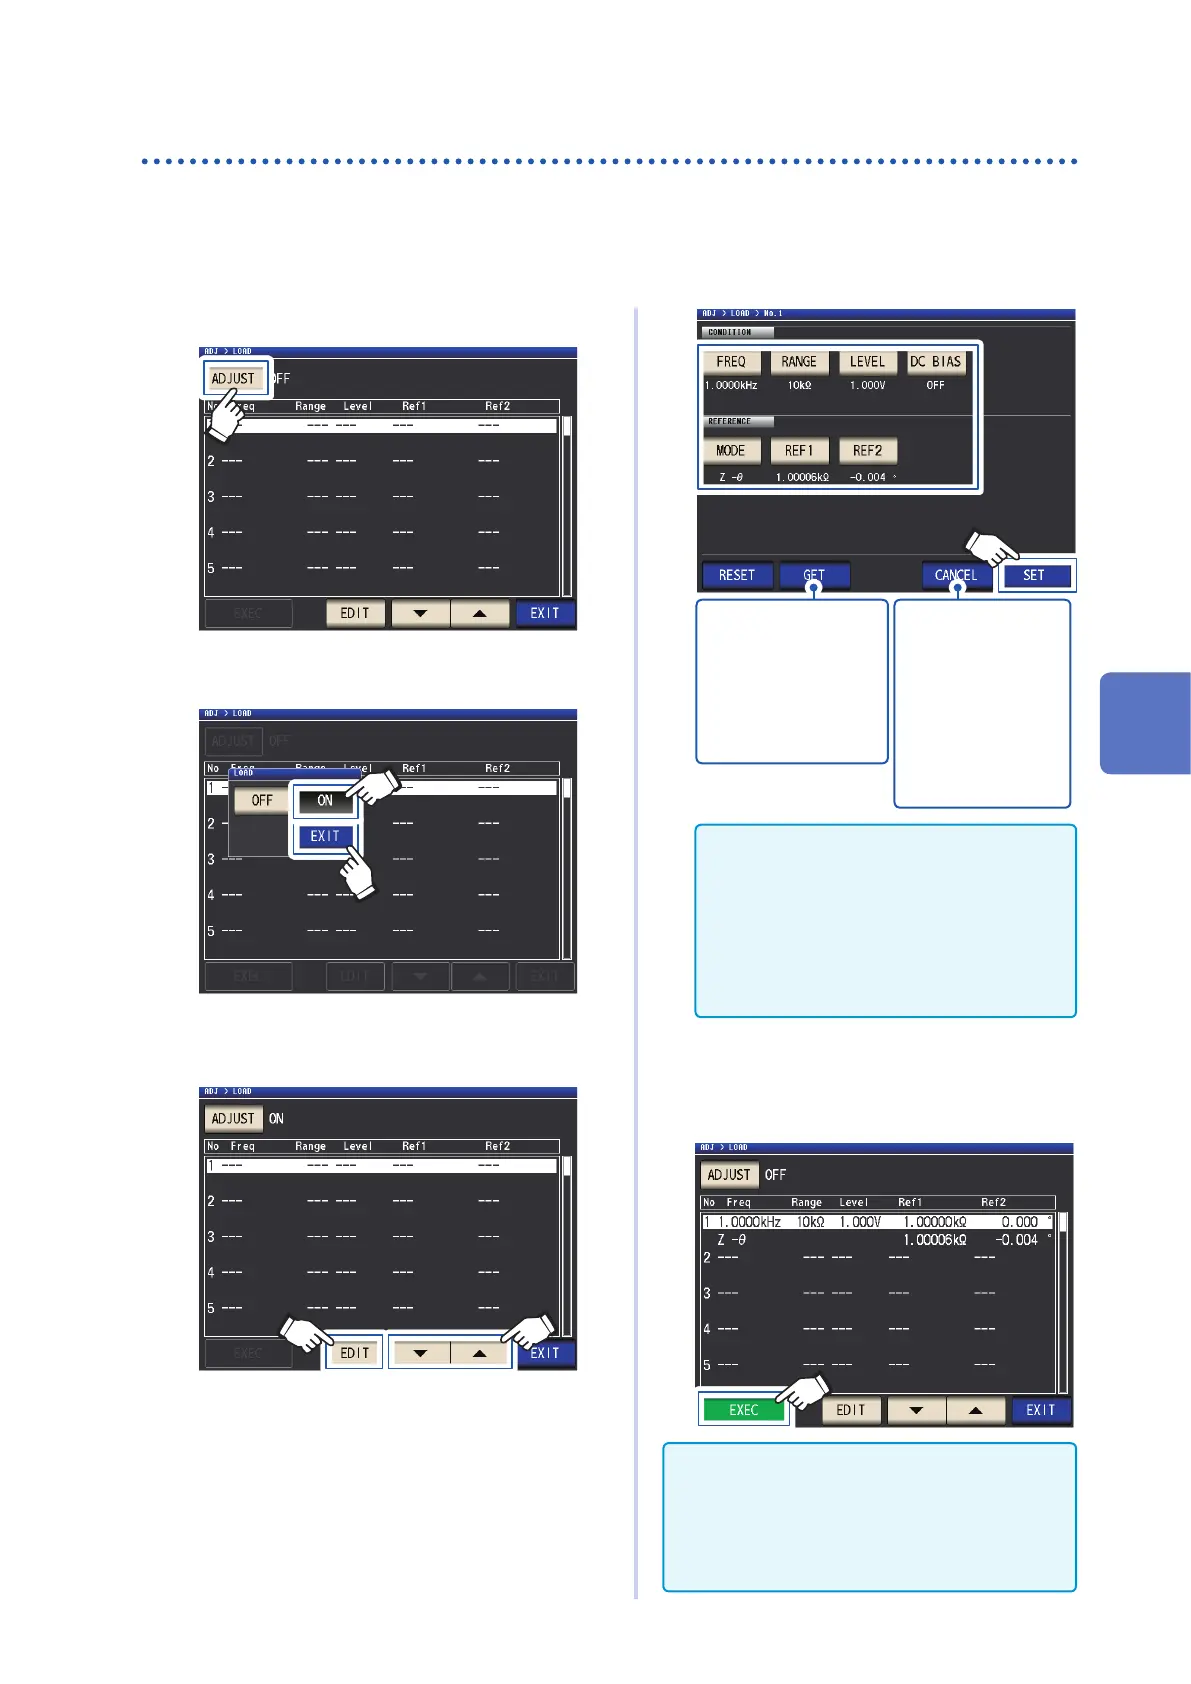
Procedures for the load correction
Once you have set the measurement cable length, use the following procedure to congure the
load correction conditions and perform correction.
(See "5.1 Setting the Cable Length (Cable Length Correction)" (p. 98).)
Screen display method (For more information, see p. 27):
(Measurement screen) ADJ key>(ADJ screen) LOAD key
1
Touch the ADJUST key.
2
Touch the ON key, and then touch the
EXIT key.
2
1
3
Select the correction point to congure
with the keys and then touch the
EDIT key.
2
1
4
Set the correction conditions in the fol-
lowing order and then touch the SET key:
1. FREQ(p. 115)
2. RANGE(p. 115)
3. LEVEL
(p. 116)
4. DC BIAS: (p. 117)
5. MODE: (p. 117)
6. REF1, REF2: (p. 118)
Allows you to set the
current measurement
conditions as the load
correction conditions.
(After touching the GET
key, touch the SET key
to accept the settings.)
Touch to cancel con-
guration of the cor-
rection conditions.
(The display will
return to the screen
shown in step 3, and
the correction con-
ditions will remain
unchanged.)
• You cannot skip ahead in the order of settings.
• Correction cannot be performed if all set-
tings have not been congured.
• When you acquire measurement conditions
with the GET key, the parameters used as
reference values (p. 118) will be initialized
to Z -
θ
, and the reference values (REF1
and REF2) will be cleared.
5
Connect the reference sample to the
measurement cable.
6
Touch the EXEC key, the correction val-
ues are acquired.
• A beep will sound if an error occurs while
acquiring correction values. In this case, the
correction values will be invalid (p. 119).
• After acquiring correction values, the acquired
values will become invalid if any correction con-
dition is changed.
5
Error Correction