107
Short Correction
Spot correction
Acquire the correction values at the set measurement frequencies. Measurement frequencies can
be set for up to ve points.
Screen display method (For more information, see p. 27):
(Measurement screen) ADJ key>(ADJ screen) SHORT key
1
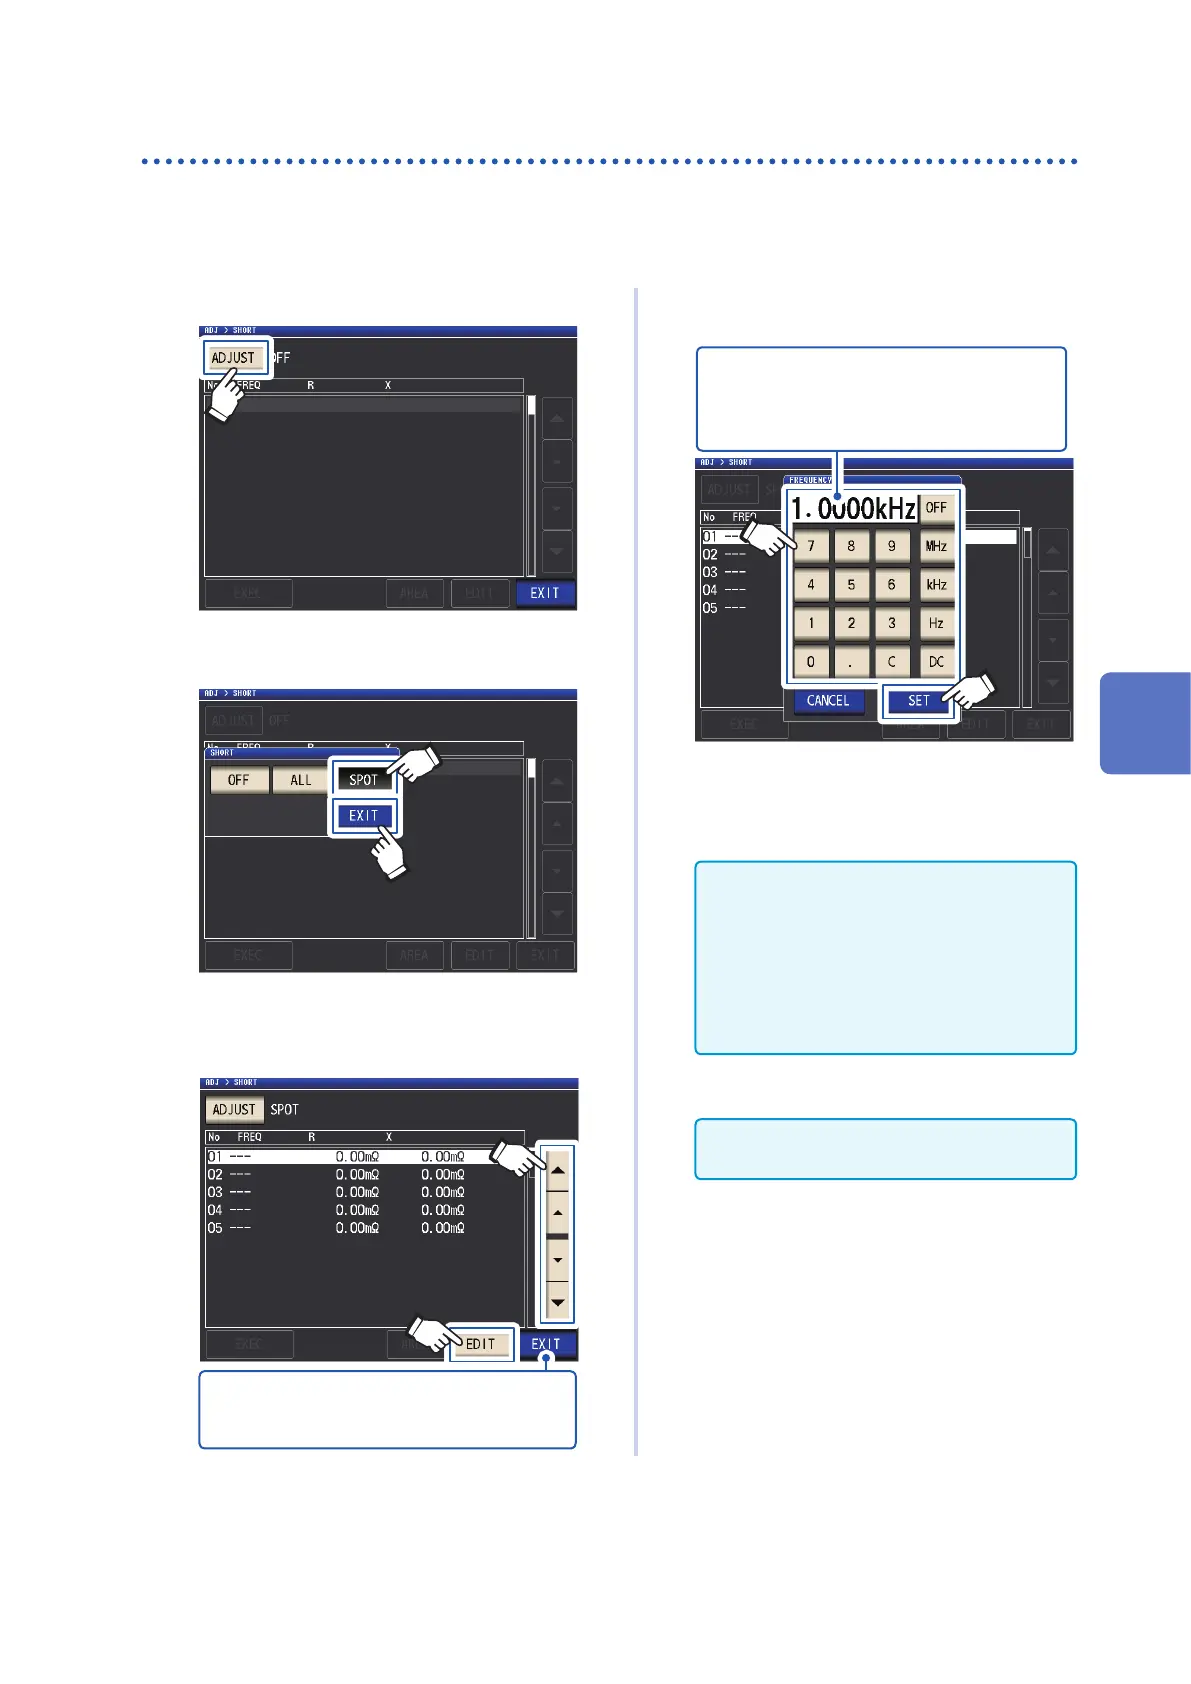
Touch the ADJUST key.
2
Touch the SPOT key, and then touch the
EXIT key.
1
2
3
Select the correction point you want to
set or edit with the key, and touch
the EDIT key.
2
1
Touch when you wish to cancel correction.
(The instrument will return to the screen shown
in step 2)
4
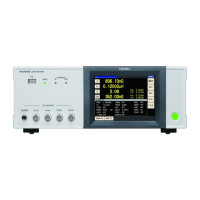
Enter a frequency for correction, and
touch the SET key to conrm it.
1
2
Until one of these keys is pressed for input
of a numerical value, the previous frequency
for which Spot correction was performed is
displayed.
• Settable range: DC, 4 Hz to 8 MHz
*
*: The maximum frequency varies with the
cable length (p. 215).
• Touch the C key to cancel input.
• If you attempt to set a measurement fre-
quency greater than the maximum fre-
quency for each cable length setting, it will
automatically be reduced to the maximum
frequency for each cable length setting.
• If you attempt to set a measurement fre-
quency lower than 4 Hz, it will automatically
be increased to 4 Hz.
The correction values from last time are dis-
played in a conrmation screen.
Check that the measurement cable is in an
short circuit state.
5
Error Correction