Installation
3/07 UDC3500 Universal Digital Controller Product Manual 21
Mounting Method
Before mounting the controller, refer to the nameplate on the outside of the case and
make a note of the model number. It will help later when selecting the proper wiring
configuration.
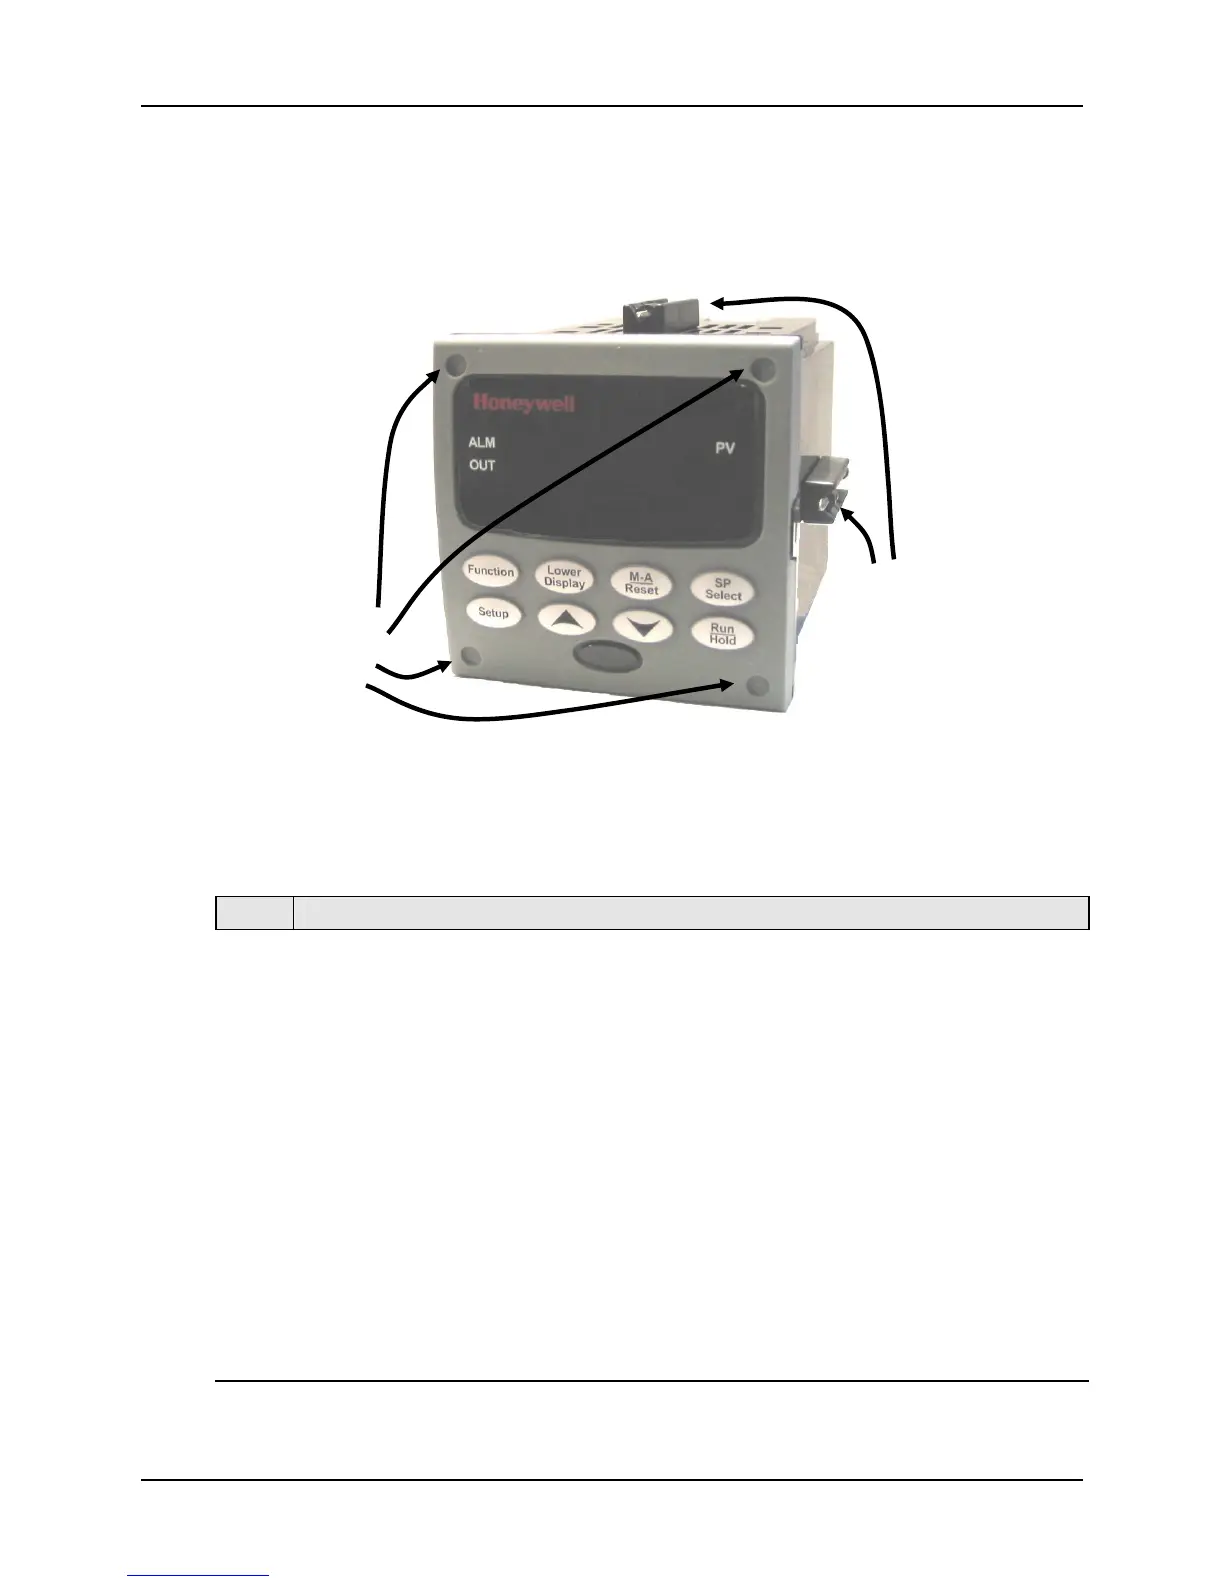
Figure 2-3 Mounting Methods
Mounting Procedure
Table 2-4 Mounting Procedure
Step Action
1
Mark and cut out the controller hole in the panel according to the dimension
information in Figure 2-2.
2
Orient the case properly and slide it through the panel hole from the front.
3
Remove the mounting kit from the shipping container and install the kit as follows:
• For normal installation (NEMA 3/IP55) two mounting clips are required. Insert
the prongs of the clips into the two holes in the top and bottom center of the case
• For water-protected installation (NEMA 4/IP66) four mounting clips are
required. There are two options of where to install the mounting clips:
1) Insert the prongs of the clips into the two holes on the left and right side of the
top and bottom of the case or
2) on the center on each of the four sides.
• Tighten screws to 2 lb-inch (22 N•cm) to secure the case against the panel.
CAUTION: Over tightening will cause distortion and the unit may not seal properly.
4
For water-protected installation (NEMA 4/IP66), install four screws with washers into
the four recessed areas in the corners of the front bezel (
Figure 2-3). Push the point of
the screw through the center piercing the elastomeric material and then tighten screws
to 5 lb-in (56 N•cm).
Attach screws and
washers here for
water protection
Mounting clips

 Loading...


