EasyManua.ls Logo

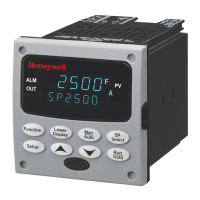
Honeywell UDC3500 User Manual

Honeywell UDC3500
460 pages
To Next Page IconTo Next Page
Page #1 background imageLoading...
Page #1 background image
Honeywell Process Solutions
Industrial Measurement and Control
UDC3500
Universal Digital Controller
Product Manual
51-52-25-120
March 2007

Table of Contents

Other manuals for Honeywell UDC3500

Questions and Answers:

Honeywell UDC3500 Specifications

General IconGeneral
BrandHoneywell
ModelUDC3500
CategoryController
LanguageEnglish

Summary

1 Introduction

1.1 Overview

Provides a general overview of the UDC3500 controller's functionality, features, and display system.

1.2 Operator Interface

Details the UDC3500's operator interface, including displays and keys.

1.3 Process Instrument Explorer Software

Explains the features and usage of the Process Instrument Explorer software for configuration.

Infrared communications

Describes the non-intrusive wireless connection using infrared for configuration and data access.

1.4 CE Conformity (Europe)

Details the product's conformity with European Council Directives for safety and EMC.

2 Installation

2.1 Overview

Outlines the process of mounting and wiring the UDC3500 controller.

2.2 Condensed Specifications

Provides condensed specifications and operating limits for controller installation.

2.3 Model Number Interpretation

Explains how to interpret the controller's model number for proper selection and wiring.

2.4 Control and Alarm Relay Contact Information

Details the contact information for control and alarm relays, including failsafe behavior.

2.5 Mounting

Covers physical considerations, overall dimensions, and mounting methods for panel installation.

2.6 Wiring

Discusses electrical considerations, power supply, grounding, and circuit wiring for noise prevention.

2.7 Wiring Diagrams

Provides diagrams for composite wiring, mains power supply, and various input/output connections.

3 Configuration

3.1 Overview

Introduces the configuration process using keystroke sequences to set control data.

3.2 Configuration Prompt Hierarchy

Illustrates the controller's prompt hierarchy, showing Set Up groups and Function prompts.

3.3 Configuration Procedure

Details the procedure for entering Set Up mode, selecting groups, and changing parameters.

3.4 Loop 1 Tuning Set Up Group

Covers parameters for establishing tuning constants for the control loop, including Gain, Rate, and Reset.

3.5 Loop 2 Tuning Set Up Group

Details tuning constants for the second control loop, including Gain, Rate, and Reset.

3.6 SP Ramp Set Up Group

Explains how to configure Set Point Ramp, Set Point Programs, and Set Point Rates.

3.7 SP Program 2 Set Up Group

Describes the configuration of the second optional Setpoint Program, including linking capabilities.

3.8 SP Program 3 Set Up Group

Details the configuration of the third optional Setpoint Program, including linking capabilities.

3.9 SP Program 4 Set Up Group

Explains the configuration of the fourth optional Setpoint Program, including linking capabilities.

3.10 Accutune Set Up Group

Covers the Accutune III feature for automatic calculation of PID tuning constants.

3.11 Algorithm Set Up Group

Details various control algorithms and timer functions available for process control.

3.12 Math Set Up Group

Describes additional math algorithms, characterizers, and totalizer functions.

3.13 Logic Gates Set Up Group

Explains the setup for various logic gates used for conditional operations.

3.14 Output Set Up Group

Details various output types, digital output status, and current output operation.

3.15 Input 1 Set Up Group

Describes parameters required to configure Analog Input 1, including type and characterization.

3.16 Input 2 Set Up Group

Covers parameters required to configure Analog Input 2, including type and characterization.

3.17 Input 3 Set Up Group

Details parameters for configuring Analog Input 3, including type and characterization.

3.18 Input 4 Set Up Group

Explains parameters for configuring Analog Input 4, including type and characterization.

3.19 Input 5 Set Up Group

Covers parameters for configuring Analog Input 5, including type and characterization.

3.20 Control Set Up Group

Deals with controlling Loop 1 process, including tuning, setpoints, and tracking.

3.21 Control 2 Set Up Group

Details controlling the Loop 2 process, including tuning, setpoints, and tracking.

3.22 Options Set Up Group

Covers configuration of remote mode switch, second/third current outputs, and digital inputs.

3.23 Communications Set Up Group

Explains how to configure the controller for connection to a host computer via Modbus or Ethernet.

3.24 Alarms Set Up Group

Details the configuration of four alarms and eight alarm setpoints for process monitoring.

3.25 Real Time Clock Set Up Group

Covers configuration of the Real Time Clock option for time-based events.

3.26 Maintenance Set Up Group

Allows counting and timing of discrete events for maintenance tracking.

3.27 Display Set Up Group

Includes selections for decimal place, temperature units, language, and power frequency.

3.28 Read Maintenance Set Up Group

Allows viewing of Healthwatch timers and counters, as these are read-only.

3.29 Time Events Set Up Group

Enables programming of specific functions at set times of day or on specific dates.

3.30 P.I.E. Tool Ethernet and Email Configuration Screens

Explains configuration screens for Ethernet and Email parameters using the P.I.E. Tool.

3.31 Configuration Record Sheet

Provides a sheet to record all controller configuration values for future reference.

4 Monitoring and Operating the Controller

4.1 Overview

Provides a general overview of the controller's monitoring and operation.

4.2 Operator Interface

Details the UDC3500's operator interface, including displays and keys.

4.3 Entering a Security Code

Explains how to set and use a security code to manage lockout levels.

4.4 Lockout Feature

Describes the lockout feature to inhibit changes to functions or parameters by unauthorized personnel.

4.5 Monitoring Your Controller

Explains how to monitor controller status using annunciators and diagnostic messages.

4.6 Start Up Procedure for Operation

Details the step-by-step procedure for starting up the controller for operation.

4.7 Control Modes

Defines different control modes like Automatic, Manual, and Cascade.

4.8 Setpoints

Explains how to configure and manage local and remote setpoints for the controller.

4.9 Timer

Describes the timer function for configurable time-out periods and start selections.

4.10 Accutune III

Covers the Accutune III autotuning method for self-regulating processes.

4.11 Fuzzy Overshoot Suppression

Minimizes process variable overshoot following setpoint changes or disturbances.

4.12 Using Two Sets of Tuning Constants

Explains how to use and switch between two sets of tuning constants for single output types.

4.13 Input Math Algorithms

Details available standard and math option algorithms for derived PV or remote setpoints.

8 Segment Characterizers

Describes 8-segment characterizers available as part of the Math Algorithm option.

Totalizer

Explains the Flow Totalizer function for calculating and displaying total flow volume.

4.14 Logic Gate Operation

Explains the function and configuration of dual-input logic gates and comparator gates.

4.16 Auto/Manual Station

Describes how digital inputs trigger the controller's switch to Auto/Manual Station mode.

4.17 Two Loops of Control

Explains operating with two independent loops of control or internal Cascade Control.

Internal Cascade Control

Details rules and diagrams for internal cascade control systems.

Output Override

Allows overriding Loop 1 output with Loop 2 output based on high/low selection.

4.18 Configuring Two Loops of Control

Guides the user through selecting the two-loop or cascade control algorithm.

4.19 Monitoring Two Loops of Control

Explains how to monitor two independent loops of control or internal cascade.

4.21 Alarm Setpoints

Details configuring alarm setpoints for relay contacts and operator interface indications.

4.22 Three Position Step Control Algorithm

Explains the TPSC algorithm for controlling valves via motor-driven relays without feedback.

4.23 Setting a Failsafe Output Value for Restart after a Power Loss

Describes how to set a user-configured failsafe output value for controller restart after power loss.

4.24 Setting Failsafe Mode

Allows setting the Failsafe Mode to either Latching or Non-Latching.

4.25 Carbon Potential, Oxygen and Dewpoint Algorithms

Explains configuring Input Algorithm 1 for Carbon Potential, Percent Oxygen, or Dewpoint applications.

Carbon Potential

Details configuring the controller to measure and control Carbon Potential using input sensors.

Percent Oxygen

Explains Percent Oxygen control using two analog inputs and controller calculations.

Dewpoint

Describes Dewpoint Algorithm for controlling Dewpoint and calculating Carbon Potential.

4.26 Healthwatch

Provides diagnostic data to monitor vital performance, predict failures, and minimize downtime.

4.27 Setpoint Rate/Ramp/Program Overview

Details enabling and configuring SP RATE, SP RAMP, and SP PROG functions.

4.28 Setpoint Rate

Explains configuring a specific rate of change for any local setpoint change.

4.29 Setpoint Ramp

Describes setting a ramp between current and final local setpoints over a time interval.

4.30 Setpoint Ramp/Soak Programming

Details programming ramp and soak segments to generate setpoint versus time profiles.

Run/Monitor the program

Provides steps for ensuring program configuration and running/monitoring programs.

4.31 P.I.E. Tool Maintenance Screens

Explains using P.I.E. Tool Maintenance Screens for remote access to functions.

Loop Data

Allows viewing the current status of each process loop via the Loop Data screen.

Loop Data – Alarm Details

Shows the status of each alarm setpoint and indicates active or disabled alarms.

Loop Data – Digital Input Details

Displays the status of each Digital Input, indicating active or disabled states.

Status Data

Allows viewing the current status of the controller's diagnostics.

Status Data – Diagnostics History

Shows the last ten diagnostic conditions that have occurred.

Ethernet Status

Displays the network status of the Ethernet Link, accessed via Ethernet or Infrared.

Healthwatch Data

Shows the current values of counters and timers used by Healthwatch.

Healthwatch Data - Reset

Allows resetting various Timers and Counters back to zero.

Totalizer Data

Shows the current values of the Totalizer and allows resetting to zero.

Real Time Clock

Shows controller and PC clock times and allows setting the controller's time.

4.32 Configuring your Ethernet Connection

Guides on configuring Ethernet connection parameters using the P.I.E. Tool.

Connecting to the Controller via Infrared Communications

Details connecting to the controller via Infrared (IR) using the P.I.E. Tool.

5 Input Calibration

5.1 Overview

Describes field calibration procedures for Analog Inputs 1 through 5.

5.2 Minimum and Maximum Range Values

Provides voltage, current, and resistance equivalents for 0% and 100% range values.

5.3 Preliminary Information

Lists important preliminary steps and cautions before performing input calibration.

5.4 Input Set Up Wiring

Details wiring procedures for various input types, including Thermocouple, RTD, and Milliamp.

5.4.1 Thermocouple Inputs Using an Ice Bath

Provides wiring connections and procedure for thermocouple inputs using an ice bath.

5.4.2 Thermocouple Inputs Using a Thermocouple Source

Details wiring connections and procedure for thermocouple inputs using a thermocouple source.

5.4.3 RTD Inputs

Provides wiring connections and procedure for RTD inputs using a decade resistance box.

5.4.4 Radiamatic, Millivolts, Volts, Carbon, Oxygen or Thermocouple Differential Inputs

Details wiring connections and procedure for various analog inputs, excluding 0-10V and -1 to 1V.

5.4.5 0 to 10 Volts or –1 to 1 Volts

Provides wiring connections and procedure for 0-10V or -1 to 1V voltage inputs.

5.4.6 Milliamperes

Details wiring connections and procedure for Milliampere inputs.

5.4.7 Dual High Level Voltage Inputs

Provides wiring connections and procedure for dual high-level voltage inputs.

5.4.8 Dual High Level Milliamperes Inputs

Details wiring connections and procedure for dual high-level milliampere inputs.

5.5 Input Calibration Procedure

Provides the step-by-step procedure for calibrating Input #1 or Input #2.

5.6 Restore Input Factory Calibration

Explains how to restore the controller's factory calibration values for inputs.

6 Output Calibration

6.1 Overview

Describes field calibration procedures for Current Outputs and Position Proportional/TPSC outputs.

6.2 First Current Output Calibration

Details the procedure for calibrating the controller's first current output.

Procedure

Outlines the steps for calibrating the first current output.

6.3 Second Current Output Calibration

Explains the procedure for calibrating the second current output.

Procedure

Outlines the steps for calibrating the second current output.

6.4 Third Current Output Calibration

Details the procedure for calibrating the third current output.

Procedure

Outlines the steps for calibrating the third current output.

6.5 Position Proportional and Three Position Step Output Calibration

Covers calibration procedures for Position Proportional and Three Position Step outputs.

6.6 Restore Factory Output Calibration

Explains how to restore factory calibration constants for current outputs.

7 Troubleshooting/Service

7.1 Overview

Introduces common instrument problems related to installation, application, and hardware/software.

7.2 Troubleshooting Aids

Lists resources like error messages, failure symptoms, and customer support for troubleshooting.

Controller failure symptoms

Compares observed controller symptoms with a table to identify probable causes.

Check installation

Advises checking installation procedures to resolve persistent symptoms.

Customer support

Provides contact information for technical assistance and web resources.

Determining the software version

Explains how to identify the controller's software version number.

7.3 Power-up Tests

Describes diagnostic tests performed by the controller upon power application.

7.4 Status Tests

Explains how to check the results of status tests to diagnose failsafe conditions.

7.5 Background Tests and Diagnostic Messages

Details background tests for data and memory integrity and diagnostic messages.

7.6 Controller Failure Symptoms

Compares observed controller symptoms with a table to identify probable causes.

7.7 Troubleshooting Procedures

Provides step-by-step procedures to diagnose and correct specific failures.

7.7.1 Procedure #1 – Power

Details troubleshooting steps for power-related failure symptoms.

7.7.2 Procedure #2 – Current Outputs

Explains how to troubleshoot Current Output failure symptoms.

7.7.3 Procedure #3 – Position Proportional

Guides on troubleshooting Position Proportional Output failure symptoms.

7.7.4 Procedure #4 – Time Proportional

Explains how to troubleshoot Time Proportional Output failure.

7.7.5 Procedure #5 – Current/Time or Time Current/Proportional

Details troubleshooting for Current/Time or Time/Current Proportional Output failures.

7.7.6 Procedure #6 – Alarm Relays

Explains how to troubleshoot Alarm Relay Output failure.

7.7.7 Procedure #7 – Keyboard

Guides on troubleshooting a Keyboard failure.

7.7.8 Procedure #8 – Analog Input

Details troubleshooting steps for Analog Input failures.

7.7.9 Procedure #9 – RS-485

Explains how to troubleshoot RS-485 Communications failures.

7.7.10 Procedure #10 – Ethernet

Details troubleshooting steps for Ethernet Communications failures.

7.7.11 Procedure #11 – Email

Explains how to troubleshoot Email failures.

7.8 Restoring Factory Configuration

Describes the procedure to restore the instrument's configuration to factory settings.

7.9 Software Upgrades

Guides on enabling new software features not ordered from the factory.

8 Parts List

8.1 Exploded View

Provides an exploded view of the UDC3500 Controller with key numbers for parts.

8.2 Removing the chassis

Details the procedure for safely removing the controller's chassis.

9 Modbus RTU Function Codes

9.1 Overview

Describes function codes for uploading and downloading configuration via Modbus.

9.2 General Information

Explains the instrument's use of Modbus RTU function codes and configuration ID tags.

Register Address Structure

Defines the structure of register addresses for integer and floating-point parameters.

9.3 Function Code 20 (14h) - Read Configuration Reference Data

Details Function Code 20 for reading information from the configuration database.

Reference Type Definitions

Defines reference types used in Modbus communication.

9.3.1 Read Configuration Examples

Provides examples of Modbus requests and responses for reading configuration data.

Example #2

Provides an example of a Modbus request and response message.

9.4 Function Code 21 (15h) - Write Configuration Reference Data

Details Function Code 21 for writing integer and floating point values to the configuration.

File Number

Explains the file number word in Modbus requests, referencing register structure.

Register Address

Describes the register address word as the tag ID for accessing parameters.

9.4.1 Write Configuration Examples

Provides examples of Modbus requests and responses for writing configuration data.

10 Modbus Read, Write and Override Parameters plus Exception Codes

10.1 Overview

Introduces information on reading, writing, and overriding parameters and exception codes.

General Information

Covers non-volatile memory retention, communications transfer rates, and modes of operation.

10.3 Read Software Options Status

Explains how to read the status of available software options.

10.4 Miscellaneous Read Onlys

Lists register addresses for miscellaneous read-only information.

10.4.1 Register Addresses for Read Onlys

Details register addresses for software type and version, which are read-only.

10.4.2 SetPoint Program Read Only Information

Provides register addresses for read-only setpoint program information.

10.5 Setpoints

Lists register addresses to select and enter setpoint values in Engineering Units or Percent.

Associated Parameters

Refers to parameters associated with setpoints for display or change.

10.6 Using a Computer Setpoint (Overriding Controller Setpoint)

Explains using a computer-generated setpoint to override the controller's active setpoint.

10.7 Configuration Parameters

Lists identifying codes for parameters in various Set-up Groups, indicating configurability.

10.7.1 Tuning Loop 1

Lists register addresses and ranges for function parameters in the Tuning Loop 1 Set-up Group.

10.7.2 Tuning Loop2

Lists register addresses and ranges for function parameters in the Tuning Loop 2 Set-up Group.

10.7.3 SP Ramp/Rate/Program #1

Lists register addresses and ranges for parameters in the Setpoint Ramp/Rate Set-up Group.

10.7.4 Setpoint Program #2

Lists register addresses and ranges for parameters in the Setpoint Program #2 Set-up Group.

10.7.5 Setpoint Program #3

Lists register addresses and ranges for parameters in the Setpoint Program #3 Set-up Group.

10.7.6 Setpoint Program #4

Lists register addresses and ranges for parameters in the Setpoint Program #4 Set-up Group.

10.7.7 Accutune

Lists register addresses and ranges for function parameters in the Adaptive Tune Set-up Group.

10.7.8 Algorithm

Lists register addresses and ranges for function parameters in the Algorithm Set-up Group.

10.7.9 Math

Lists register addresses and ranges for function parameters in the Math Set-up Group.

10.7.10 Logic

Lists register addresses and ranges for function parameters in the Logic Set-up Group.

10.7.11 Output Algorithms

Lists register addresses and ranges for function parameters in the Output Algorithms Set-up Group.

10.7.12 Input 1

Lists register addresses and ranges for function parameters in the Input 1 Set-up Group.

10.7.13 Input 2

Lists register addresses and ranges for function parameters in the Input 2 Set-up Group.

10.7.14 Input 3

Lists register addresses and ranges for function parameters in the Input 3 Set-up Group.

10.7.15 Input 4

Lists register addresses and ranges for function parameters in the Input 4 Set-up Group.

10.7.16 Input 5

Lists register addresses and ranges for function parameters in the Input 5 Set-up Group.

10.7.17 Control

Lists register addresses and ranges for function parameters in the Control Set-up Group.

10.7.18 Control Loop 2

Lists register addresses and ranges for function parameters in the Control Loop 2 Set-up Group.

10.7.19 Options

Lists register addresses and ranges for function parameters in the Options Set-up Group.

10.7.21 Alarms

Lists register addresses and ranges for function parameters in the Alarms Set-up Group.

10.7.22 Maintenance

Lists register addresses and ranges for function parameters in the Maintenance Set-up Group.

10.7.24 Display

Lists register addresses and ranges for function parameters in the Display Set-up Group.

10.7.25 Clock

Lists register addresses and ranges for function parameters in the Clock Set-up Group.

10.8 Modbus RTU Exception Codes

Explains Modbus RTU exception codes and their meanings.

11 Further information

11.1 Modbus RTU Serial Communications

Refers to the Modbus RTU Serial Communications User Manual for details.

11.2 Modbus Messaging on Ethernet TCP/IP

Refers to the MODBUS Messaging on Ethernet TCP/IP Implementation Guide.

11.3 How to Apply Digital Instrumentation in Severe Electrical Noise Environments

Refers to a document on applying digital instrumentation in noisy electrical environments.

12 Index

13 Sales and Service

Sales and Service

Provides contact information for application assistance, specifications, and distributors.

Related product manuals