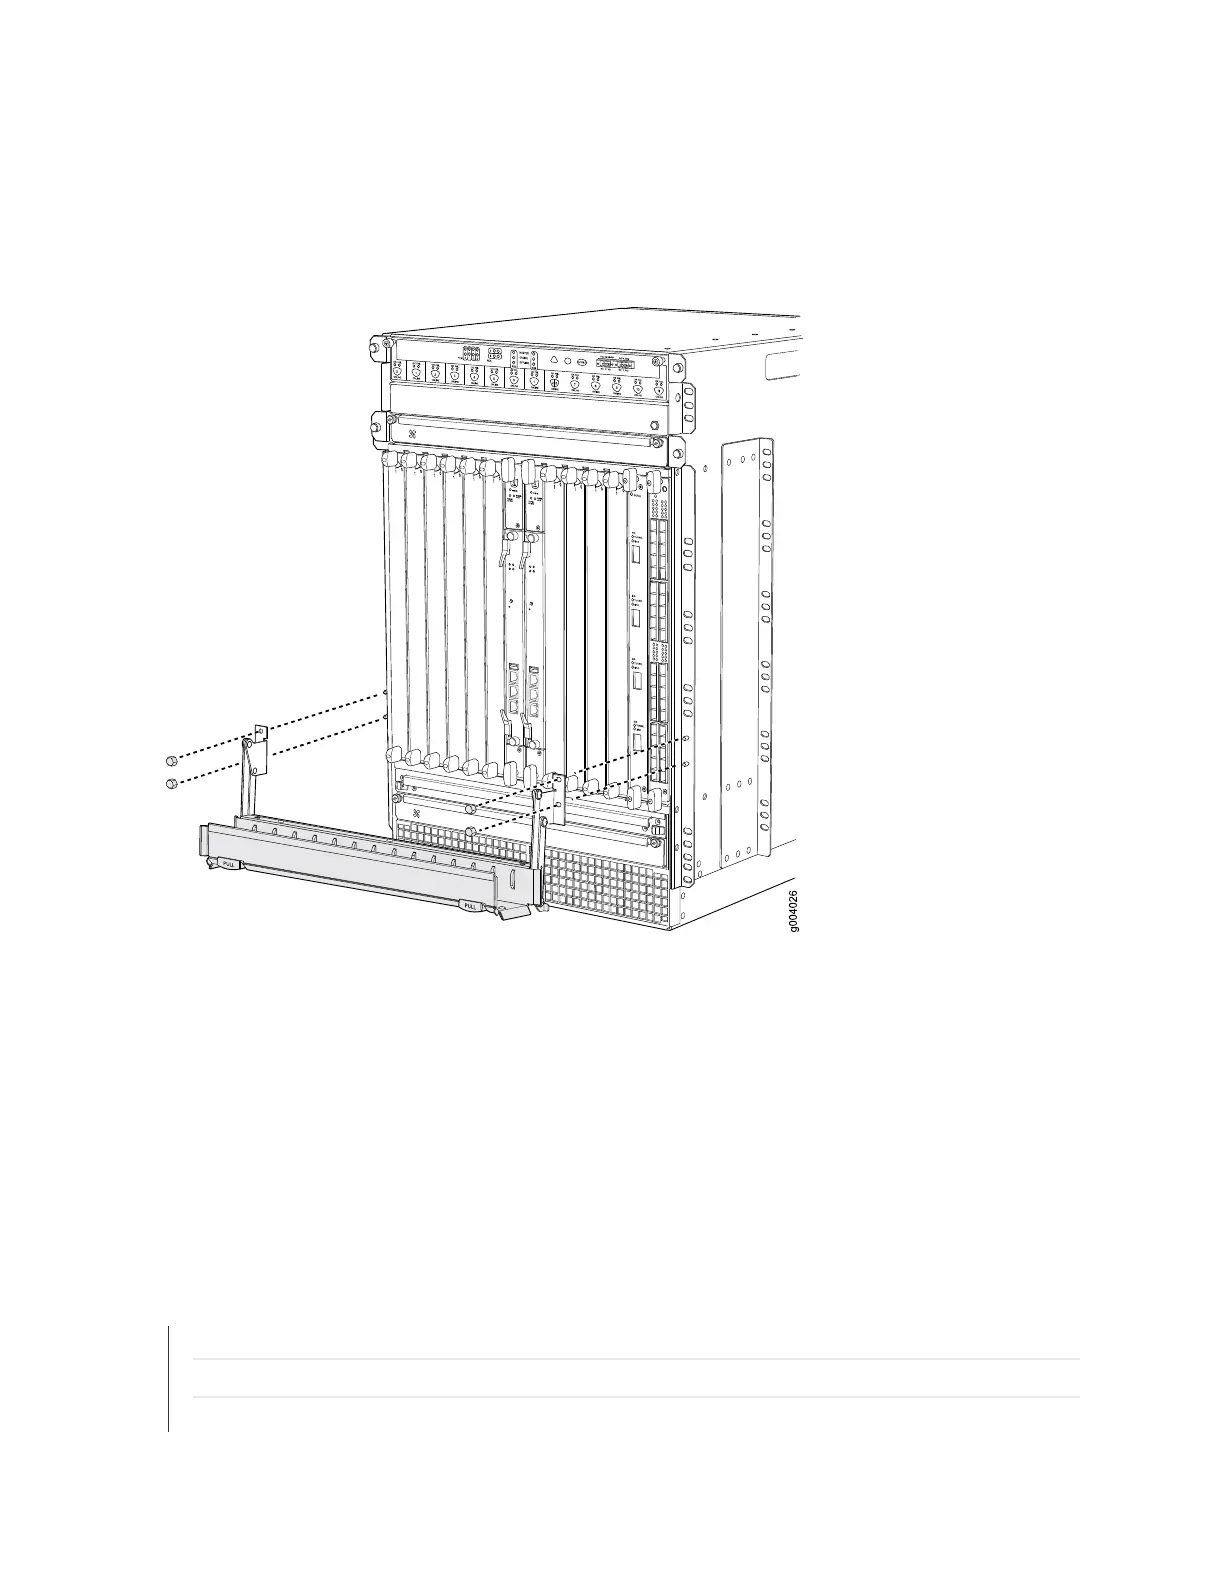
3. Grasp the bottom of the standard cable manager, and pull it straight out from the studs on the front
of the chassis.
Figure 161: Removing the Standard Cable Manager
To install the standard cable manager (see Figure 161 on page 438):
1. Position the standard cable manager on the studs on the lower front of the chassis.
2. Insert the nuts on the corners in the standard cable manager onto the studs on the chassis.
3. Using a 7/16-in. (11 mm) nut driver, tighten the nuts securely.
RELATED DOCUMENTATION
Preventing Electrostatic Discharge Damage to an MX960 Router
MX960 Cable Manager Description | 22
Verifying the Version of the MX960 Cable Manager | 626
438