Actions Yes No
Step 3
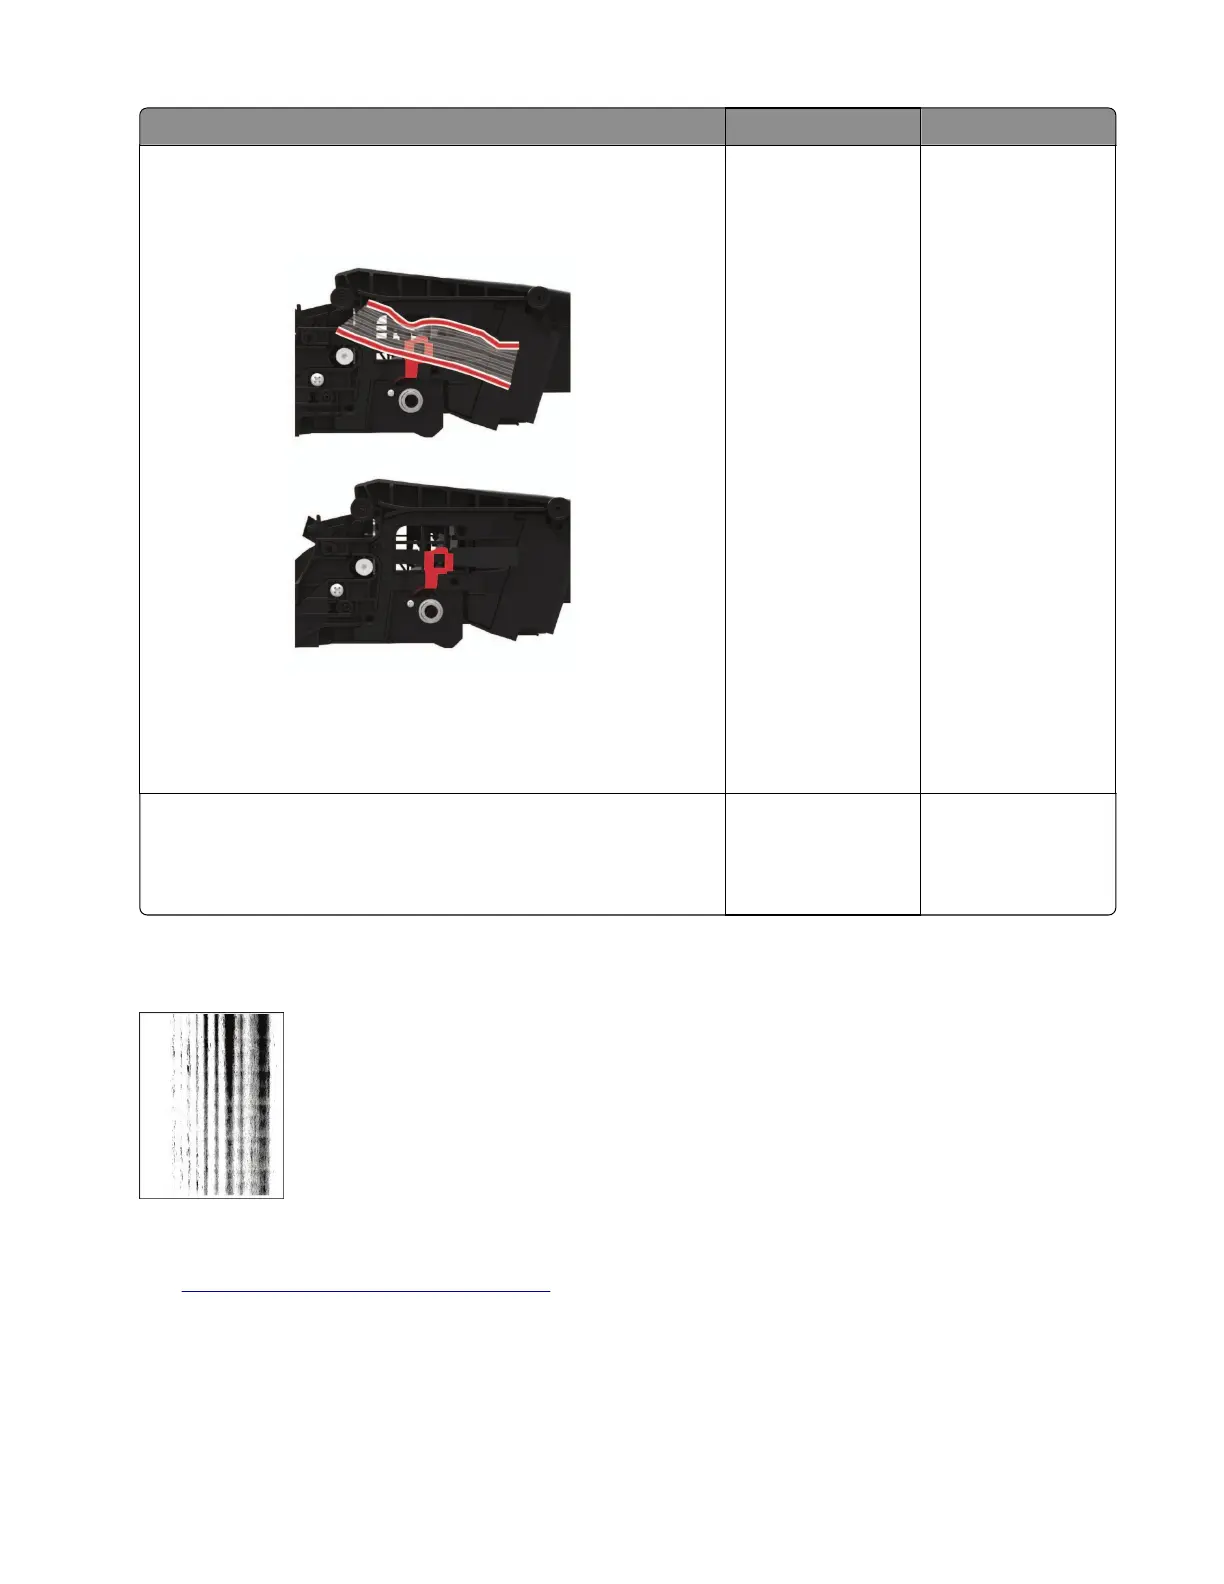
Remove any packing material left on the imaging unit, including
pieces of tape on the side of the unit and the red separator plastic.
Note: You may need a pair of pliers to remove a piece of broken
plastic inside the imaging unit.
Does the problem remain?
Go to step 4. The problem is
solved.
Step 4
Replace the imaging unit.
Does the problem remain?
Contact the next
level of support.
The problem is
solved.
Vertical dark streaks with print missing check
Note: Before performing this print quality check, go to the control panel home screen and navigate to
Settings > Troubleshooting > Print Quality Test Pages, and then perform the initial print quality check.
See
“Initial print quality check” on page 44.
4064
Diagnostics and troubleshooting
67