Actions Yes No
Step 5
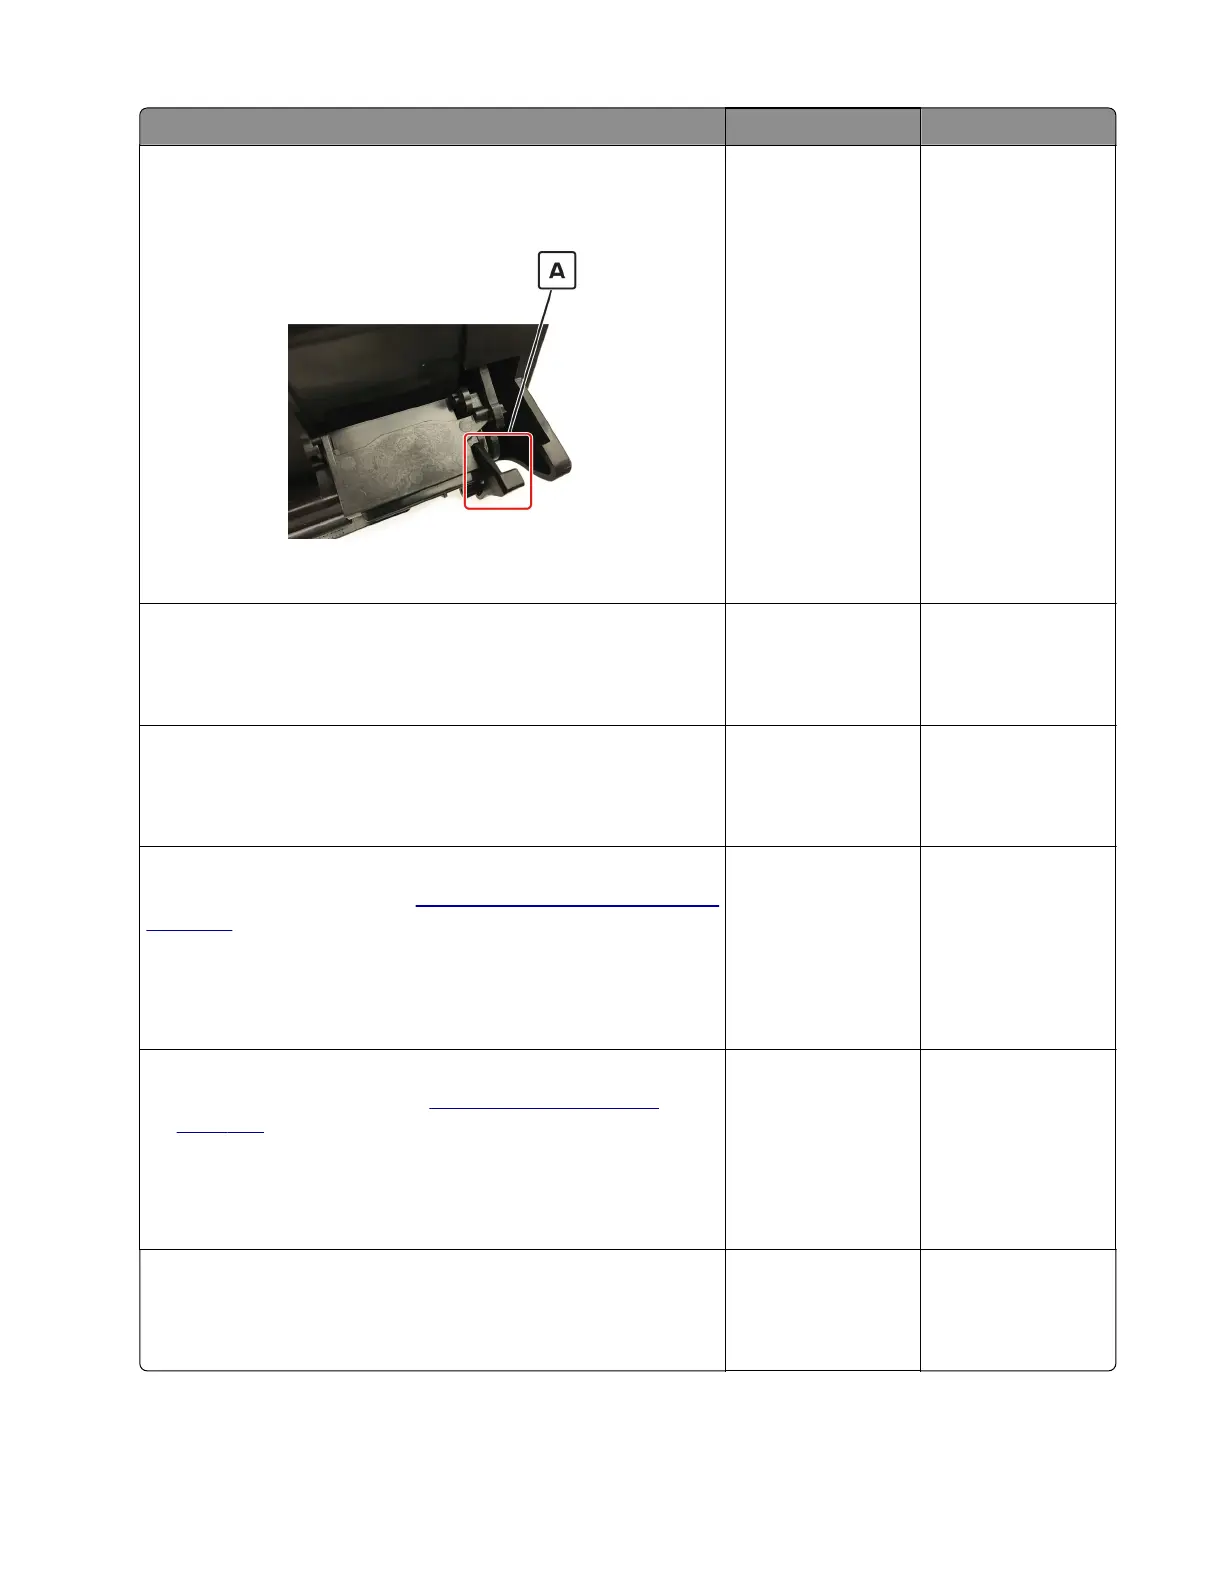
Check the shutter tab (A) on the toner cartridge for signs of
damage.
Is the shutter tab damaged?
Go to step 6. Go to step 7.
Step 6
Replace the imaging unit and the toner cartridge.
Does the problem remain?
Go to step 7. The problem is
solved.
Step 7
Check the printhead glass for contamination.
Is the printhead glass free from dust and debris?
Go to step 8. Go to step 9.
Step 8
Clean the printhead glass. See
“Cleaning the printhead glass” on
page 764.
Warning—Potential Damage: When cleaning the printhead
glass, do not use compressed air.
Does the problem remain?
Go to step 9. The problem is
solved.
Step 9
a Remove the right cover. See “Right cover removal” on
page 420.
b Check connection J15 from the controller board to the HVPS,
and then check all other connections on the HVPS.
Are the connections properly connected?
Go to step 11. Go to step 10.
Step 10
Replace the connections.
Does the problem remain?
Go to step 11. The problem is
solved.
4064
Diagnostics and troubleshooting
70