(00292)H 5 - 19
Custom White Balance Specification Method
・Point Setting
In the Custom White Balance mode, move the cursor to the white section of the image
being displayed and click the left mouse button to obtain the white balance value for the
point at the center of the cross-hatched cursor and then the entire image displayed will be
redrawn.
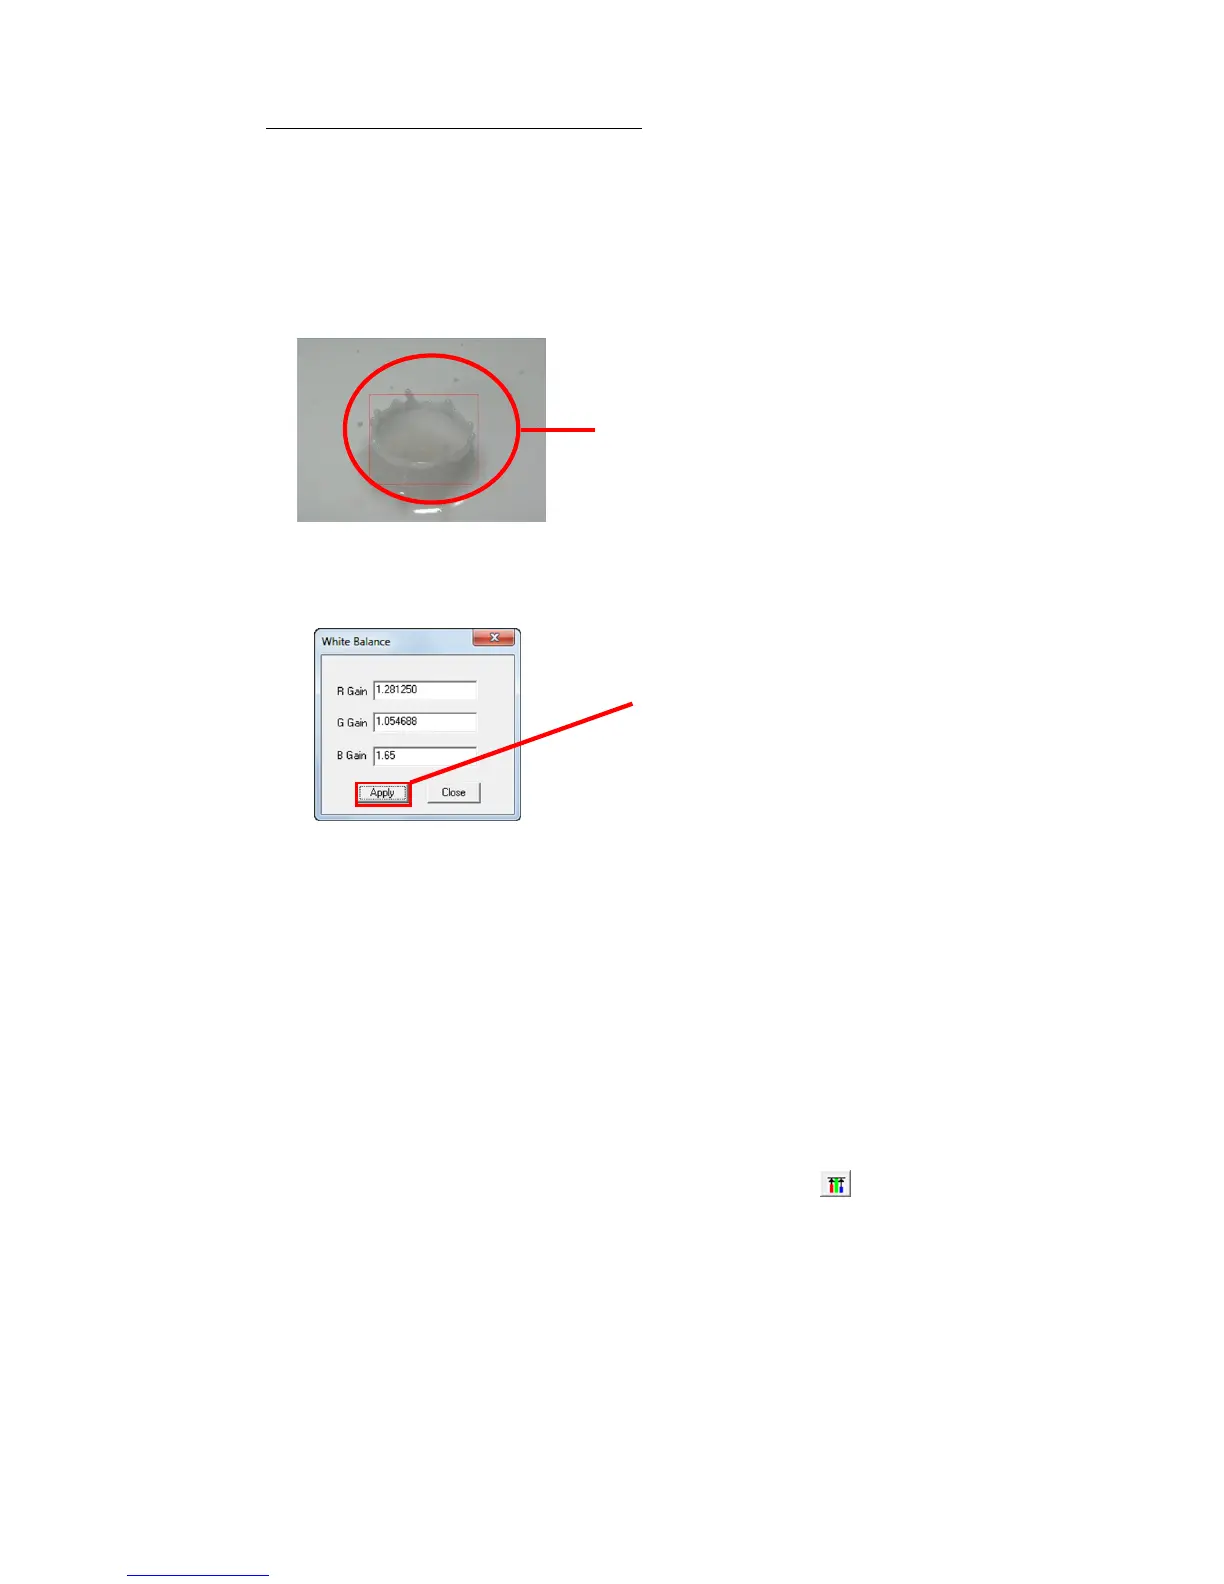
・Specify Region
Drag the mouse to a specific region to obtain the
white balance value for that specific region and
then the entire image displayed will be redrawn.
・Numerical Input
Input the RGB gain value in the "White Balance"
window and press "Apply" to obtain the white
balance value for the RGB gain value input and
then the entire image displayed will be redrawn.
Click “White Balance” -> “CUSTOM” -> “Select CUSTOM” in the "Adjust Image Quality"
menu and the white balance value will be the value set in Custom White Balance.
Click "Select CUSTOM" when the CUSTOM white balance setting hasn't been changed and the
CUSTOM white balance value will be the white balance value equivalent to 5000K, and then
the entire image displayed will be redrawn.
Click "Select CUSTOM" when the CUSTOM white balance setting has been changed and the
CUSTOM white balance value will be the changed white balance value and then the entire
image displayed will be redrawn.
The CUSTOM white balance value is saved until the MCFF is closed.
To cancel the CUSTOM White Balance mode, either select something other than "CUSTOM"
for "White Balance" in the "Adjust Image Quality" menu or click "Start White Balance"
for the image quality adjustment section of the "Item Toolbar".