5 - 24 (00292)H
■ Cropping
“Crop” cuts the camera image to the desired range so the image can be shrunk.
Click “ON” in “Crop” in the “Conversion Settings” to crop.
Click on the “Main Toolbar” to crop. (Expert Mode only)
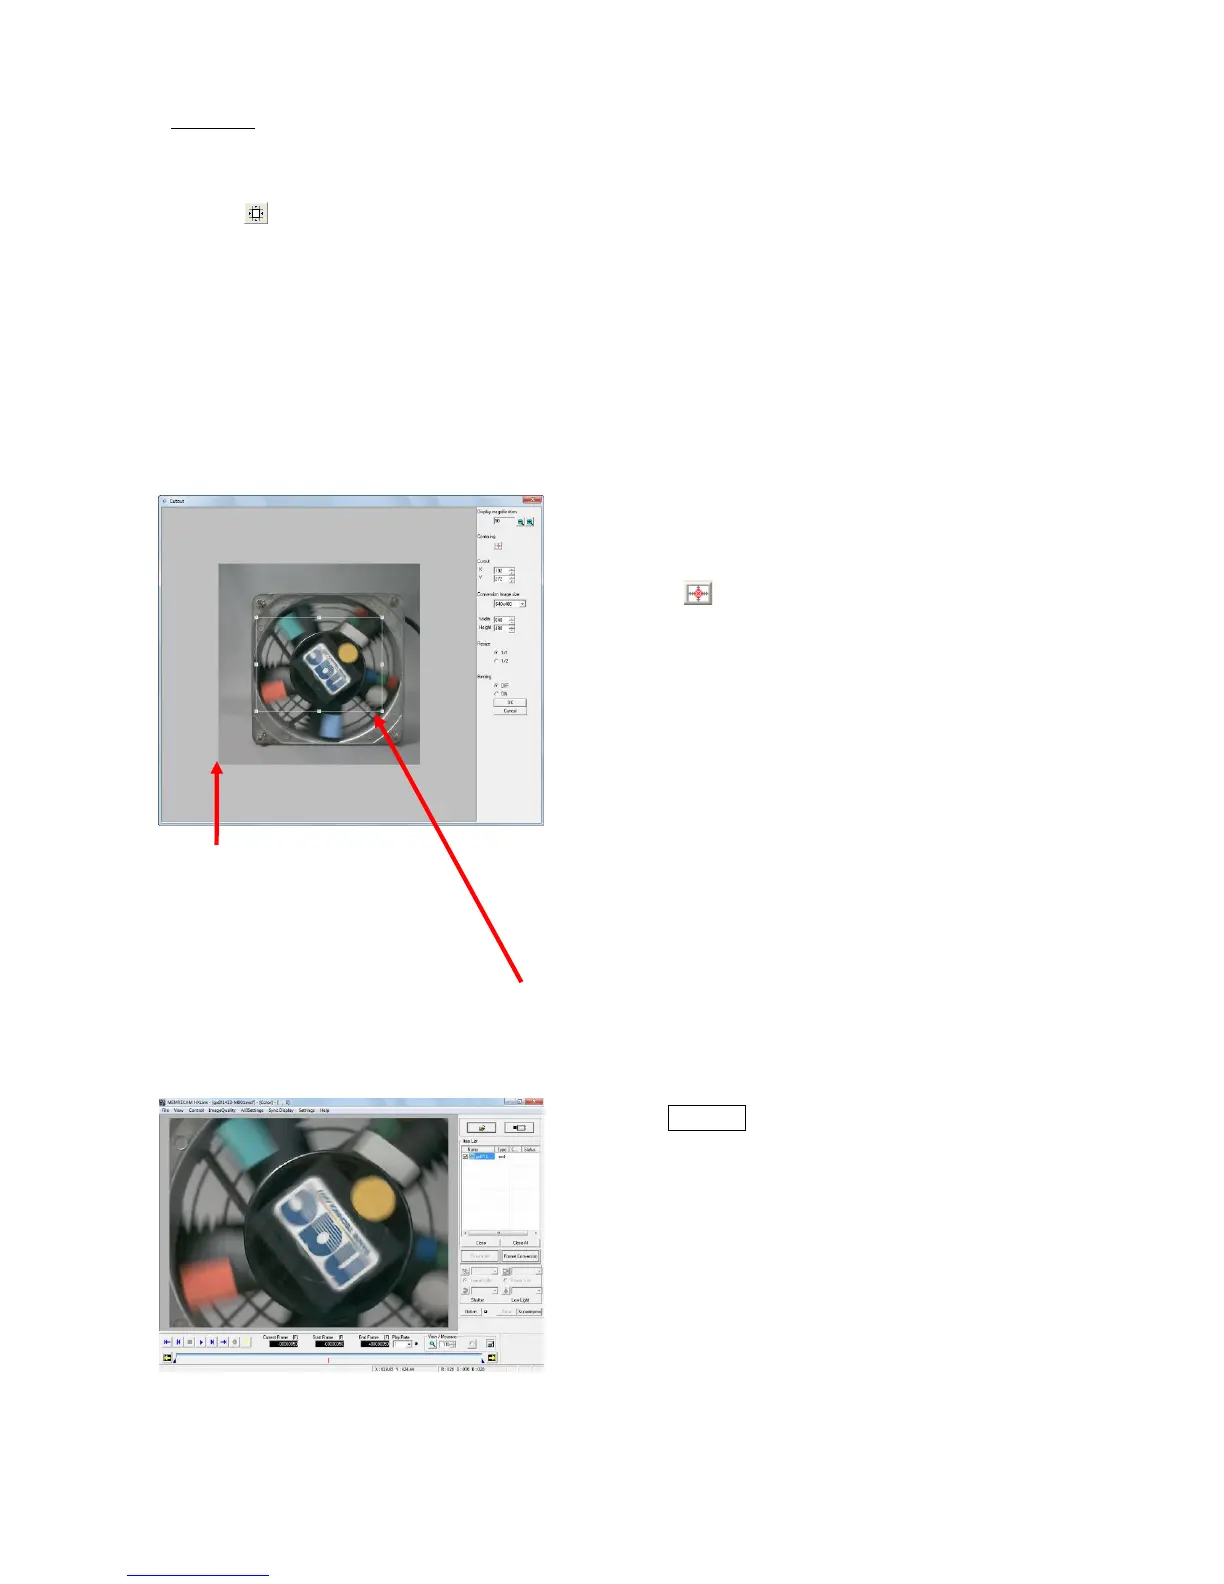
If “Crop” is ON, the window for cropping opens to specify the area to be cropped.
In the “Crop” window, specify the range of the image to be cropped and resizing settings to reduce
the image after conversion. If the converted image size is larger than the cropped image, a gray
area is shown on the cropped image, and information can be superimposed without blocking the
image.
If “Crop” is OFF, the settings are disabled and the original image is shown.
The image shown for the cropped converted image is as follows.
If cropping, reversing and rotating the image,
select the crop settings.
If reversing or rotating the image after
cropping, the cropping settings are
disabled after setting.
・Display Magnification
Select a display magnification from
50,100,200,400%
(This display magnification is not reflected on
the converted image)
・Center
Click to move the center of the image to
the center of the cropped range
・Crop Position
Numerically specify the coordinates for
the lower left corner of the range to be
cropped.
(the coordinate origin is the lower left
corner of the image shown)
・Converted Image Size
Select the converted image size from
previously set sizes
Numerically specify the width and height of
the converted image size
・Resize
Select the resize settings for the cropping and
conversion.
Specify the range to be cropped by dragging the frame with the mouse. Right click
the mouse in the “Crop” window to change the frame color.
 Loading...