R&S
®
ZVA / R&S
®
ZVB / R&S
®
ZVT GUI Reference
Channel Menu
Operating Manual 1145.1084.12 – 30 373
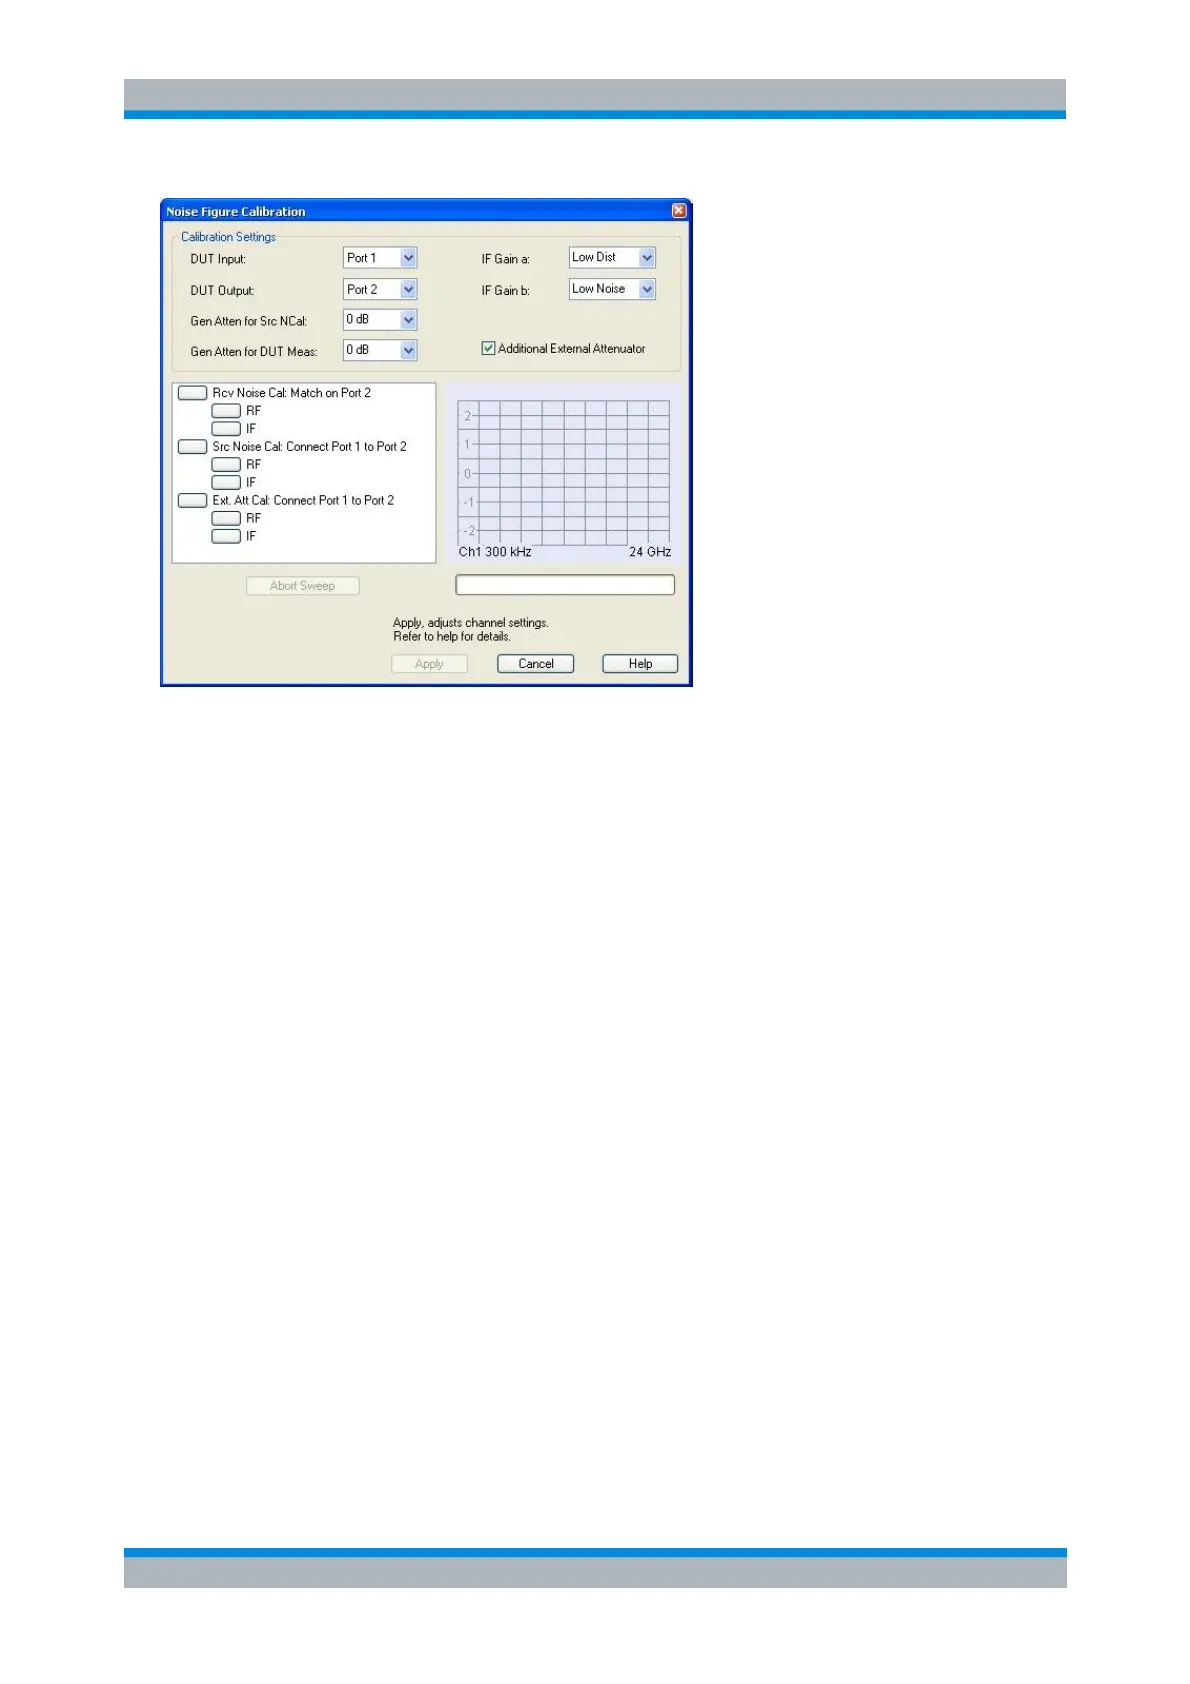
DUT Input and DUT Output denote the input and output ports of the DUT/NWA.
Gen Atten for Src NCal reduces the source level during the source noise calibration (calibration
step no. 2) by the selected value. Increase the attenuation factor to protect a pre-amplifier with
sensitive input from excess input levels. In general, a small attenuation factor improves the
accuracy of the source noise figure measurement.
Gen Atten for DUT Meas reduces the source level during the measurement (i.e., after the noise
figure calibration). Select an appropriate factor to ensure that the DUT is operated in its linear
range. If Gen Atten for DUT Meas differs from Gen Atten for Src NCal, then the source noise
calibration is extended by a second calibration sweep which compensates the effect of the
additional attenuator (Attenuator Cal).
IF Gain a configures the receiver path for the reference channels (a-waves). The default setting
Low Distortion is appropriate for relatively high RF levels. Changing the default setting can be
appropriate e.g. if an external pre-amplifier and a large Gen Atten for Scr NCal value is used.
IF Gain b configures the receiver path for the measurement channels (b-waves). The default
setting Low Noise is appropriate for relatively low RF levels and ensures maximum dynamic
range.
Additional External Attenuator must be checked when an external attenuator is used. It extends
the list of calibrations by a third step (attenuator calibration). This option is not available for mixer
noise figure measurements; see Basic Test Setup and Noise Figure Calculation.
The list of calibrations shows all calibration steps involved. A click on one of the boxes starts the
corresponding calibration sweep. For mixer noise figure measurements, the RF and IF frequency
ranges can be calibrated separately. If Apply RF Image Correction is selected in the Define Noise
Figure Measurement dialog, the RF image frequencies are added for all three calibration steps.
To obtain a sufficient set of calibration data, it is recommended to calibrate all frequency ranges
for each step at once (click the higher-level nodes Port <n> Connect Match, Port <m> Connect
Port<m> to Port<n>, Additional External Generator after establishing each calibration test setup).
SENSe1:POWer:IFGain<pt>:MEASure
[SENSe<Ch>:]CORRection:COLLect:NFIGure:STARt
[SENSe<Ch>:]CORRection:COLLect:NFIGure[:ACQuire]