29. Layer 3 Switching
ROX™ v2.2 User Guide 295 RuggedBackbone™ RX5000
29.2. Configuring Layer 3 Switching
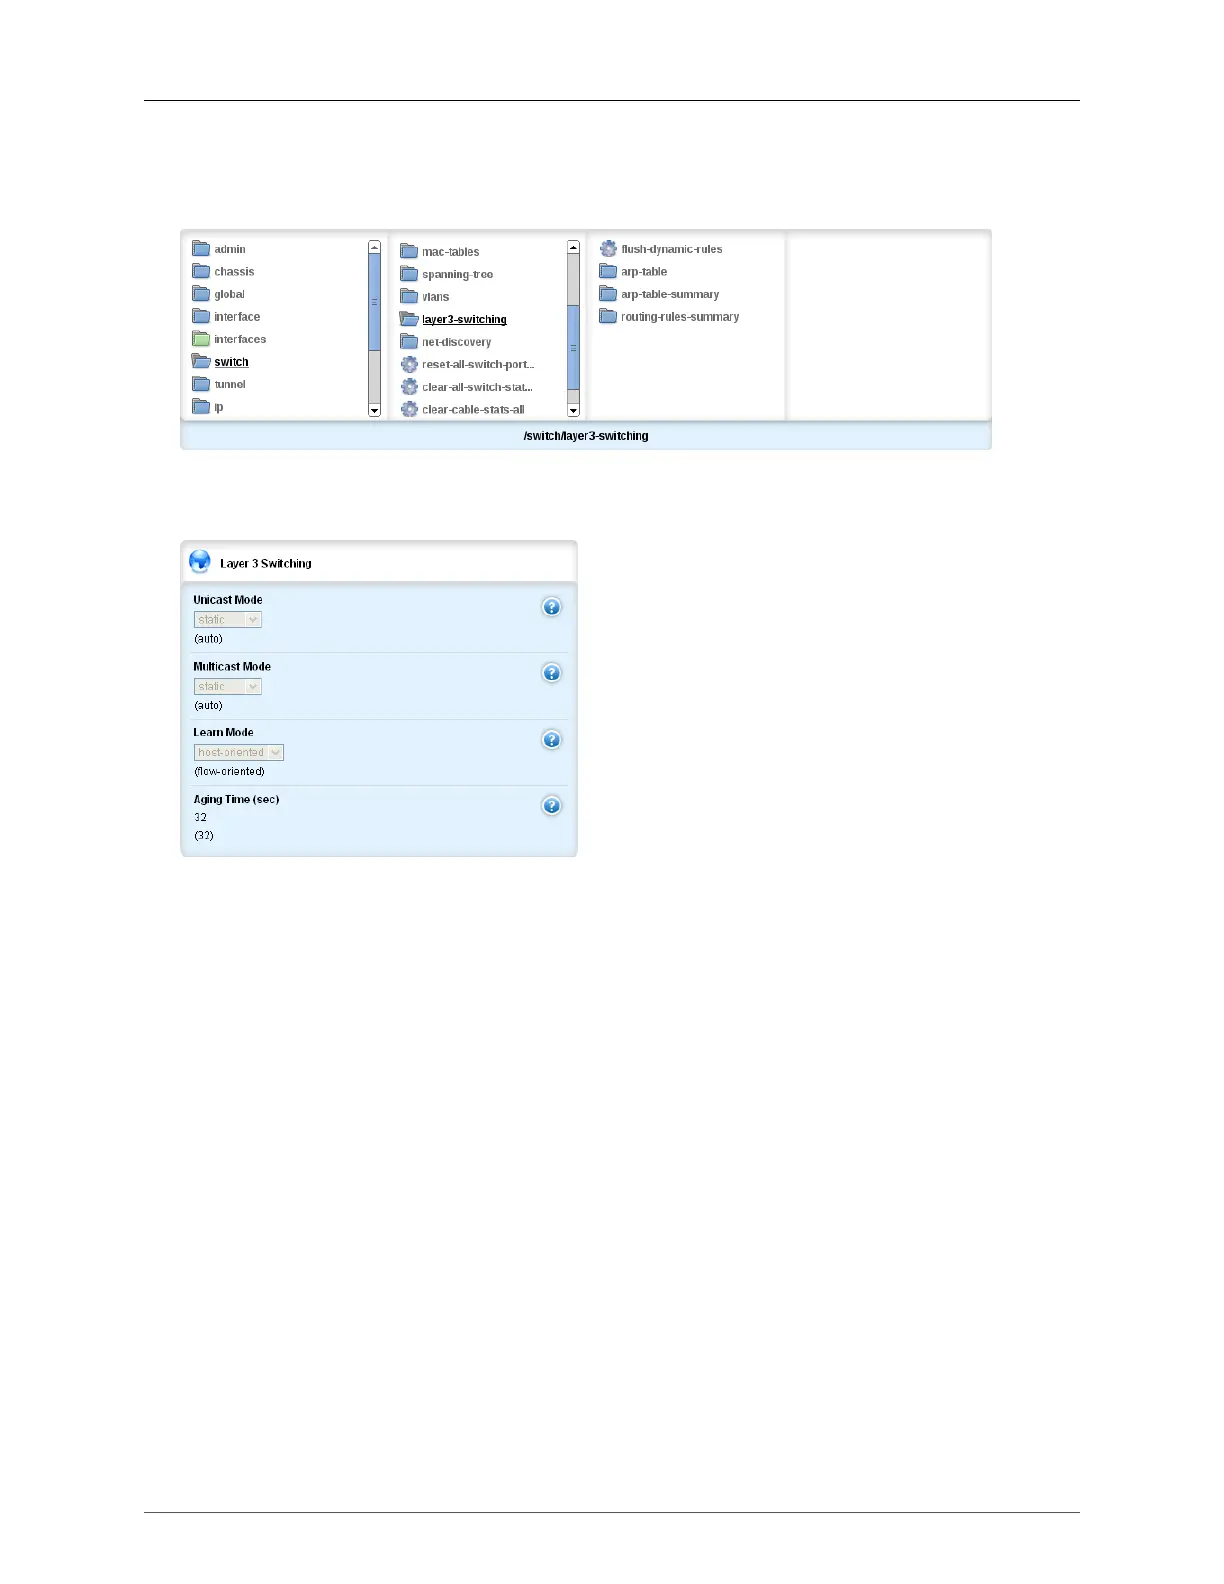
To display the Layer 3 Switching menu, navigate to switch/layer3-switching.
Figure 29.5. Layer 3 Switching menu
The Layer 3 Switching form on the menu page displays the configured Layer 3 switching settings.
Figure 29.6. Layer 3 Switching form
To configure Layer 3 switching, do the following:
• set the Layer 3 switching settings. See Section 29.2.1, “Configuring Layer 3 Switching Settings”.
• create static ARP table entries. See Section 29.2.2, “Creating Static ARP Table Entries”.
After configuring Layer 3 switching, you can do the following:
• view static and dynamic ARP table entries. See Section 29.2.3, “Viewing Static and Dynamic ARP
Table Entries”.
• view the routing rules summary. See Section 29.2.4, “Viewing Routing Rules”.
• flush dynamic hardware routing rules. See Section 29.2.5, “Flushing Dynamic Hardware Routing
Rules”.