STONEX R2
③As all the known PtIDs have been
input, press [ENT] to move to the
azimuth item, and continue inputting.
After finishing all inputting, press [F2]
to compute the result.
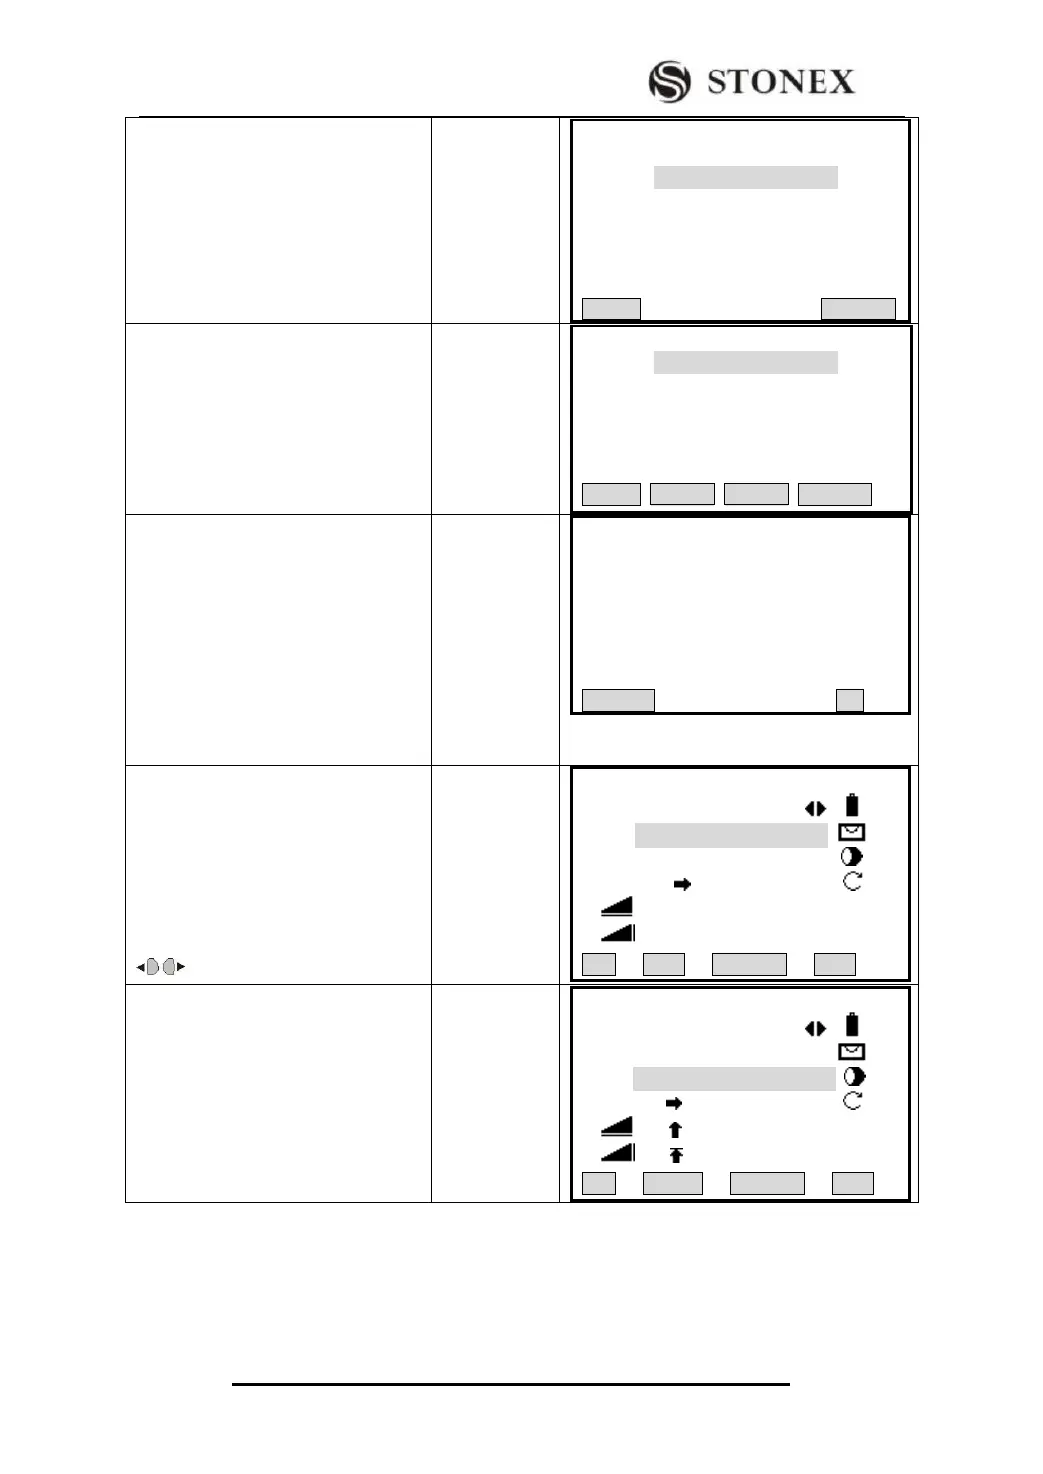
【COGO New Point】
New Pt: --- ---
X/N : 20.000 m
Y/E : 10.000 m
STAKE RECORD
④If this point needs to be staked out,
input the PtID, press [F1](STAKE). ‴
1)
If it only needs to record the data, just
press [F4]. ‴2) Here take staking out
as an example.
【COGO New Point】
New Pt: --- ---
X/N : 20.000 m
Y/E : 10.000 m
STAKE RECORD
⑤ As the program displays “Record
new point?”, press [F4] (OK) to store
new points in Job ,and start staking
out.
If you press [F1] (CANCEL), stake-out
is started without storing the data. It is
a must to name the calculation result
for COGO so as to start staking out.
【COGO New Point】
Record new point??
CANCEL OK
⑥ Collimate the prism center, input
prism height, or the H/Z if needed.
Press [F2] (DIST) to start
measurement. If some more points are
also needed to be staked out, and as
cursor staying on PtID item, press
to select. ‴ 3)
【COGO Stake Out】
PtID: 5
R.Ht: 1.923 m
H/Z: 0.000 m
△Hz : 50°10′50″
△ : 1.025 m Ⅰ
△ : ---.--- m
All DIST RECORD EDM
⑦The factor offset between stake-out
point and measurement point are
displayed and computed in the screen.
【COGO Stake Out】
PtID: 5
R.Ht: 1.923 m
HT : 0.000 m
△Hz : 50°10′50″
△ : 1.966 m Ⅰ
△ : 2.369 m
All DIST RECORD EDM