09/2007
4-8
Phaser 8860/8860MFP Service Manual
REP 1.0.9, REP 1.0.11
Initial Issue
Repairs and Adjustments
REP 1.0.9 Control Panel (8860MFP)
Parts List on PL 1.0
Removal
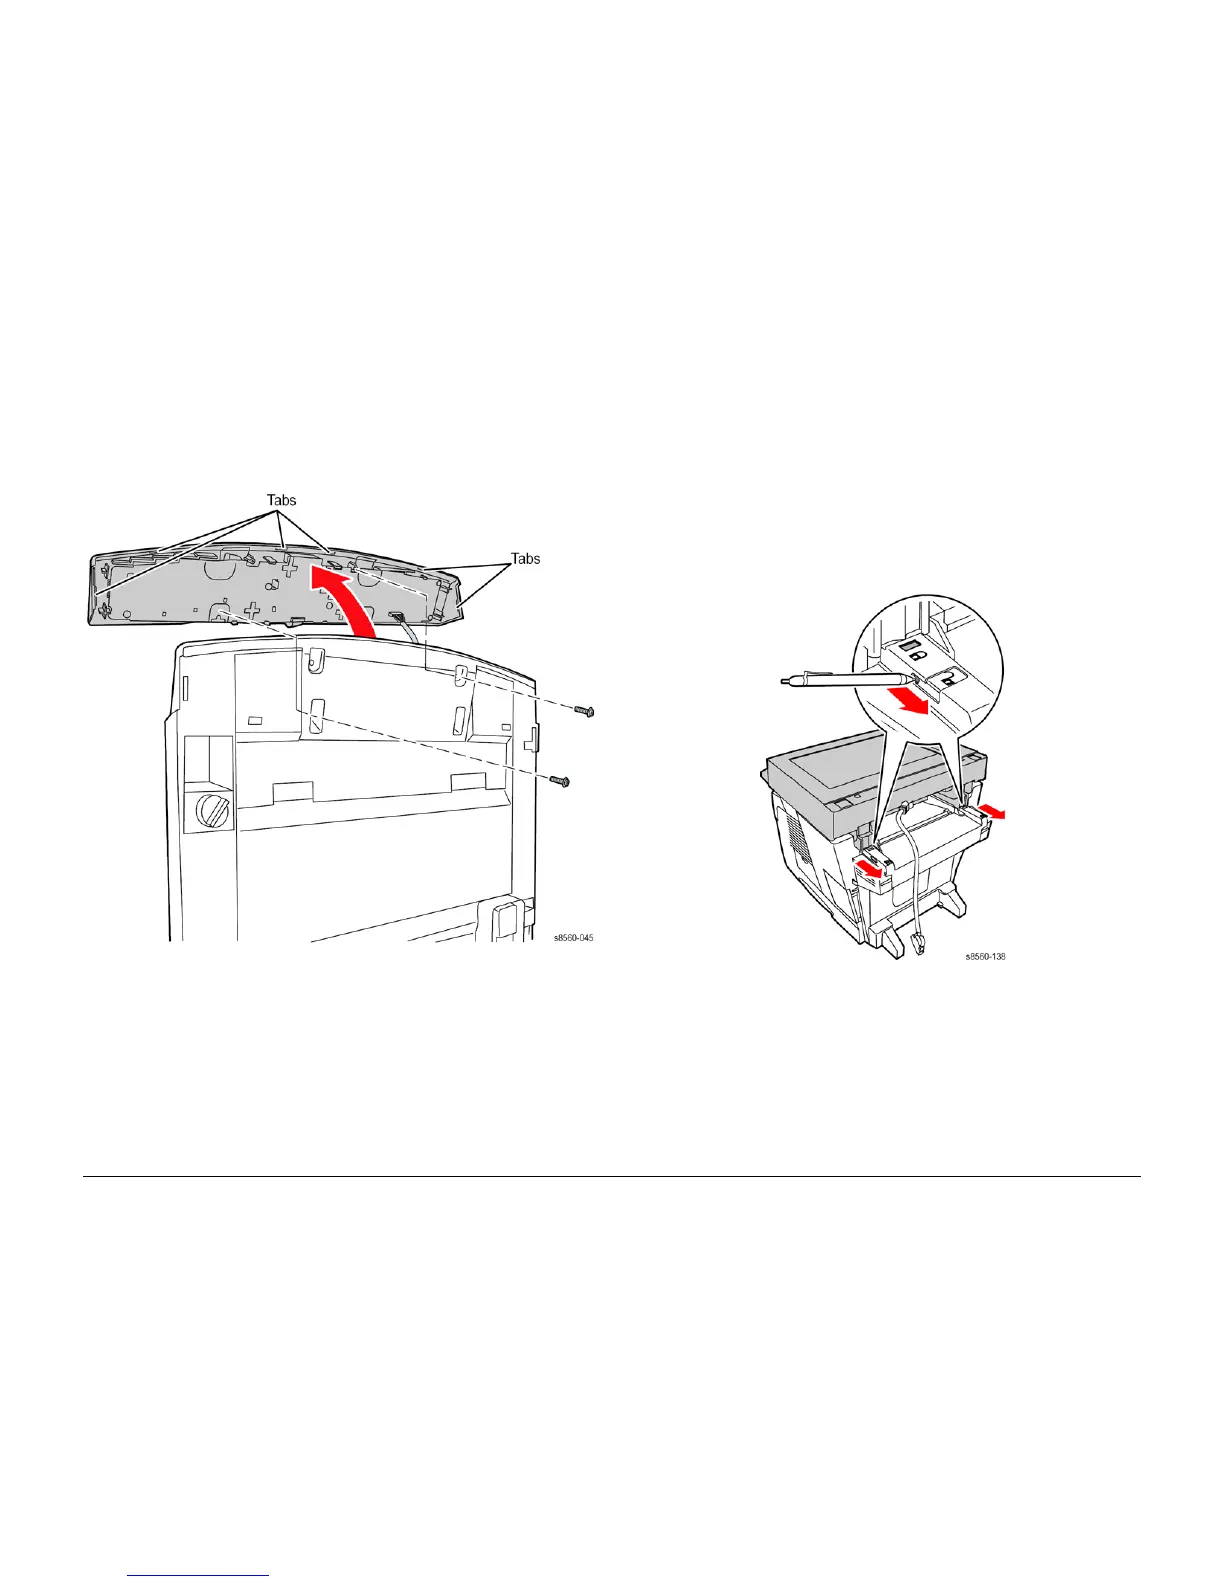
1. Open the Scanner.
2. Remove 2 (plastic, T-20) screws that secure the Control Panel to the Scanner.
Figure 1 Removing the 8860MFP Control Panel
3. Release the tab at each end of the Control Panel, then release the remaining 4 tabs along
the front edge to access the Control Panel connector.
4. Disconnect P/J19 and remove the Control Panel from the Scanner.
REP 1.0.11 Scanner Assembly (8860MFP)
Parts List on PL 1.0
Removal
CAUTION
Lock the Scanhead before removing the assembly. A utility for locking the Scanhead is pro-
vided in the Service Tools Menu. Power down the printer with the DADF closed.
1. Remove the DADF (REP 1.0.15).
2. Place the Scanhead in the locked position for removal.
3. Disconnect the Scanner from the system.
Figure 1 Unlocking the Scanner Hinges
4. Release the hinge latches using a screwdriver or pen.
5. Slide the Scanner towards the back, and then lift to remove it from the printer.
Replacement
NOTE: Failure to adequately secure the Scanner cable connection to the Rear Panel can result
in sporadic Scanner errors. Seat the Scanner connector completely using the connector’s two
thumbscrews.