09/2007
4-28
Phaser 8860/8860MFP Service Manual
REP 2.0.7, REP 2.0.8
Initial Issue
Repairs and Adjustments
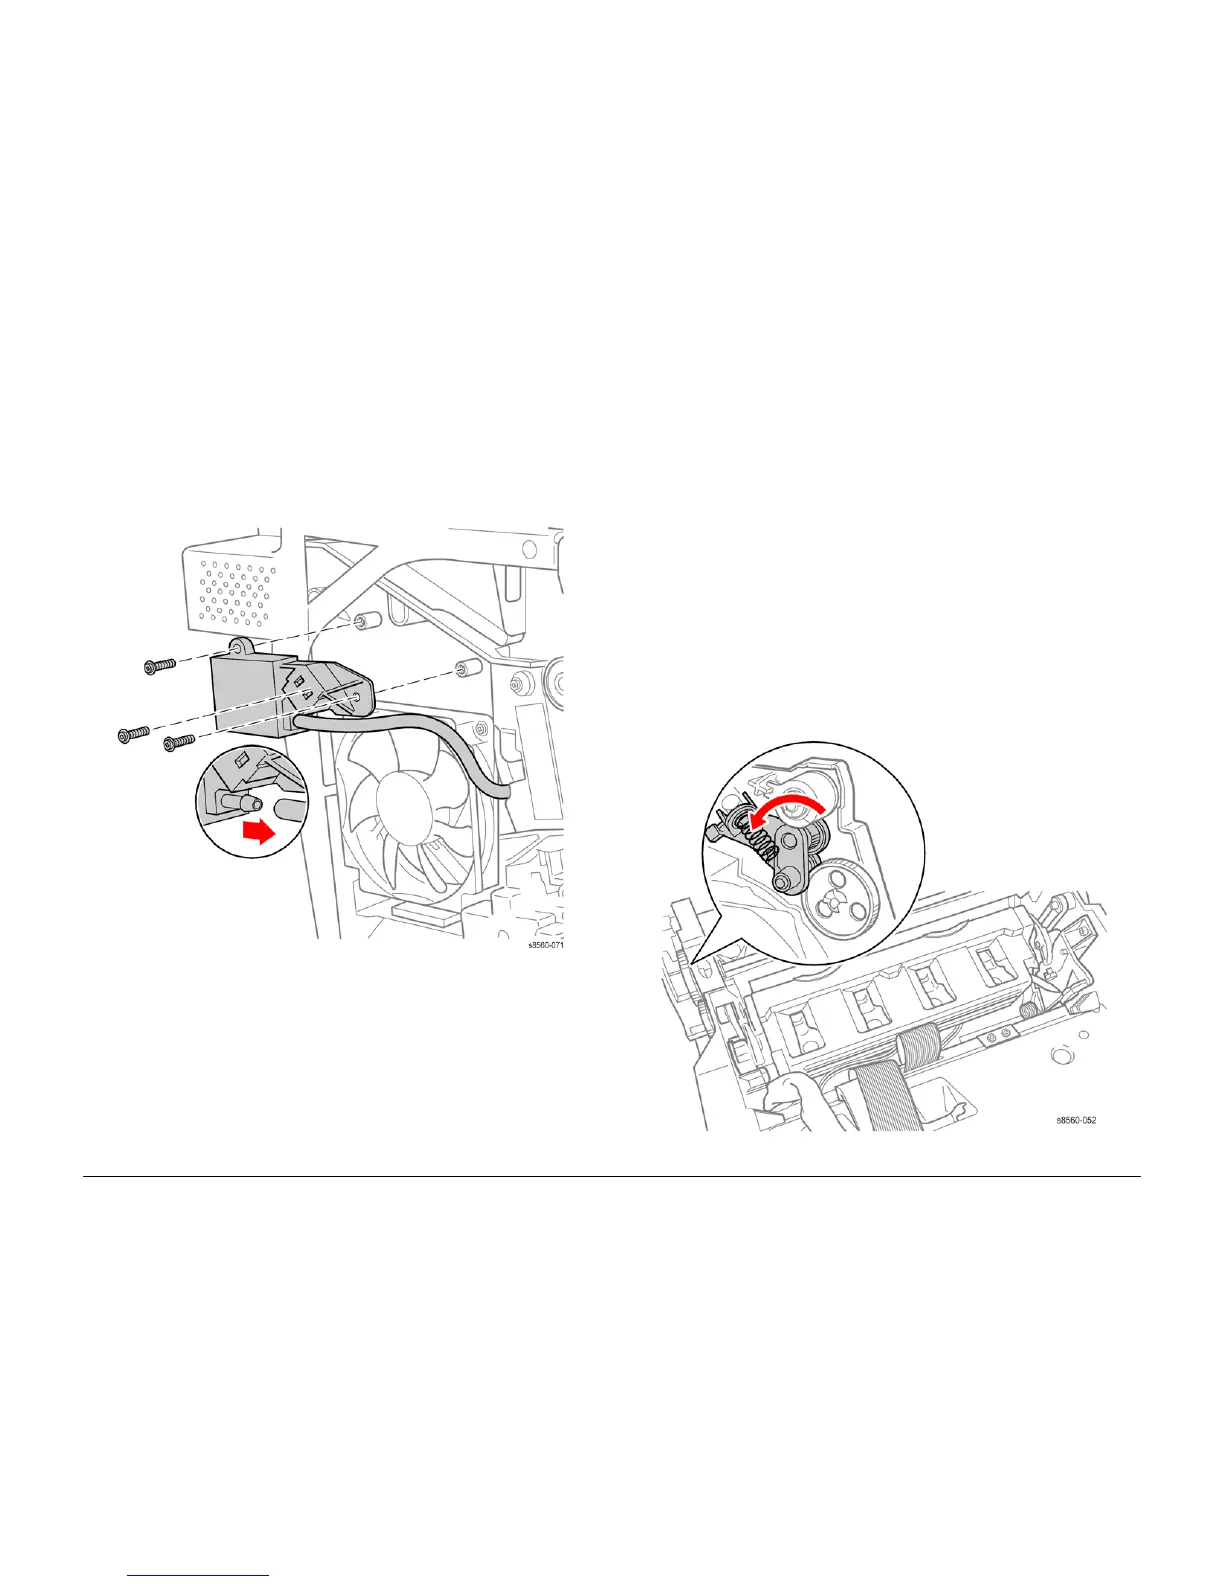
REP 2.0.7 Purge Pressure Pump
Parts List on PL 2.0
Removal
1. Remove the Left Side Cover (REP 1.0.7 or REP 1.1.9 for the 8860).
2. Disconnect the Purge Pump Hose from the pump.
3. Disconnect the harness from the pump.
4. Remove 3 (plastic, T-20) screws that secure the pump to the chassis.
Figure 1 Removing the Purge Pressure Pump
REP 2.0.8 Left and Right Printhead Restraints
Parts List on PL 2.0
Removal
NOTE: These steps describe Printhead Restraint removal for the 8860MFP. On 8860 models,
access the Printhead Restraints by removing the Ink Loader (REP 1.1.8). Afterwards, return to
this procedure and begin at Step 6.
When parked, the Printhead is held in place by pins that are captured by left and right Print-
head Restraints. If the pins are released, tension from the Printhead Tilt Spring forces the
Printhead toward the Drum. Gradually release the tension when unlocking the restraints.
WARNING
Allow adequate time for the system to cool before servicing the printer.
1. Remove the Scanner Assembly with the attached DADF (REP 1.0.11)
2. Remove the Output Tray (REP 1.0.6)
3. Remove the Right Side Cover (REP 1.0.21)
4. Remove the Left Side Cover (REP 1.0.7)
5. Remove the Ink Loader Assembly (REP 2.0.1)
6. Place several sheets of paper between the Printhead and Drum to protect the Drum.
7. Unlock the Wiper Assembly by raising the Wiper Assembly Lock.
Figure 1 Releasing the Printhead Restraints