09/2007
4-14
Phaser 8860/8860MFP Service Manual
REP 1.1.9, REP 1.1.10
Initial Issue
Repairs and Adjustments
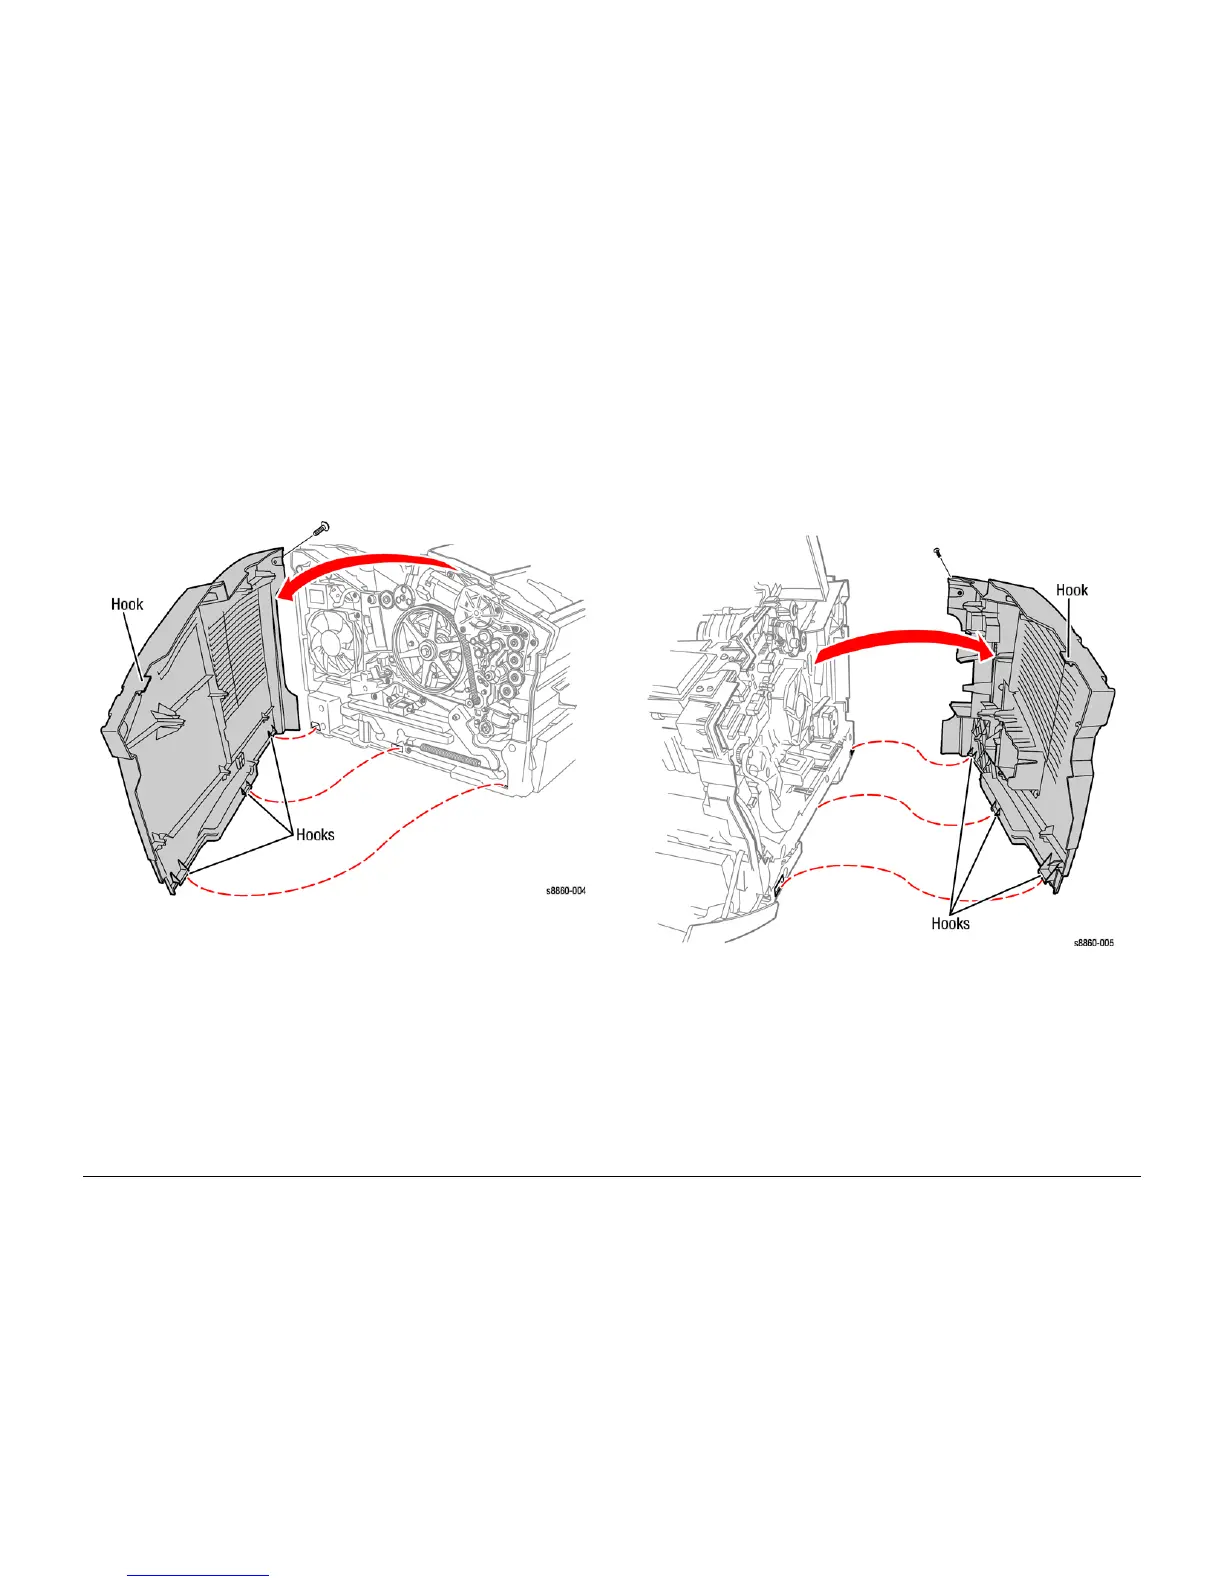
REP 1.1.9 Left Side Cover (8860)
Parts List on PL 1.1
Removal
1. Remove the Control Panel Cover (REP 1.1.5).
2. Open the Exit Cover and Front Door.
3. Remove 1 (metal, T-20) screw.
4. Release the tabs and remove the cover.
Figure 1 Removing the Left Side Cover
REP 1.1.10 Right Side Cover (8860)
Parts List on PL 1.1
Removal
1. Open the Exit Cover and Front Door.
2. Remove the Control Panel Cover (REP 1.1.5).
3. Remove 1 (metal, T-20) screw.
4. Pull forward to release the tab located near the AC connection and release the front tab
while pulling outward at the top.
Figure 1 Removing the Right Side Cover