09/2007
4-32
Phaser 8860/8860MFP Service Manual
REP 2.0.10, REP 2.0.11
Initial Issue
Repairs and Adjustments
Figure 2 Removing the Transfix Camshaft
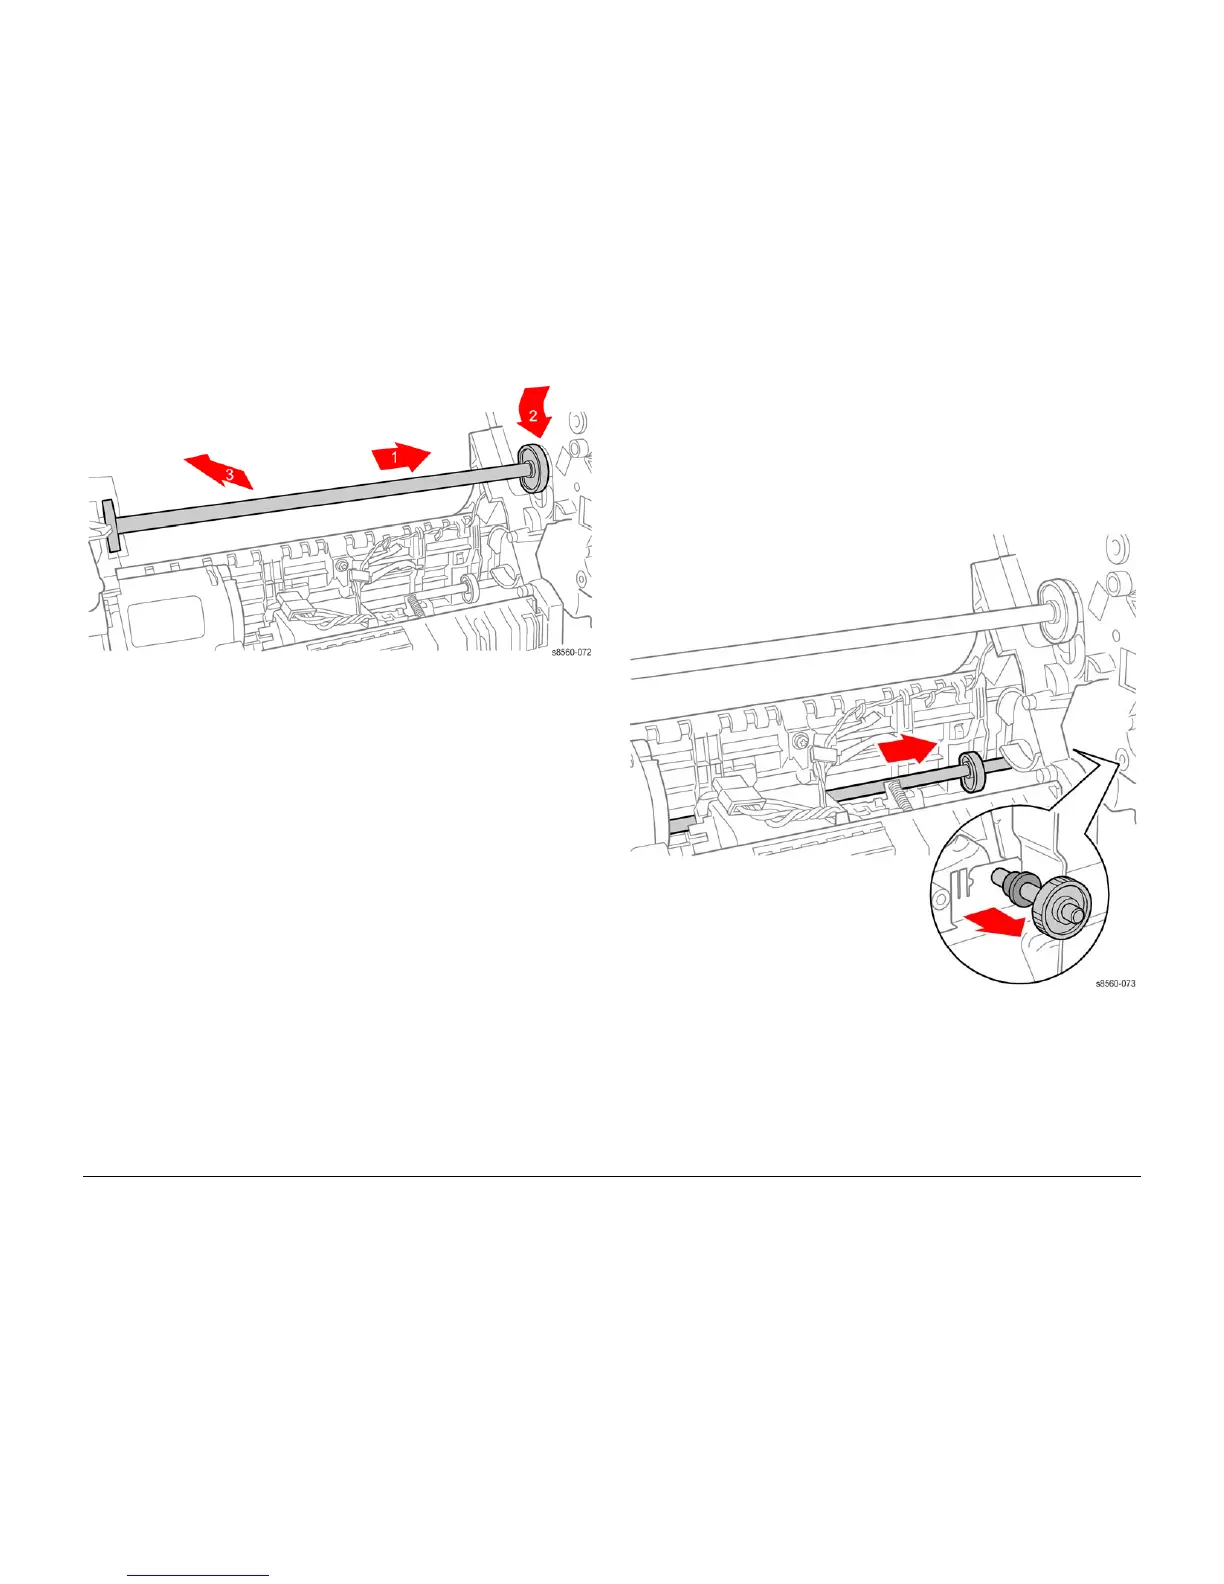
REP 2.0.11 Drum Maintenance Camshaft
Parts List on PL 2.0
Removal
1. Remove the Drum Maintenance Pivot Plate (REP 2.0.16).
2. Remove the Process Drive (REP 4.0.7).
3. Slide the camshaft to the right, release the bushing by carefully prying it from the ground
plate, Move the left end of the camshaft towards the rear of the system. Next, move the
camshaft to the right, then lift the camshaft through the slot while removing it to the right.
Figure 1 Removing the Drum Maintenance Camshaft
Replacement
CAUTION
When reinstalling the camshaft, line up the hole on the bushing with the metal ground plate. Do
not damage or bend the ground plate to install the camshaft.
When installing the camshaft, position the flat side of the D-shaped cams towards the rear of
the system as shown in Figure 1. Align the hole in the white Head Tilt Gear with the arrow on
the chassis to put the Head Tilt Gear in home position.