09/2007
4-40
Phaser 8860/8860MFP Service Manual
REP 2.0.16, REP 2.0.17
Initial Issue
Repairs and Adjustments
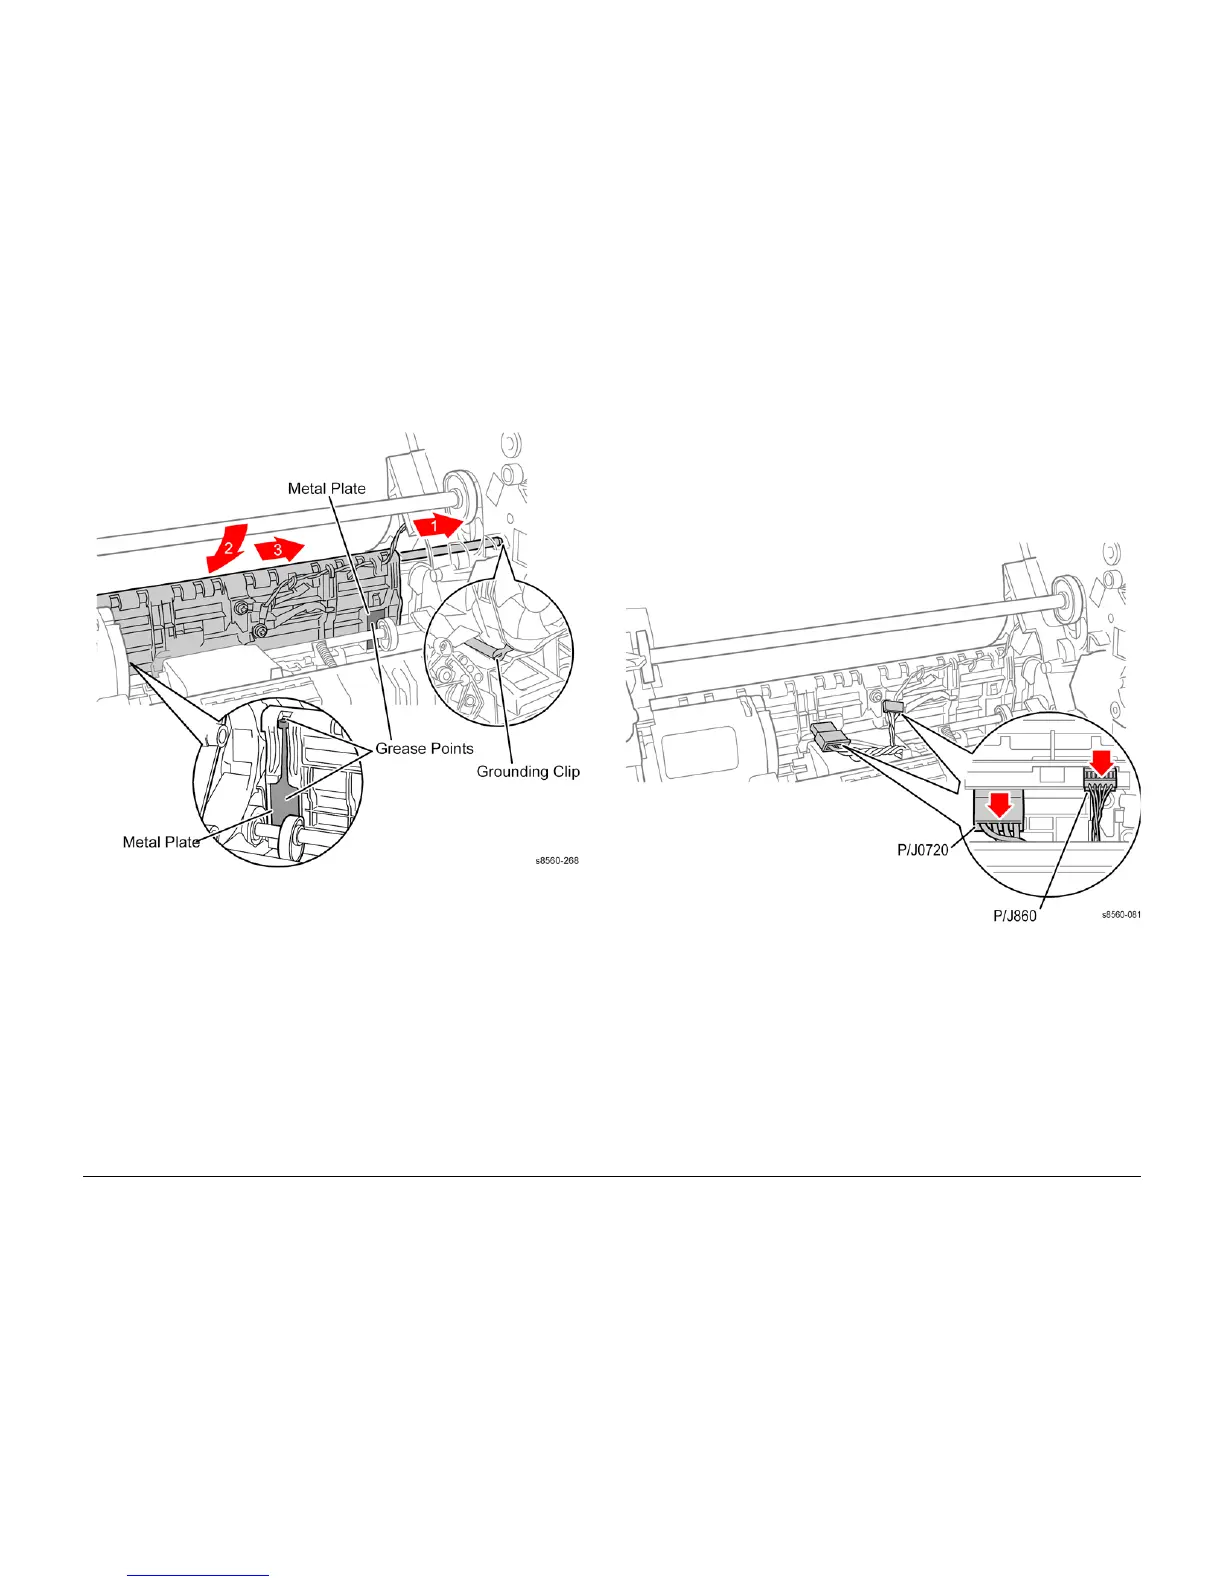
10. Disconnect P/J860 from the I/O Board.
11. Feed the harness through the hole in the chassis near the front of the Drum Assembly
while sliding the plate out the Drum Maintenance drawer cavity.
Figure 2 Removing the Drum Maintenance Pivot Plate
Replacement
Lightly grease the metal plates on the underneath side of the Pivot Plate using a small amount
of Rheolube 768 grease (P/N 070E00890). Also check that the right end of the Pivot Plate
Shaft is in contact with the Ground Plate following installation of the Drum Fan. Perform the
Head Tilt Gear (ADJ 4.13.1), and Process Drive Alignment (ADJ 4.7.1) adjustments before
restoring system power
REP 2.0.17 Preheater and Deskew Assembly
Parts List on PL 2.0
Removal
1. Open the Front Door
2. Remove the Lower Inner Duplex Guide (REP 3.0.2).
3. Remove the Inner Simplex Guide (REP 3.0.1).
4. Release the lock on the back of the AC connector (P/J0720) and unplug 2 connectors
from the Preheater.
Figure 1 Preheater Electrical Connections
5. Slide the latches in and forward to release the Preheater as shown in Figure 2.