09/2007
4-49
Phaser 8860/8860MFP Service Manual
REP 3.0.18, REP 3.1.13
Repairs and Adjustments
Initial Issue
Figure 2 Replacing the Retard Roller
Replacement
For the Pick Roller, insert the replacement roller with the metal shaft at the top and toward the
left. The grey rollers should be facing you. Position the roller back about 2 inches (5 cm) in the
tray cavity. Fell for a large plastic lip on the right and the mating gear on the left. Rotate the Pick
Roller up and back to snap it into place.
REP 3.1.13 Exit Module (8860)
Parts List on PL 3.1
Removal
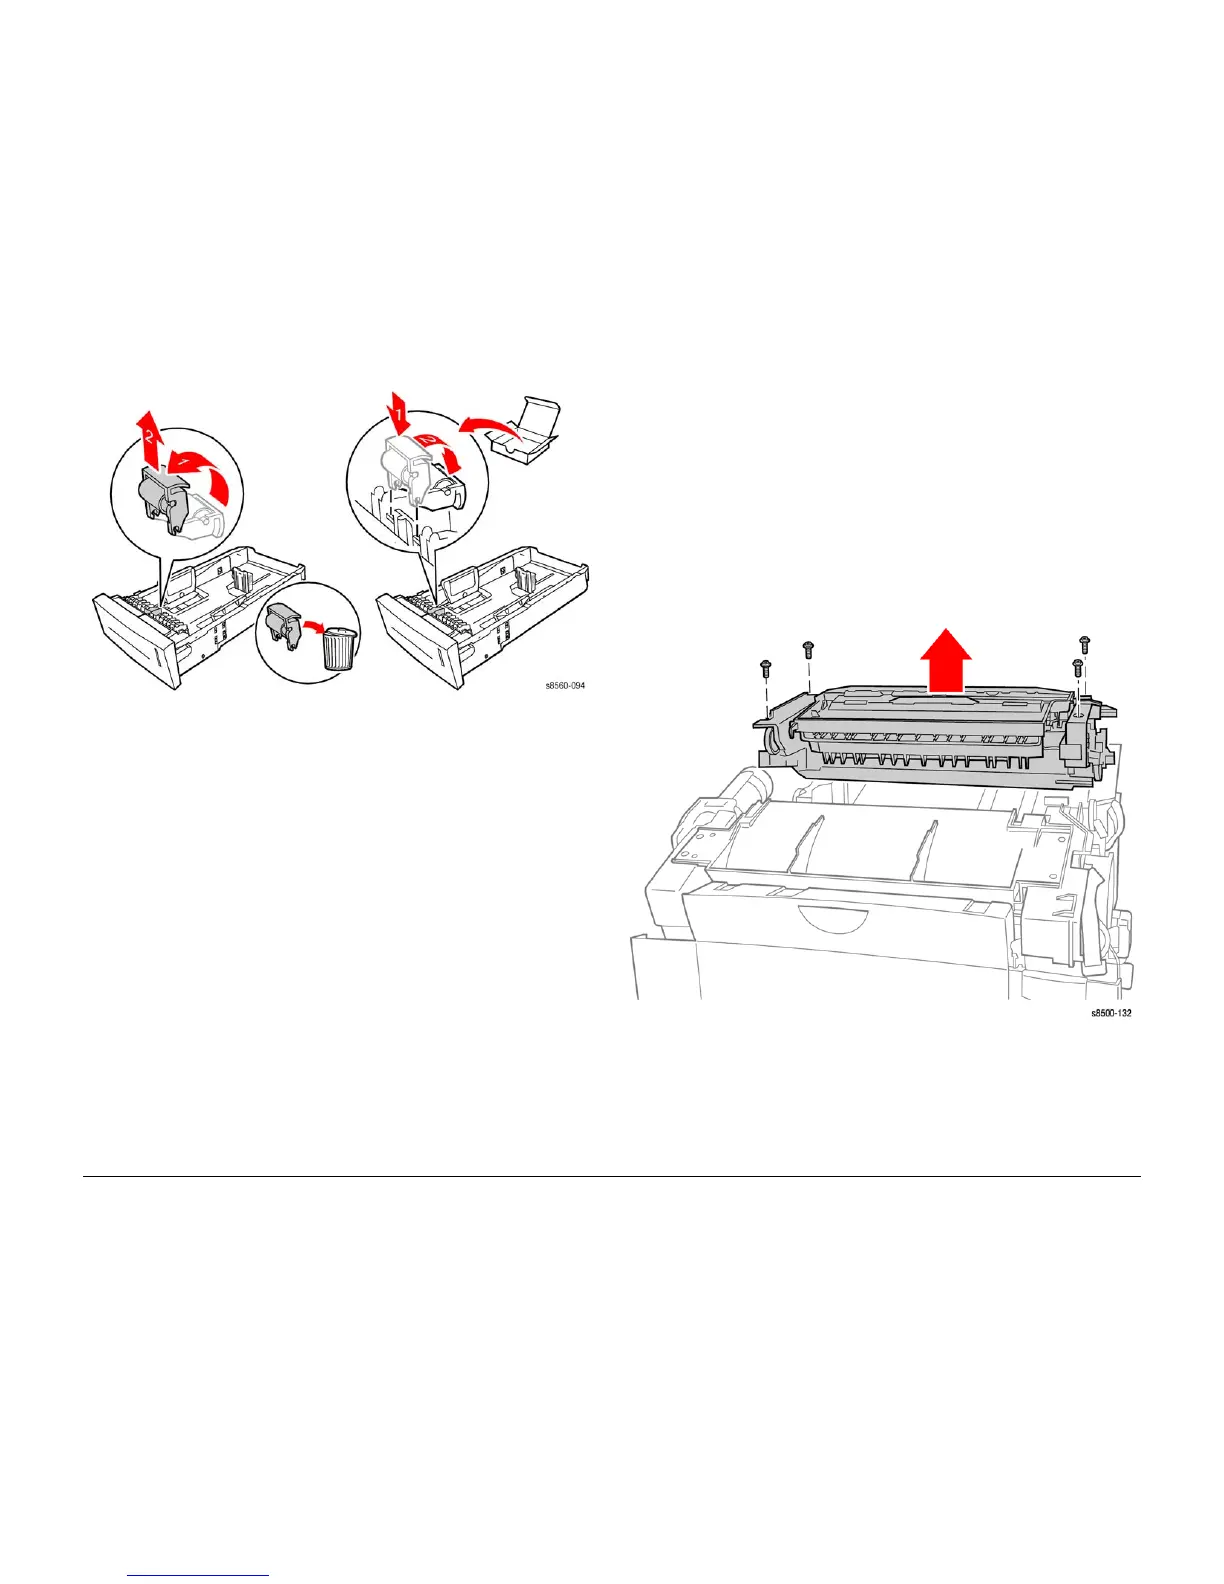
CAUTION
The Drum Temperature and Exit Module Sensor harnesses are routed through an opening in
the Exit Module frame. Use care during removal to avoid damaging these harnesses.
1. Remove the Exit Cover (REP 1.1.7).
2. Disconnect 2 I/O Board connections.
• Drum Temperature Sensor (P/J870).
• I/O Board connector (P/J680).
3. Remove the 3 (plastic, T-20) screws that secure the Media Drive Motor. Allow the motor to
hang from the harnesss.
4. Remove the 4 (metal, T-20) screws that secure the Exit Module.
Figure 1 Removing the 8860 Exit Module
5. Lift the Exit Module from the chassis.
Replacement
Seat the Exit Module on the chassis., torque the 4 screws to 15 in. lbs, and perform ADJ 2.5.1.
The system may report error 7,009.4x if the Wiper Assembly is misaligned.