09/2007
4-68
Phaser 8860/8860MFP Service Manual
REP 5.0.13, REP 5.0.19
Initial Issue
Repairs and Adjustments
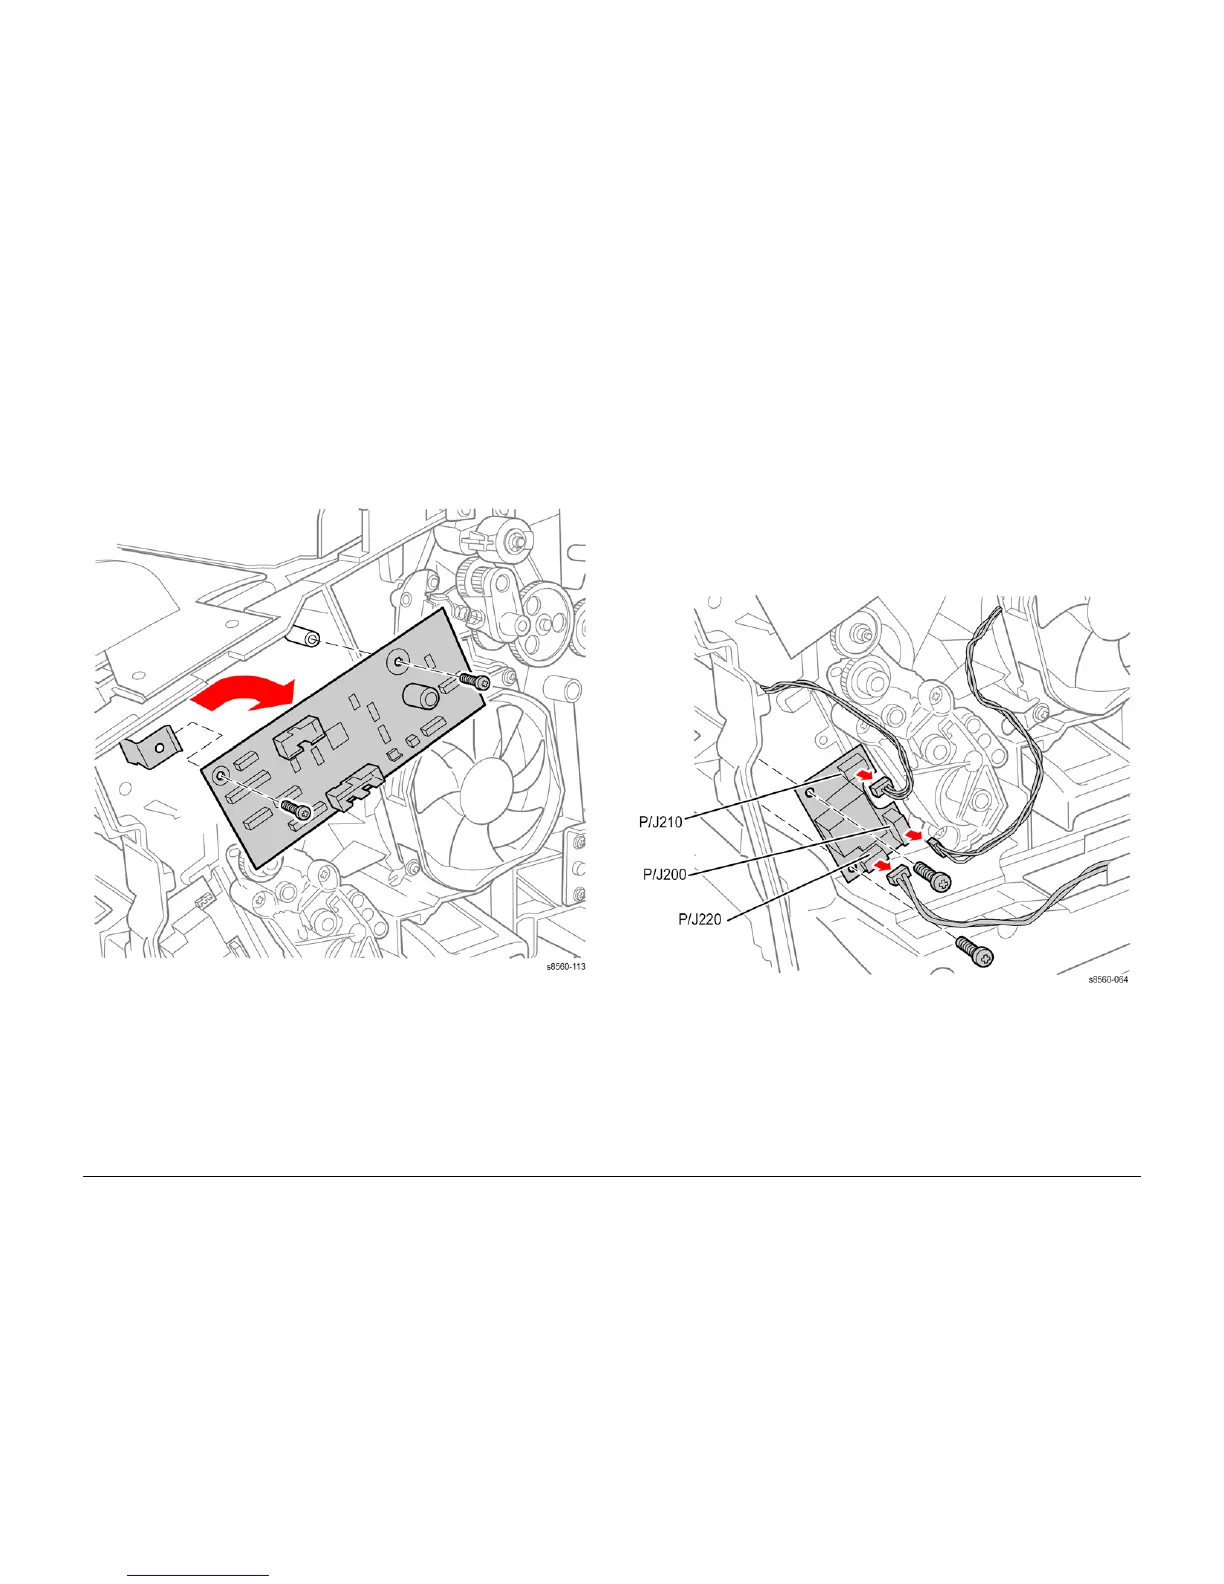
REP 5.0.13 I/O Board
Parts List on PL 5.0, PL 5.1
Removal
1. Remove the Right Side Cover (REP 1.0.21 or REP 1.1.10 on the 8860).
2. Disconnect the harnesses from the board.
3. Remove 2 screws that secure the board to the chassis.
Figure 1 Removing the I/O Board
Replacement
CAUTION
When replacing the I/O Board screws, torque to no more than 12 in.-lbs. Overtightening these
fasteners can result in irreversible damage to the chassis.
Position the corner of the board behind the Ground Tab before installing the screws.
REP 5.0.19 Drum Heater Relay Board
Parts List on PL 5.0
Removal
WARNING
Disconnect the AC Power Cord before servicing the system. The Drum Heater Relay
Board connects directly to the AC Line.
1. Remove the Right Side Cover (REP 1.0.21 or REP 1.1.10 on the 8860).
2. Disconnect the harnesses from the board.
3. Remove the 2 screws that secure the board to the chassis.
Figure 1 Removing the Drum Heater Relay Board