09/2007
4-62
Phaser 8860/8860MFP Service Manual
REP 4.0.16, REP 4.0.18
Initial Issue
Repairs and Adjustments
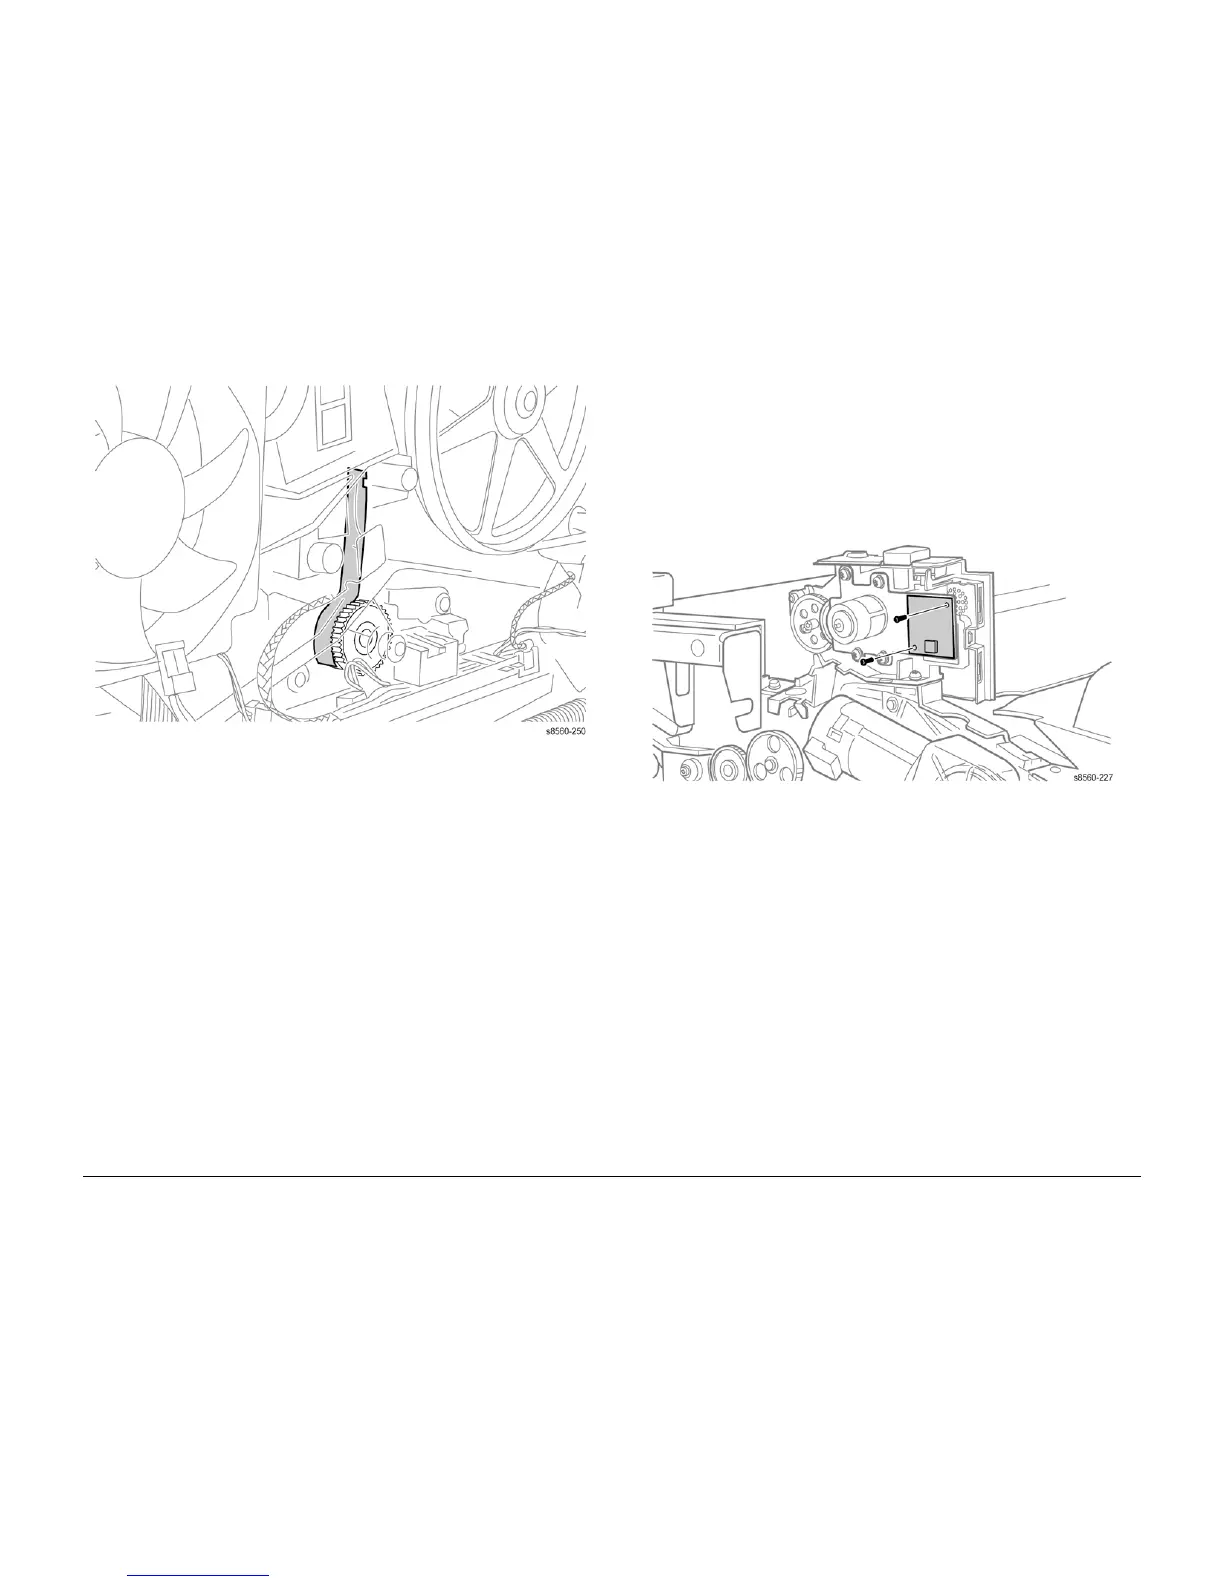
Figure 5 Head Tilt Spring Alignment
4. Seat the gear by lifting the Head Tilt Solenoid Actuator.
5. Replace the KL-Clip on the end of the Head Tilt Gear Shaft.
6. Perform the Head Tilt Gear (ADJ 4.13.1), and Process Drive Alignment (ADJ 4.7.1)
adjustments before restoring system power.
REP 4.0.18 Fax Speaker (8860MFP)
Parts List on PL 4.0
Removal
1. Remove the Scanner Assembly with attached DADF (REP 1.0.11).
2. Remove the Output Tray (REP 1.0.6).
3. Remove the Left Side Cover (REP 1.0.7).
4. Disconnect the Speaker.
5. Remove the 2 (metal) screws that secure the Speaker to the Exit Elevator Motor bracket.
Figure 1 Removing the Speaker