09/2007
4-12
Phaser 8860/8860MFP Service Manual
REP 1.1.5, REP 1.1.6
Initial Issue
Repairs and Adjustments
REP 1.1.5 Control Panel Cover (8860)
Parts List on PL 1.1
Removal
CAUTION
The Control Panel is connected by 3 harnesses. Use care not to damage these harnesses
while removing or replacing the cover.
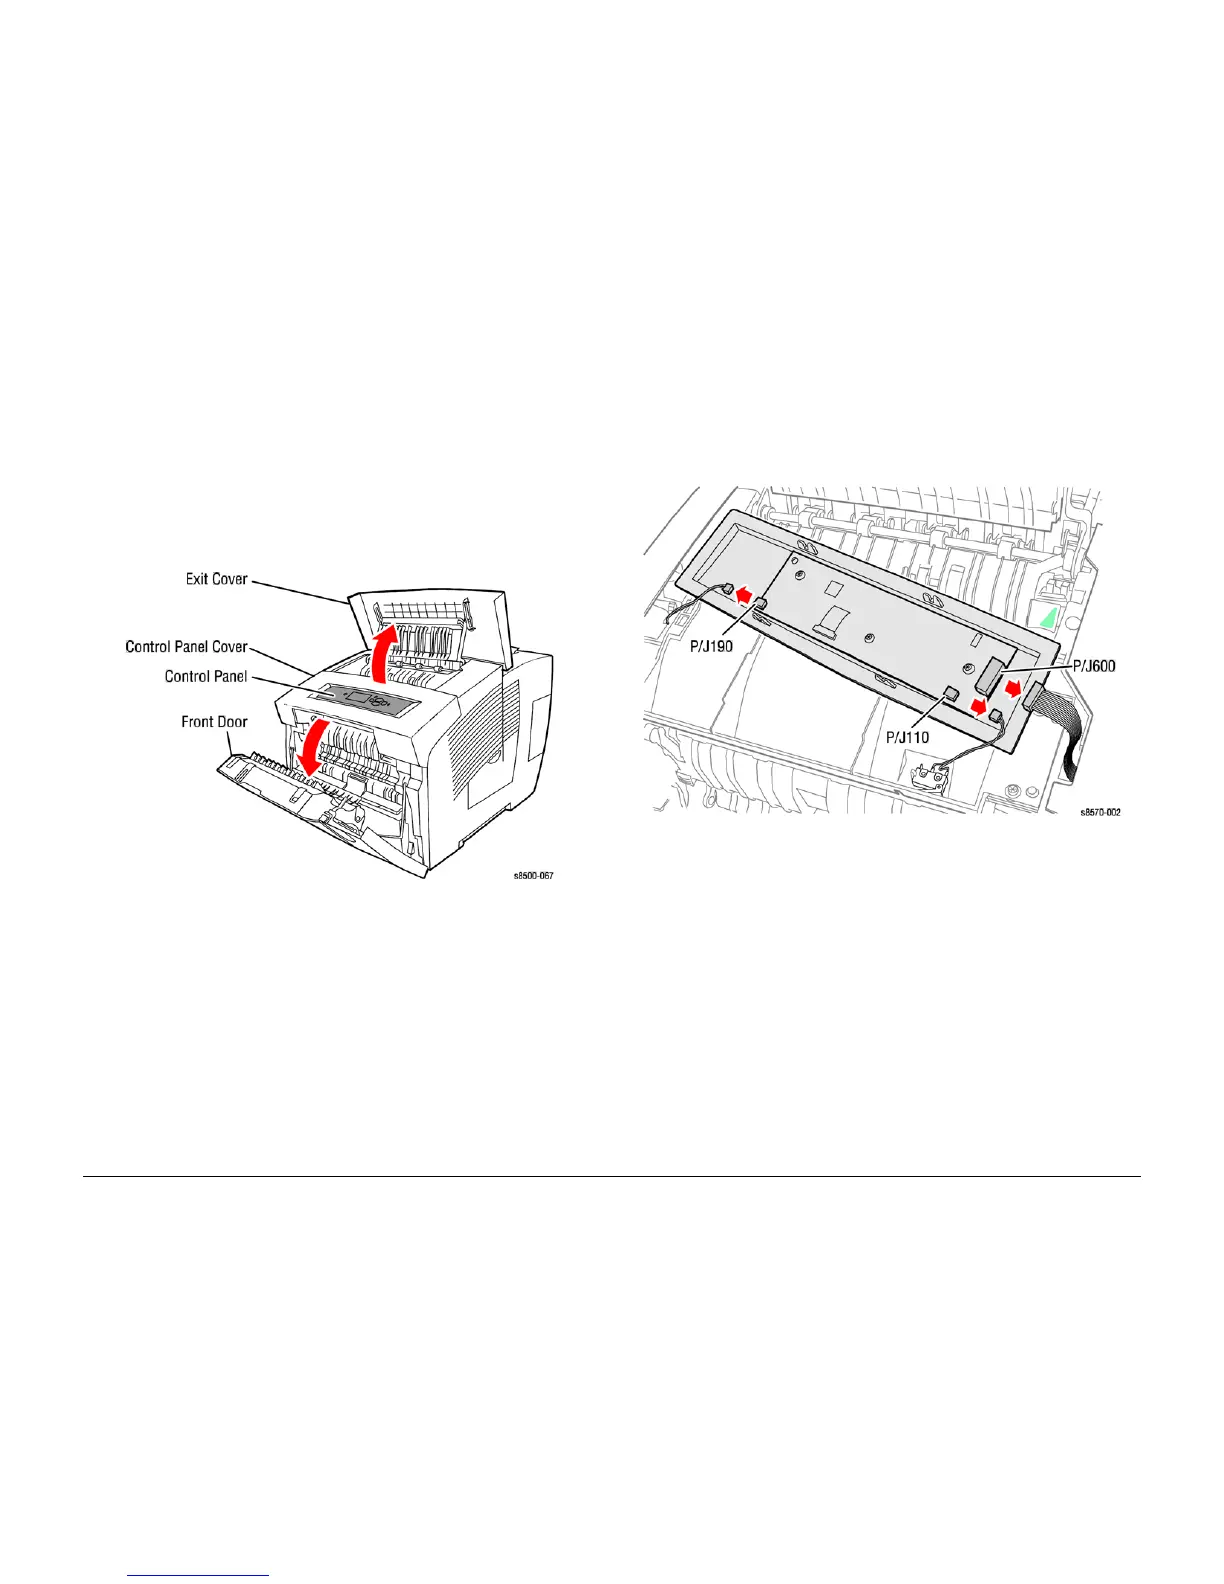
1. Raise the Exit Cover.
2. Open the Front Door.
3. Using either your fingers or a small flathead screwdriver, loosen the Control Panel Cover
on the left side, and then slide it forward while lifting up to remove it from the printer..
Figure 1 Removing the Control Panel Cover
REP 1.1.6 Control Panel (8860)
Parts List on PL 1.1
Removal
4. Remove the Control Panel Cover (REP 1.1.5).
5. Disconnect the P/J190, P/J110, and P/J600 from the Control Panel.
Figure 1 Removing the Control Panel
Replacement
CAUTION
Use care during reassembly to avoid damaging the connections on the underside of of the
Control Panel.