09/2007
4-51
Phaser 8860/8860MFP Service Manual
REP 4.0.4, REP 4.0.5
Repairs and Adjustments
Initial Issue
Replacement
Perform the Head Tilt Gear (ADJ 4.13.1), and Process Drive Alignment (ADJ 4.7.1) adjust-
ments before restoring system power.
REP 4.0.5 X-Axis Motor
Parts List on PL 4.0
Removal
1. Remove the Right Side Cover (REP 1.0.21 or REP 1.1.10 for the 8860).
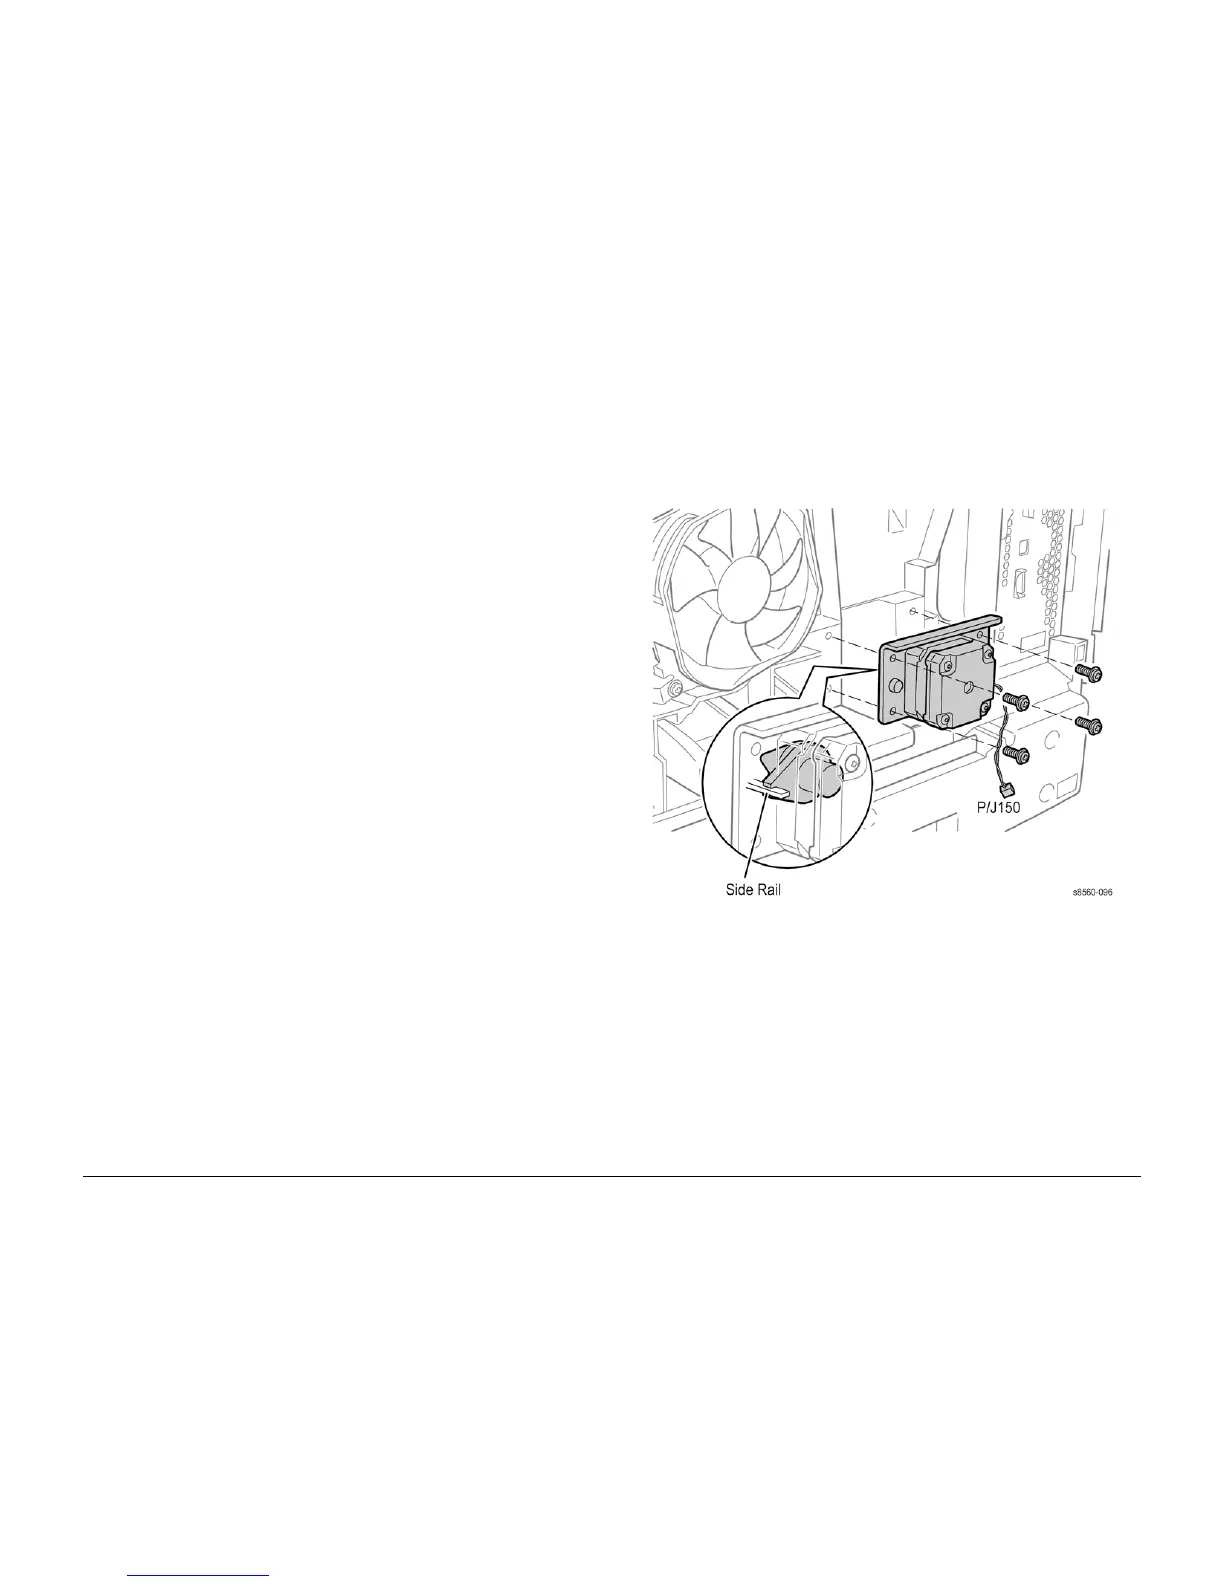
2. Disconnect the X-Axis Motor (P/J150) from the Right Side Harness.
3. Remove 4 (plastic, T-20) screws that secure the motor to the frame.
Figure 1 Removing the X-Axis Motor
Replacement
Engage the fork extending from the motor shaft to the Side Rail as shown in Figure 1. Also, slip
the mounting plate behind the ground strap and replace the cable retainer on the lower right
screw. Perform the Head Tilt Gear (ADJ 4.13.1), and Process Drive Alignment (ADJ 4.7.1)
adjustments before restoring system power.