09/2007
6-51
Phaser 8860/8860MFP Service Manual
Printhead Troubleshooting Checklist, Printhead
Diagnostics
Initial Issue
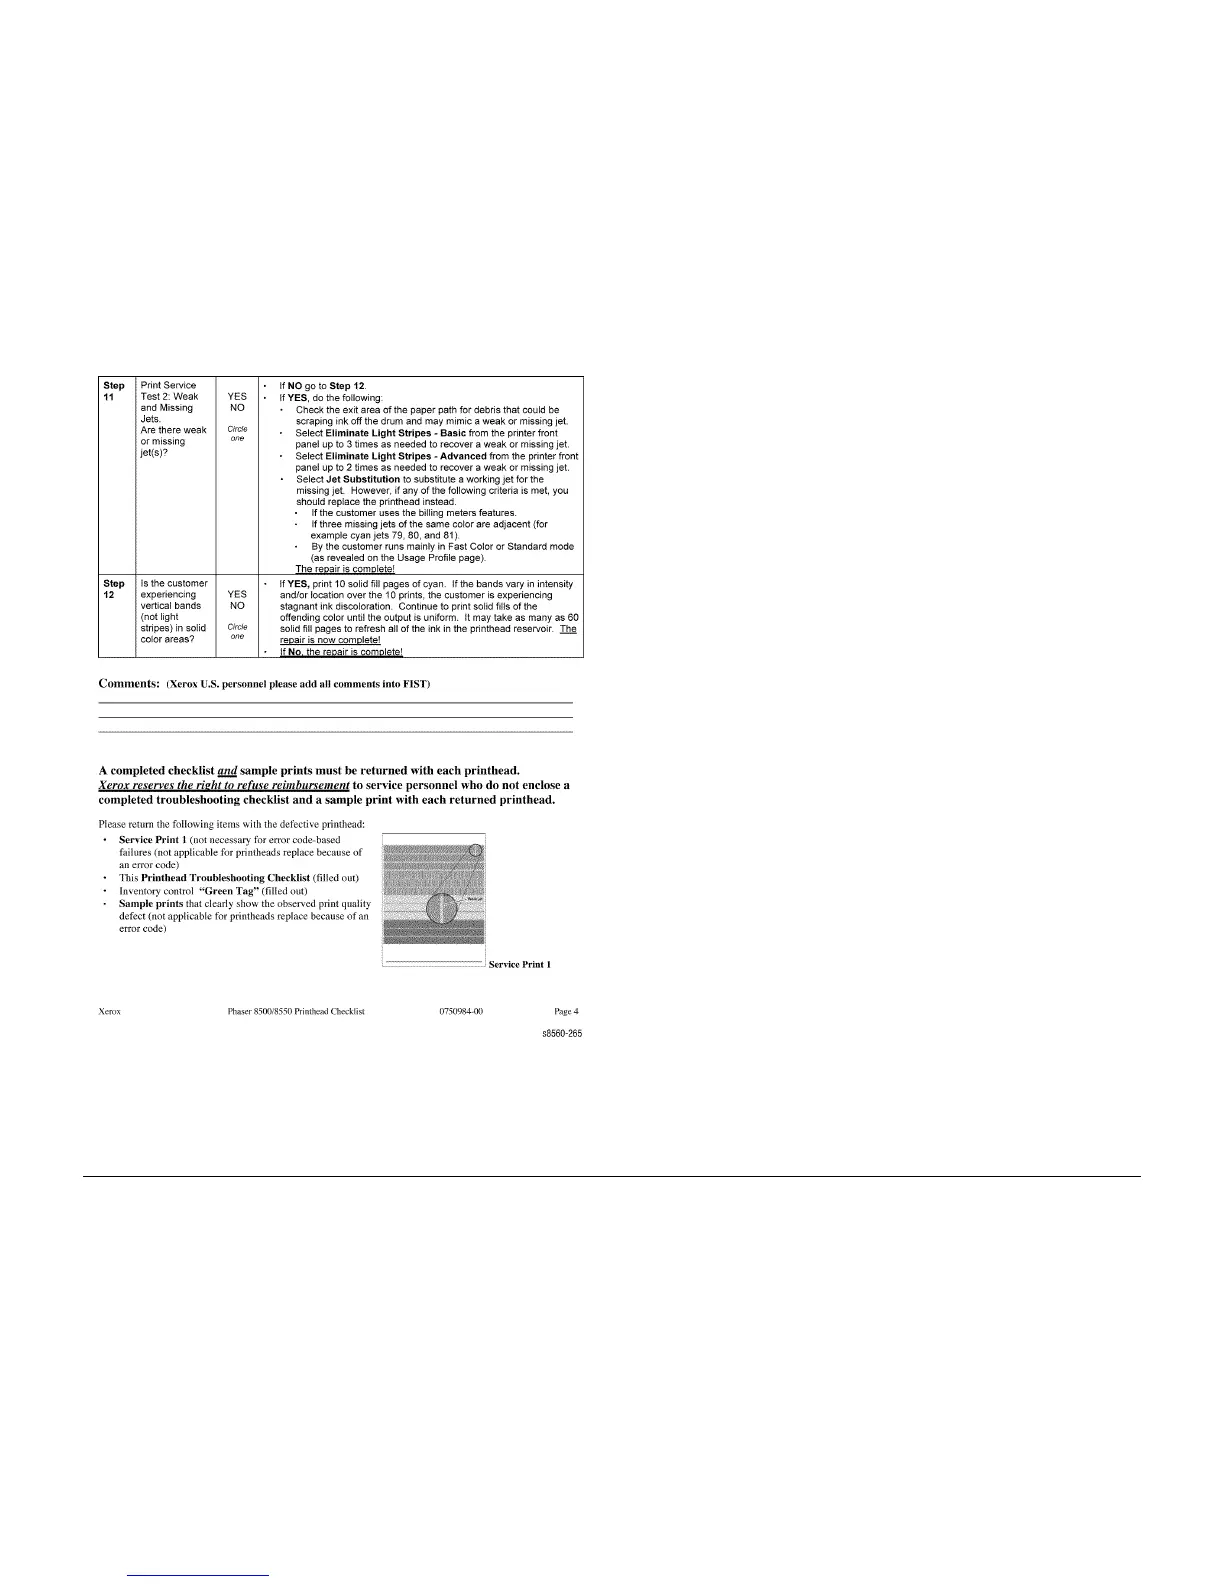
Figure 4 Printhead Checklist Page 4
NOTE: An Adobe PDF version of this checklist is included on the EDOC CD. Print and com-
plete this checklist as part of the Printhead replacement process.
Printhead Cleaning Cycle
If the Printhead, ink reservoirs, or jetstack temperature are below purge threshold, the system
performs a head clean cycle.
1. The system waits for the Printhead to reach its purge temperature.
2. The system moves the Wiper Blade to the bottom of its travel and tilts the Printhead for-
ward to its print position to check the ink levels. If the ink level is low, ink is melted into the
appropriated reservoirs.
3. The Printhead tilts to the standby position and moves the Wiper Blade to the purge posi-
tion in front of the Printhead faceplate
4. The Purge Pump begins the pressure purge. After about 2 seconds, the Purge Pump
solenoid opens.
5. The Printhead tilts forward against the Wiper Blade and the purge and wipe cycle begins.
6. The Control Panel indicates the system is performing the cleaning process.
7. The Printhead is moved left to the tilt zone, where the Printhead can tilt back without inter-
ference, and the Media Drive motor moves the Wiper Blade to the bottom of its travel to
engage the PrintHead Tilt Cam. The Process Drive motor rotates the Printhead tilt gears,
which move the Printhead to the forward print position.
8. After the print engine is in a known valid state, the Control Panel display shows the warm-
up progress. The Ready LED first flashes. When warm-up completes, the Ready LED
lights solid.
9. The temperature of the Printhead, Drum and Preheater are allowed to stabilize at their
operating temperatures and ink is melted if needed.
10. The Printhead is homed to the print position for printing.
11. A Cleaning page is printed at this time, if a purge was performed.
12. A Start page is printed (if enabled).
13. The Control Panel displays a message that the system is initializing and then Ready.
14. The print engine is initialized and is ready to print.